Here’s the answer to a couple of questions I asked a lot. Firstly can I paint over Chalk Paint with Fusion? Quick answer is Yes you can. There is no reason not to use chalk paint as a primer before adding a coat of Fusion. Do remember that this works only if there is no wax involved. Otherwise make sure you remove the wax first.
Second Question. Can I paint fabric with Fusion. Yes you can. Have a hunt on this blog and you will find out how.
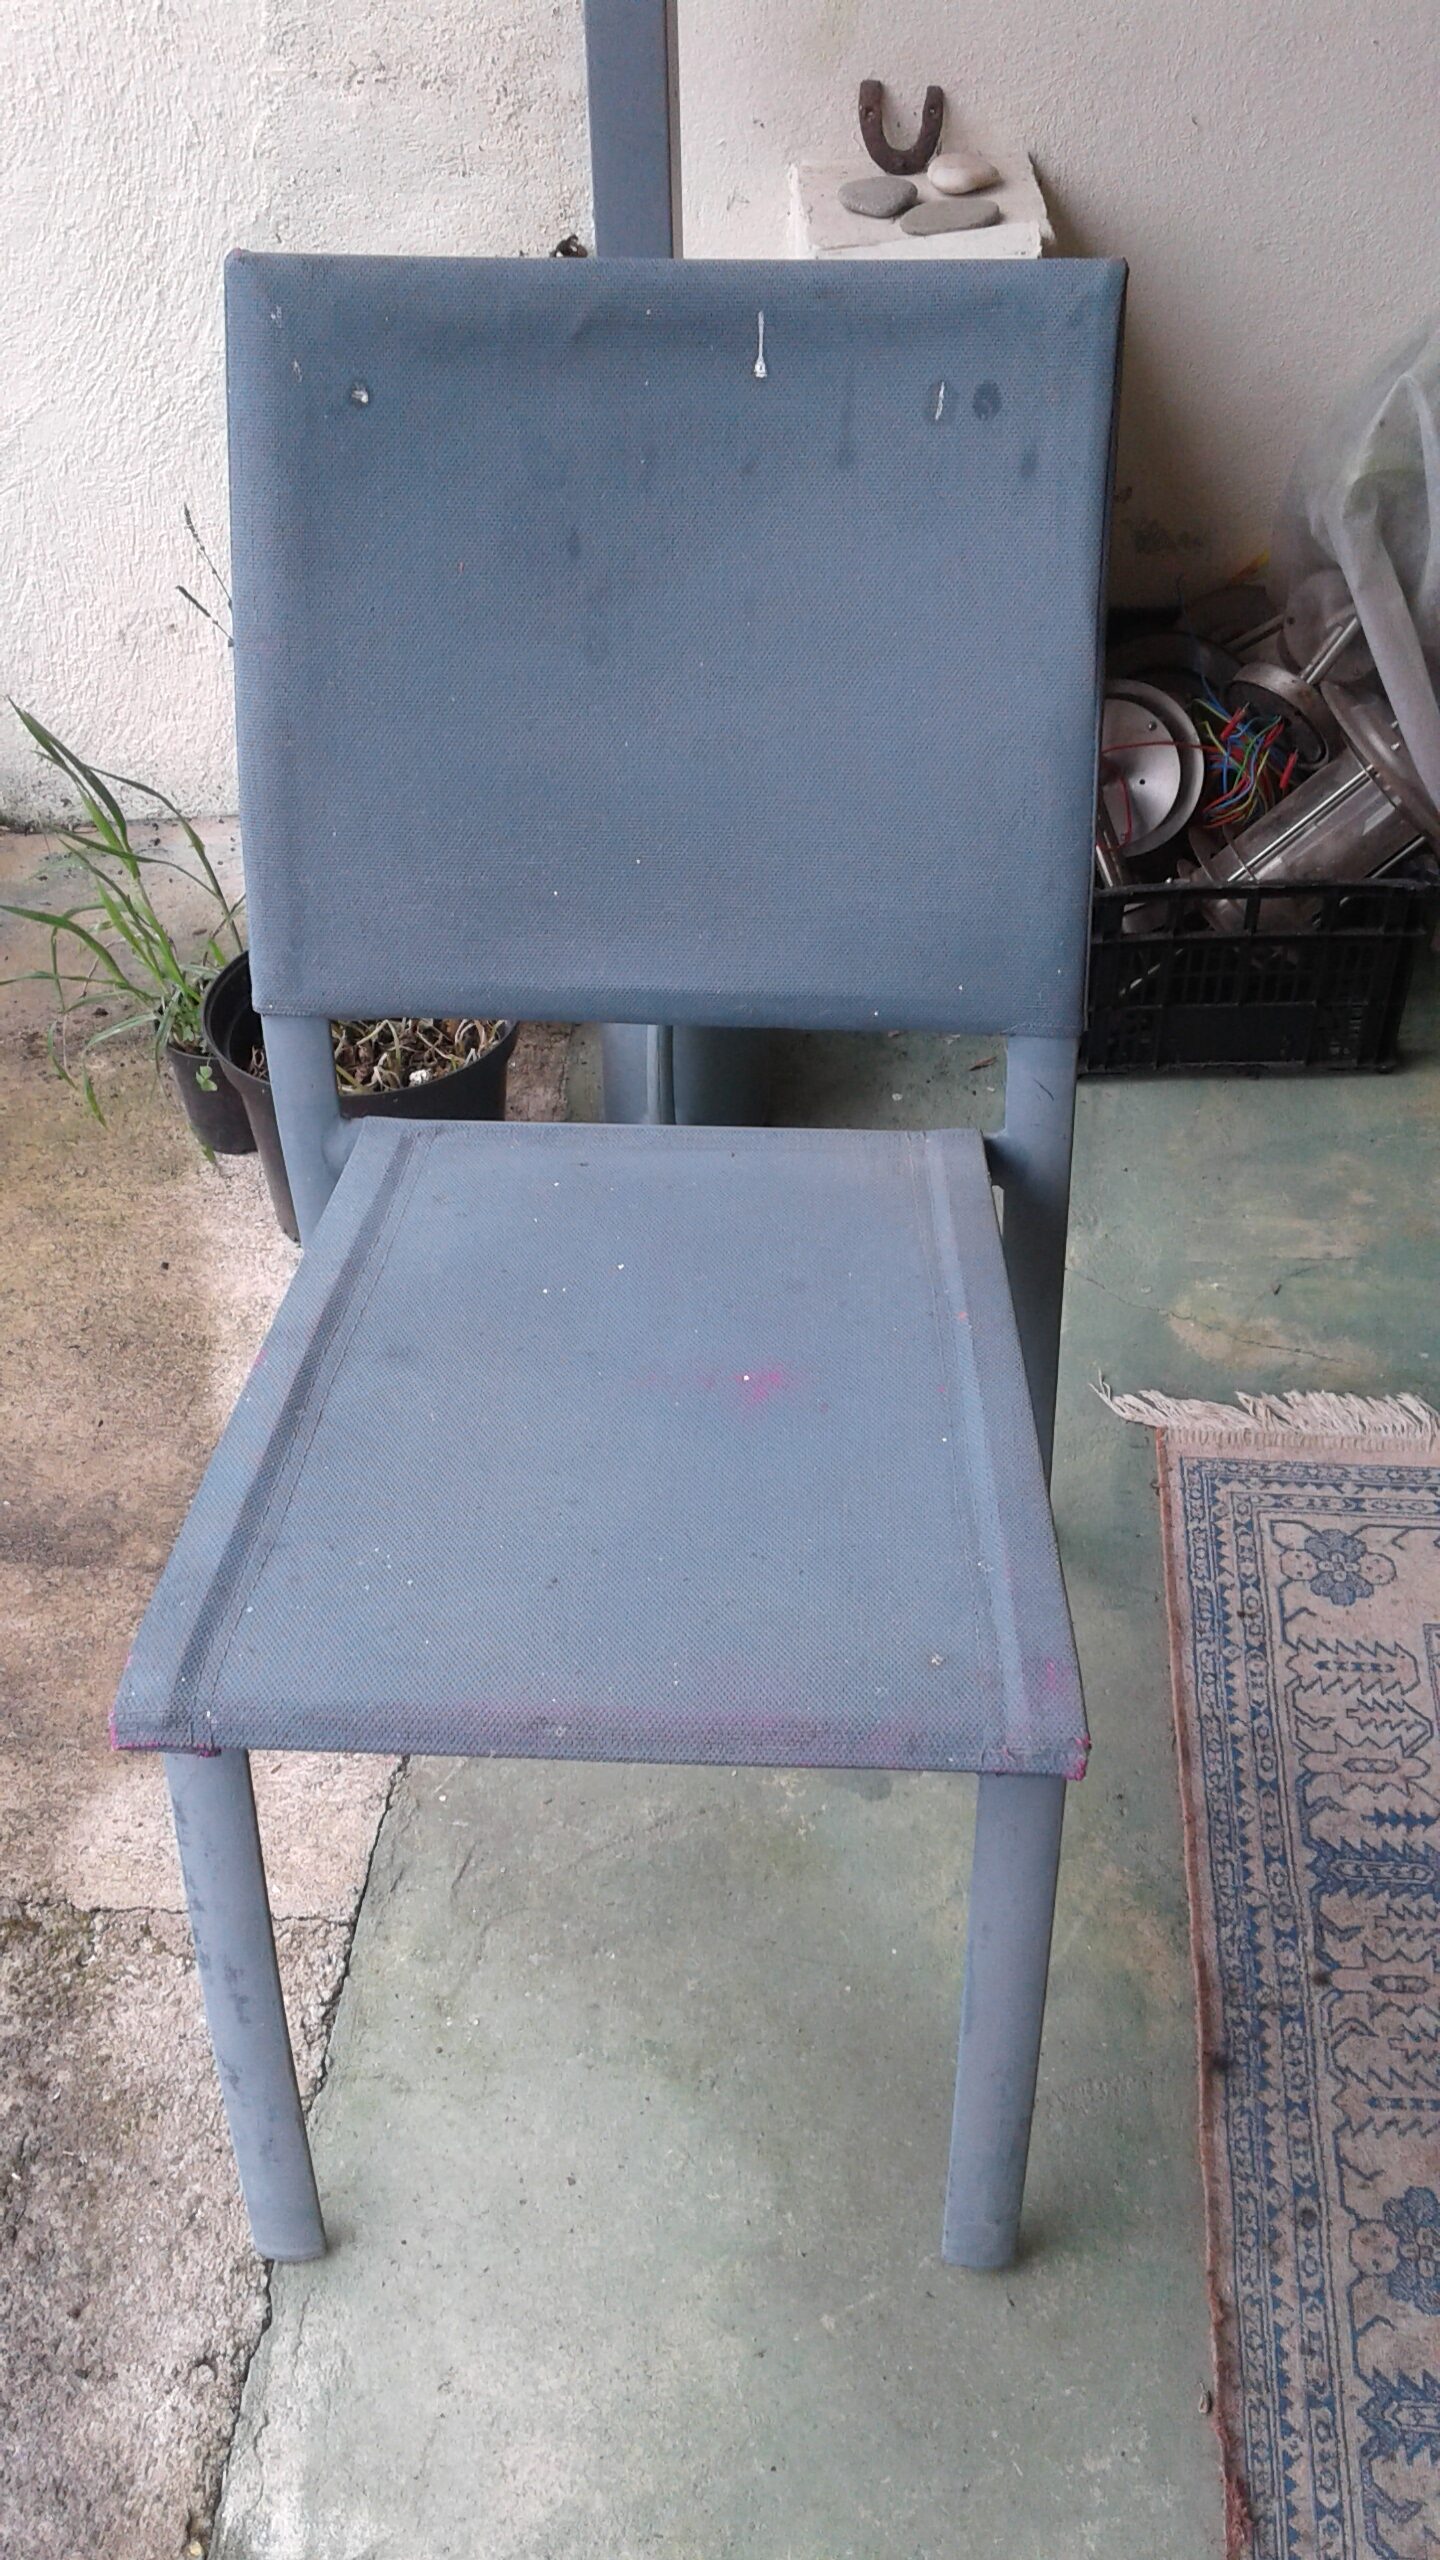
Today though I am going to show how to do both at the same time. I started out with an outside chair that had previously been painted in Aubusson Chalk Paint some years ago. Sadly this winter the birds used it for target practice. I think you get the picture. So first job was to give it a wash down. Original Chalk Painted Chair in Aubusson
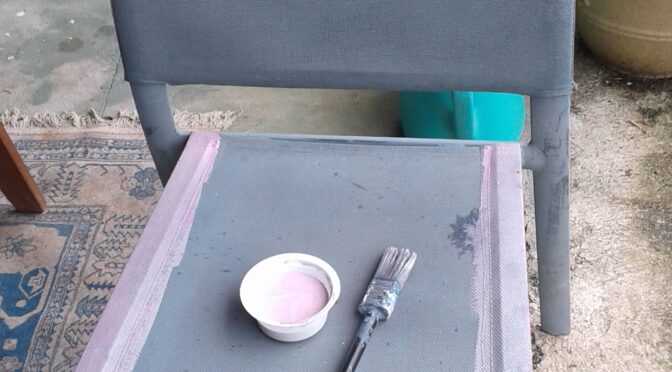
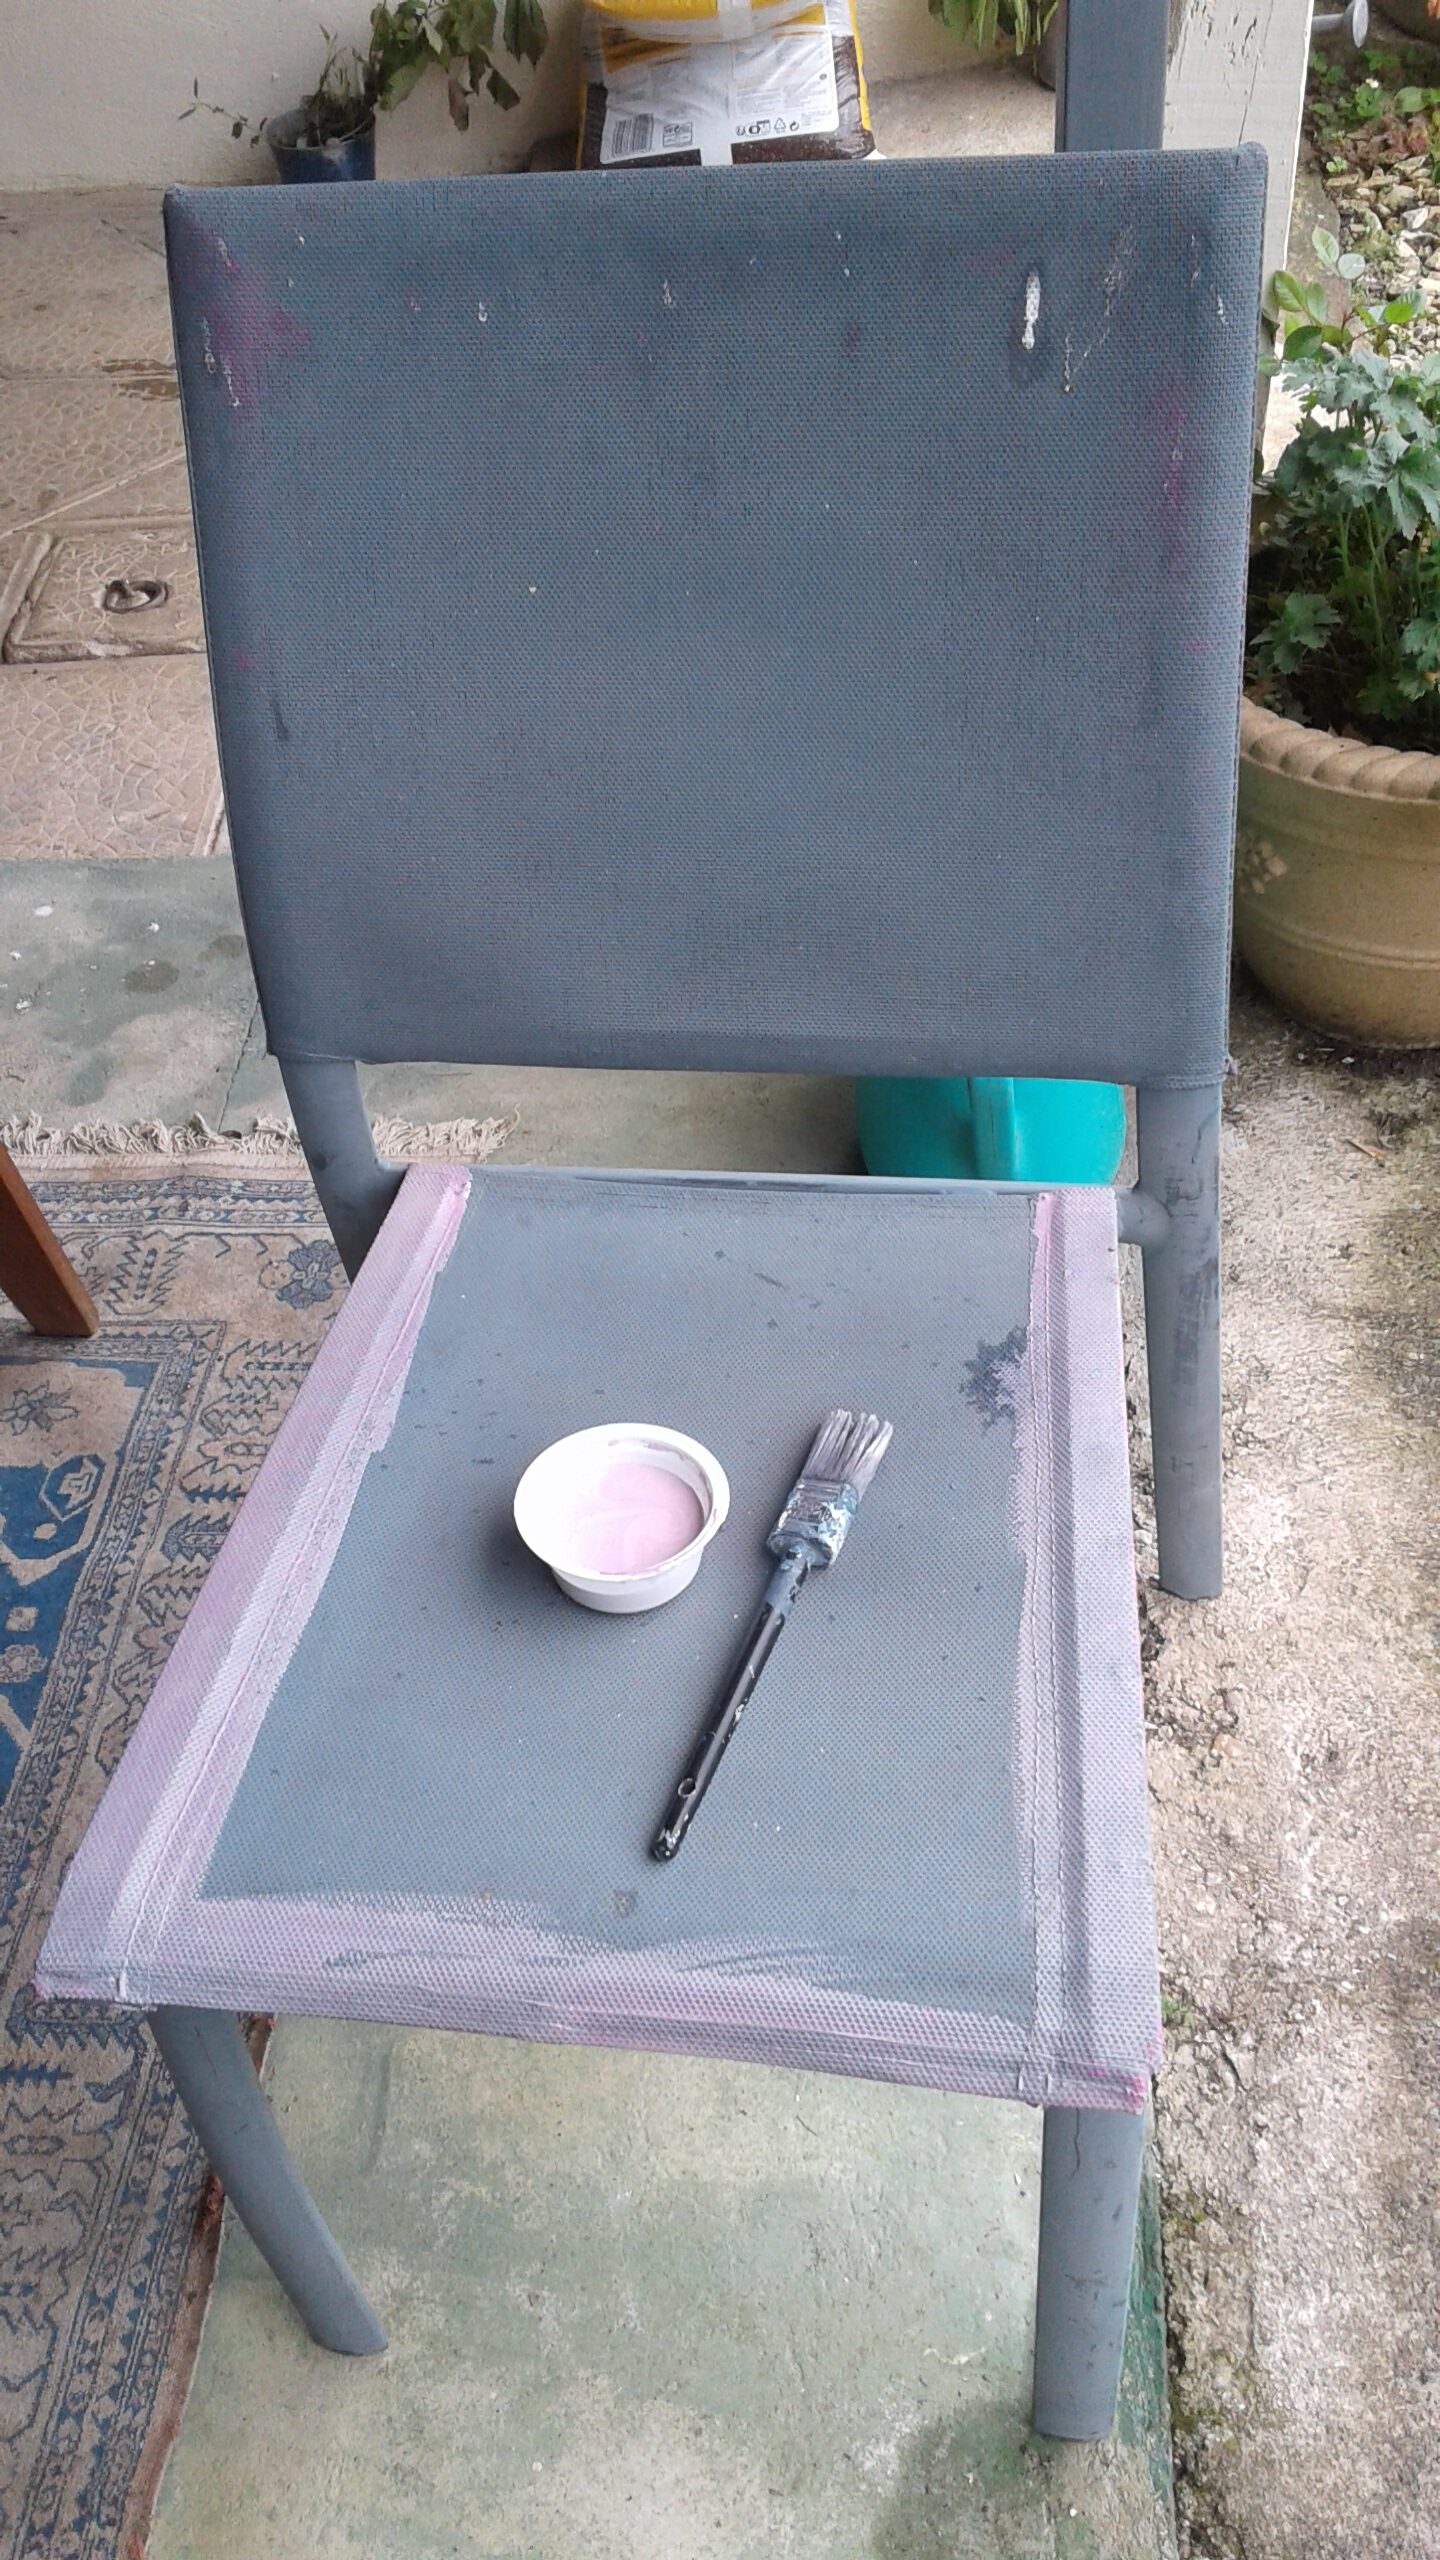
The secret of painting fabric is to allow the paint to soak into the fabric. In this instance I used a 50/50 mix water to paint. The start of Painting The First Coat
As you can see the first coat is a bit of an ugly stage. But fear not this get sorted once you add the second or if need be the third coat. With the second coat use a 25/75 mix of water to paint and lastly a coat of undiluted paint. Inbetween coats remember to give it a sand with fine grit sandpaper. This stops the fabric becoming hard and unwelcoming. First coat sanded
In this particular case the first coat had done quite a good job so the second coat was applied by dipping the brush into water before loading the paint on to it. Finished Chair
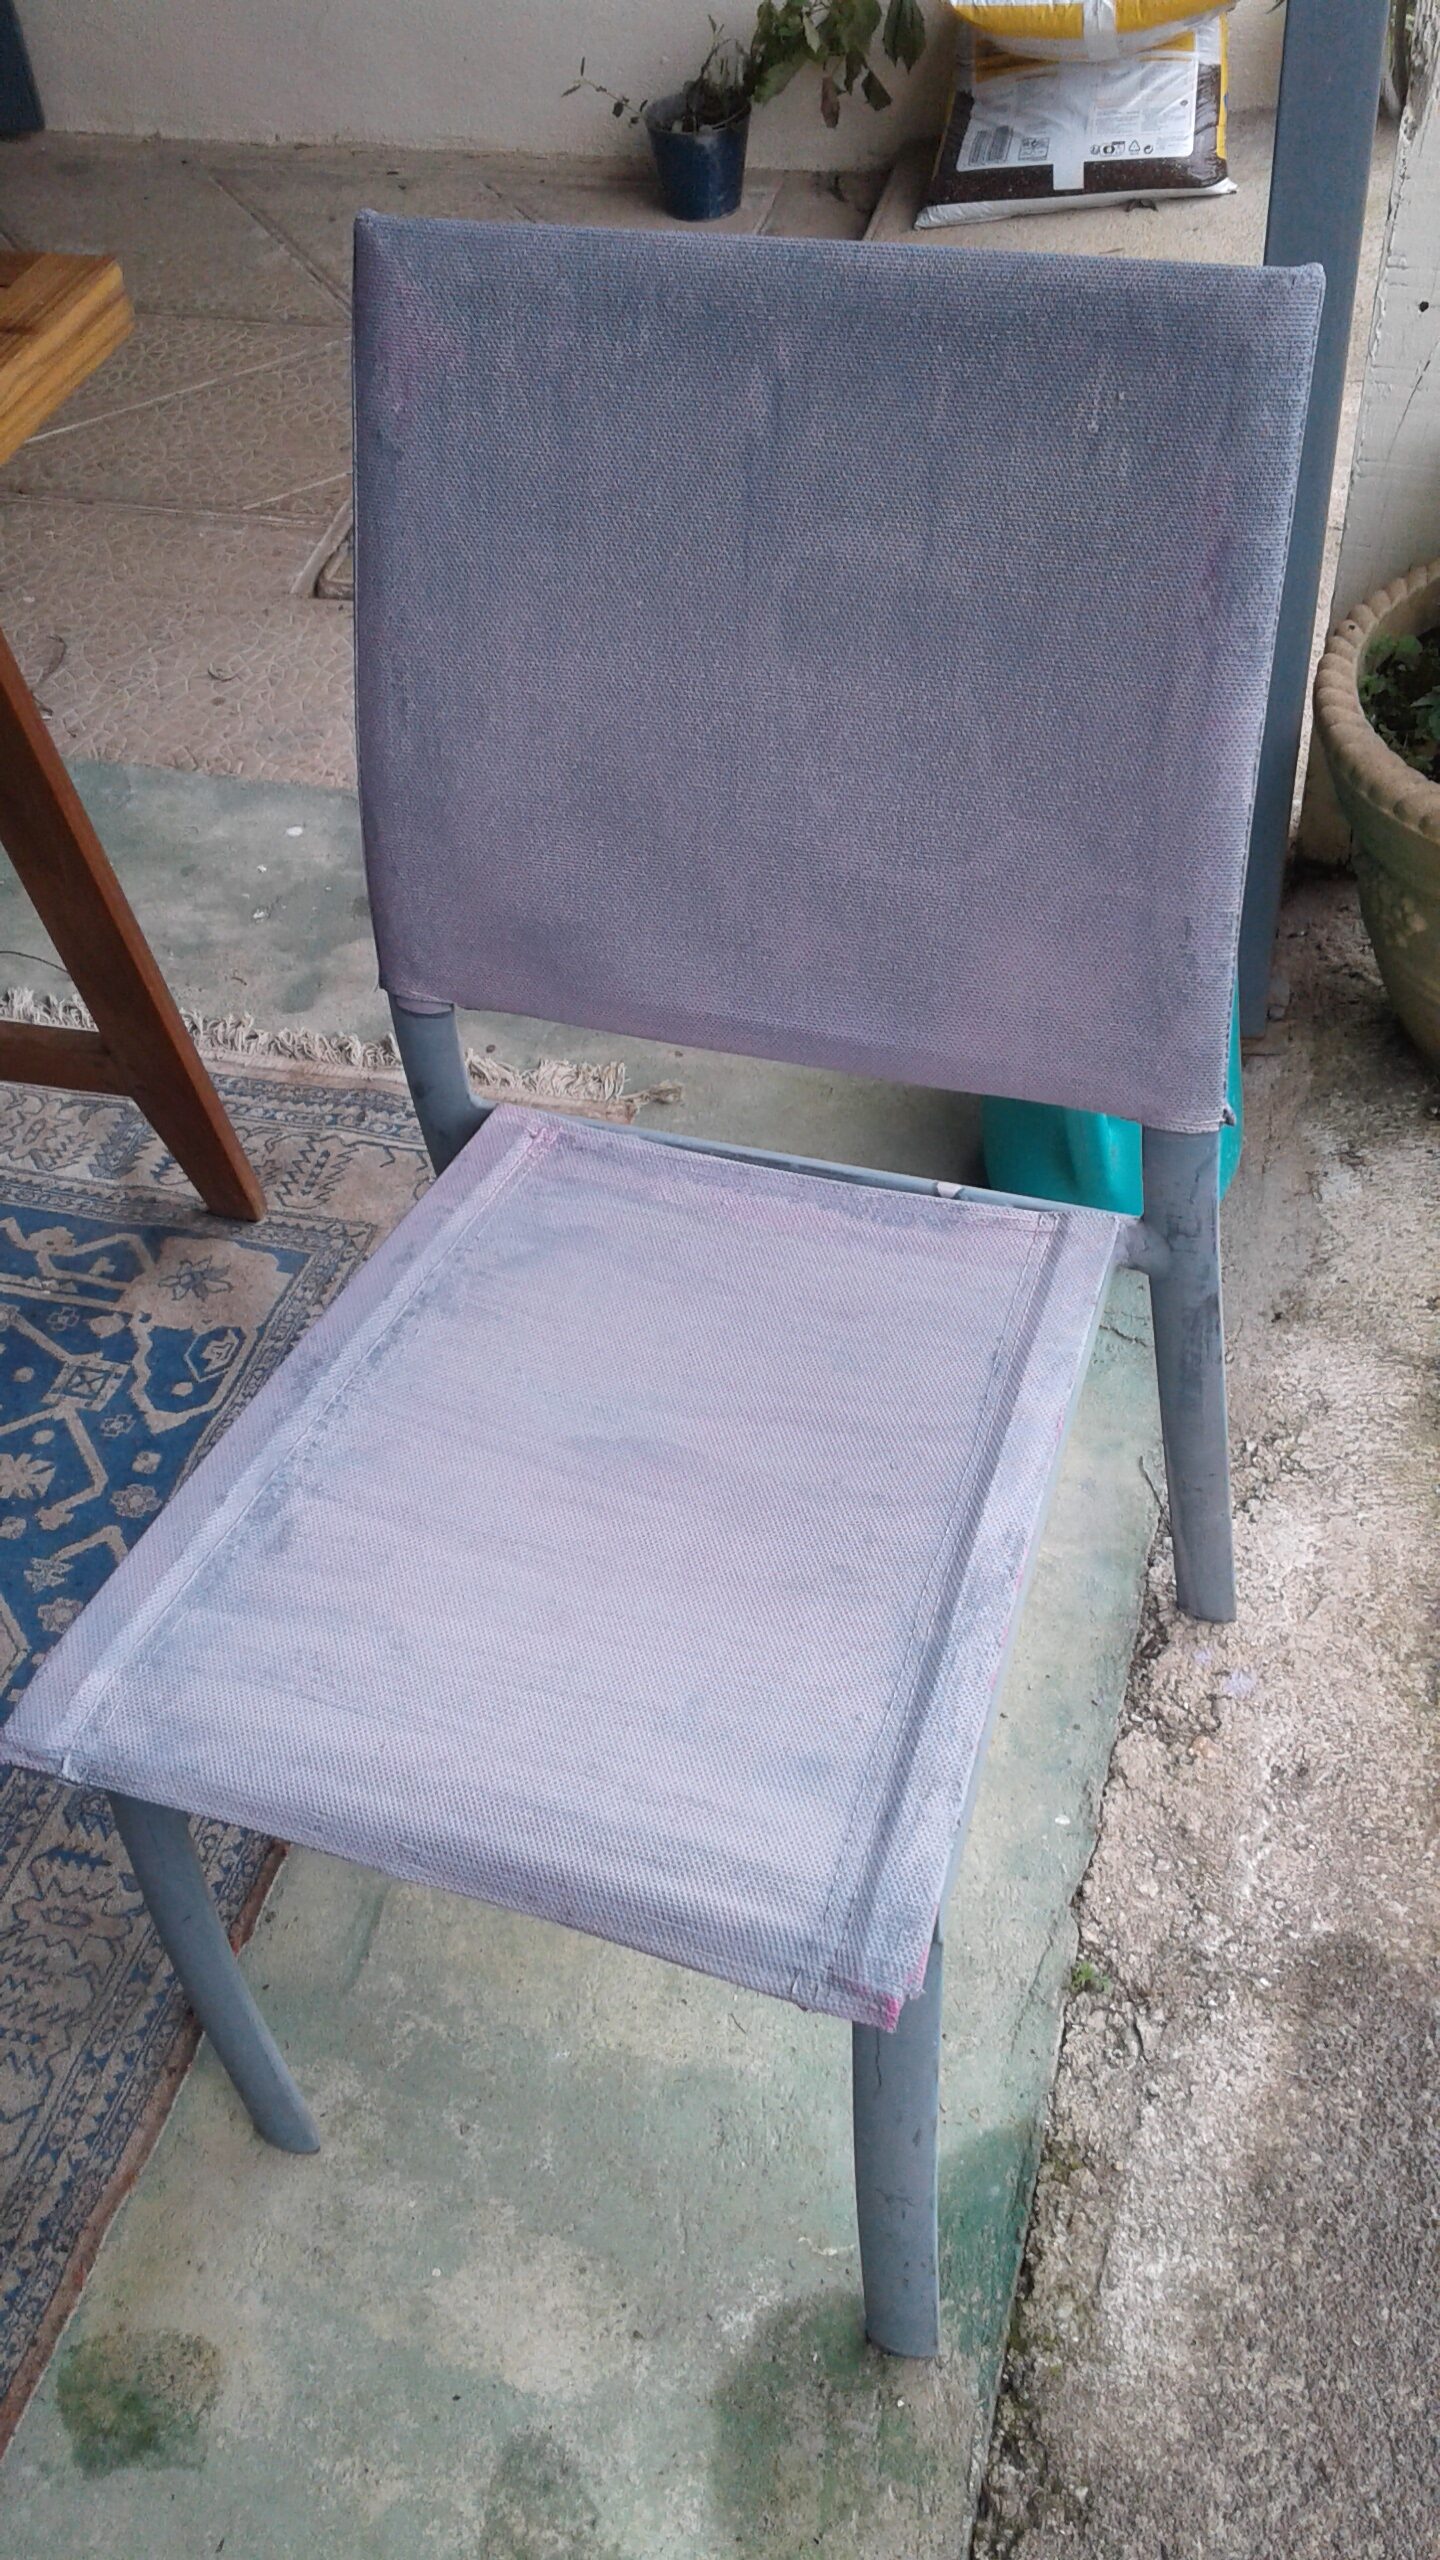
Now we have gone from Aubusson to Divine Lavender.A waterprrof finish whichj is also UV resistant.
Get your Fusion Mineral Paintin France from La Deuxième Chance.
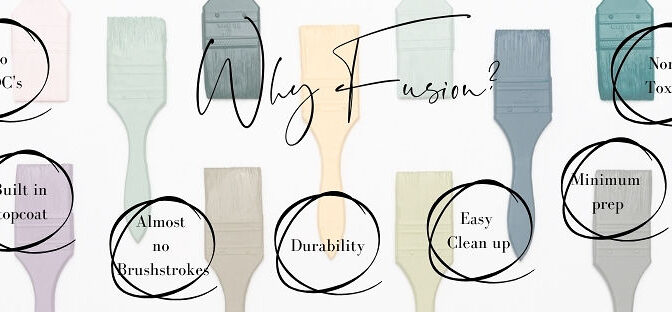
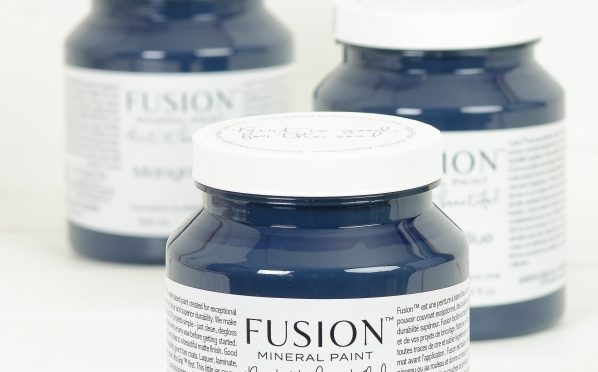
Fusion Mineral Paint was created by entrepreneur and DIY expert Jennylyn Pringle. Fusion™ Mineral Paint’s unique formula features 100% acrylic resin and is the highest grade strength on the market. Fusion’s™ results are nothing less than spectacular, providing furniture painters a best-in-class paint that features; an environmentally conscious formulation, zero VOCs, superior durability, and easy one-step application with a built-in top coat!
Fusion Mineral Paint.
The Fusion™ Difference
● Environmentally conscious by design
All Fusion™ products are non-toxic, lead free, virtually odourless and have no volatile organic compounds (VOC) and contain no ammonia or formaldehyde.
Wide Choice of Colours available.
● Little to no prep work required
Fusion™ can be applied to most previously painted or coated surfaces without priming or significant prep work.
● Built-in top coat
Not only is Fusion™ easy to use and perfect for beginners and pros, it can be used on virtually any surface to maximize your creativity. No primer needed and the top coat is built right into the formula!
● Incredible coverage
Fusion™ paint offers incredible coverage of 75 sq ft per pint (500 mL). In most cases, one coat is all you need.
Fusion Mineral Paint is also great for outdoor use.
● Highly durable formulation
Once Fusion™ has cured, it yields a highly durable and a washable finish. Fusion™ uses industrial grade acrylic resin in the formula, so it’s slightly flexible and can move with your furniture, flooring, kitchen cabinetry, and more. No chipping or cracking!
● Super smooth, matte finish
Fusion™ is offered in a gorgeous matte finish. This means an almost zero reflectance value that allows you to achieve a beautiful smooth matte finish with no brushstrokes in sight.
● 50+ colours
Get inspired with our true colour fan decks featuring over 50 hues. We’ve curated our customer favourites from the past 30 years, and combined them with beautiful new custom blend recipes for shade variations that are sure to delight.
Get your pot of inspiration and paint it beautiful with Fusion Mineral paint from La Deuxième Chance.
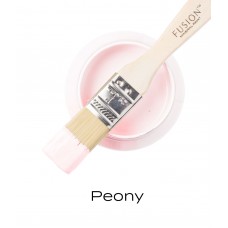
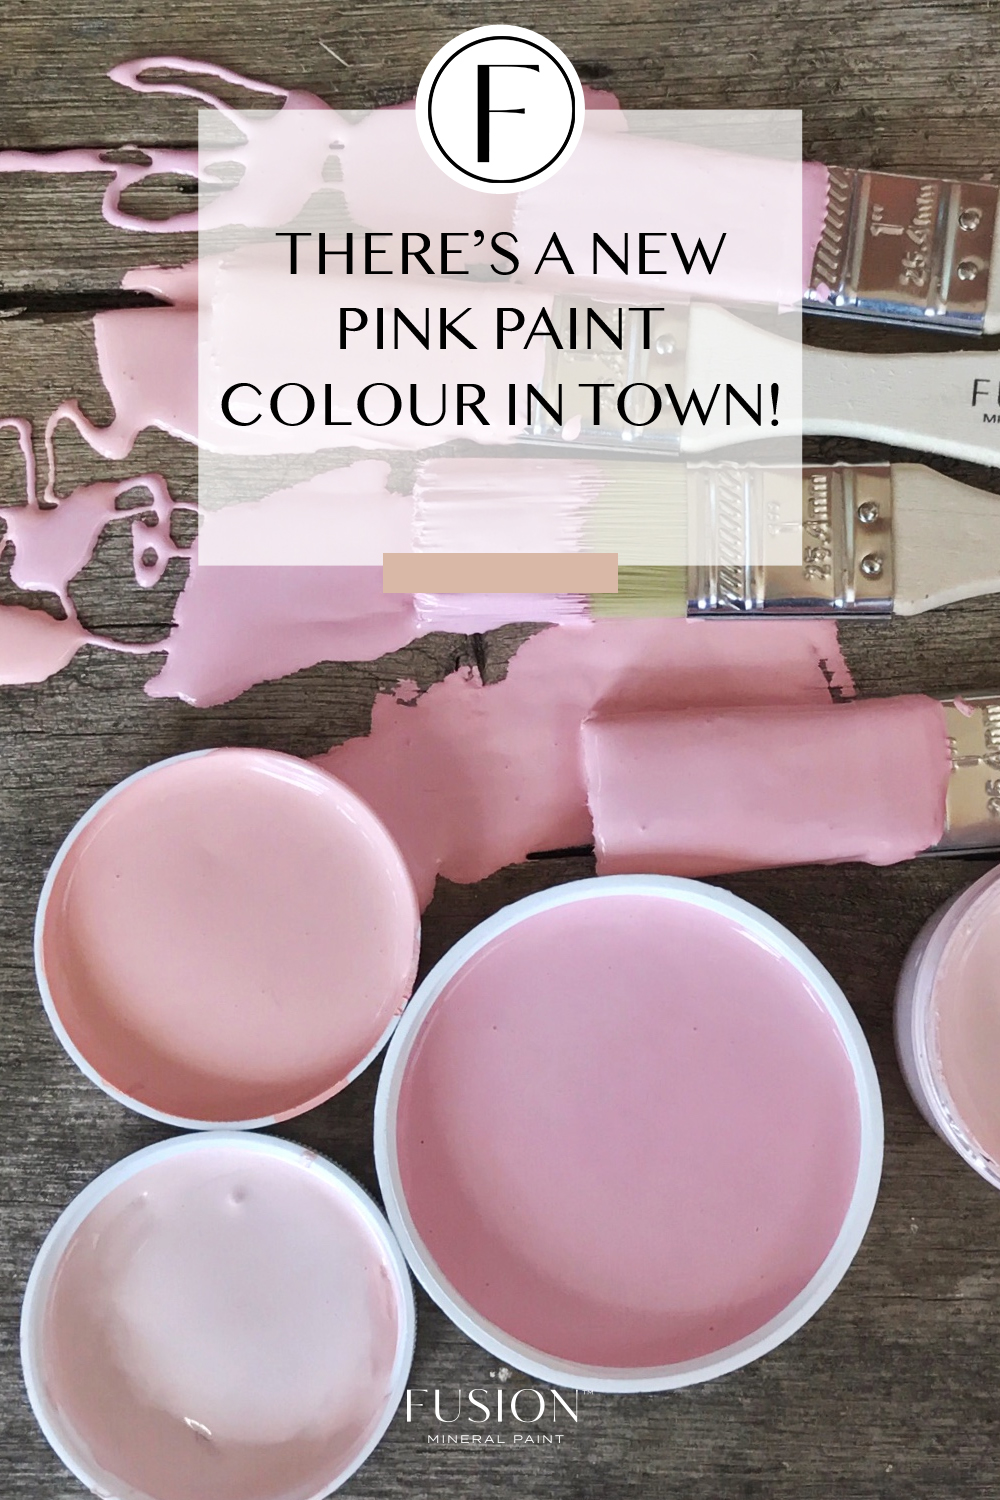
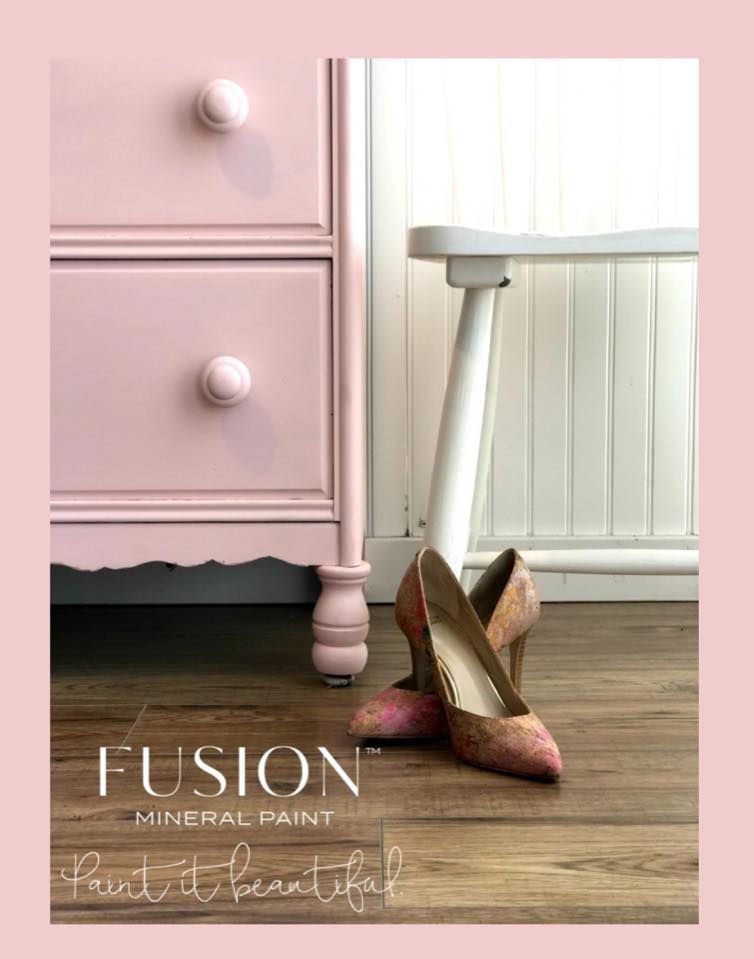
Say hello to Fusion Peony. A subtle and soft pink.
Say hello to Fusion Peony
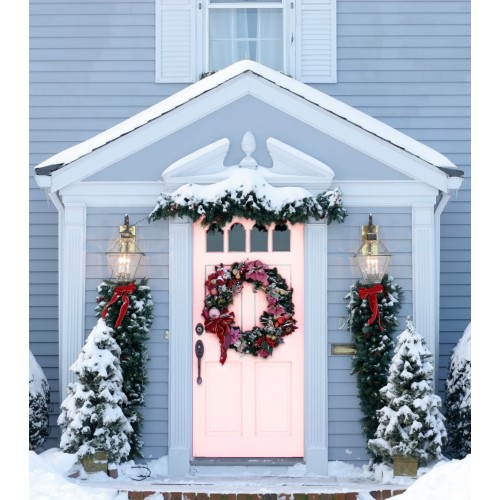
This delicate pink is a soft blush, yet can so easily be the centre of attention. Front door painted in Fusion Peony
Fusion Peony is now the replacement for Fusion English Rose which has sadly been retired.It is a lighter pink than English Rose but just as pretty.
Try it with Fusion Casement for a soft and pretty contrast, or with
Fusion Sterling for a sophisticated look. Fusion Peony
Available to order via our website or in our store.
We don’t normally shout about new products before we launch them but this one has me excited. Fusion Pouring Resin and Fusion Cell Enhancer are coming in 2020. If you wish to pre-order them you can do so from our website.
So what’s all the fuss about?? Here’s a taster…
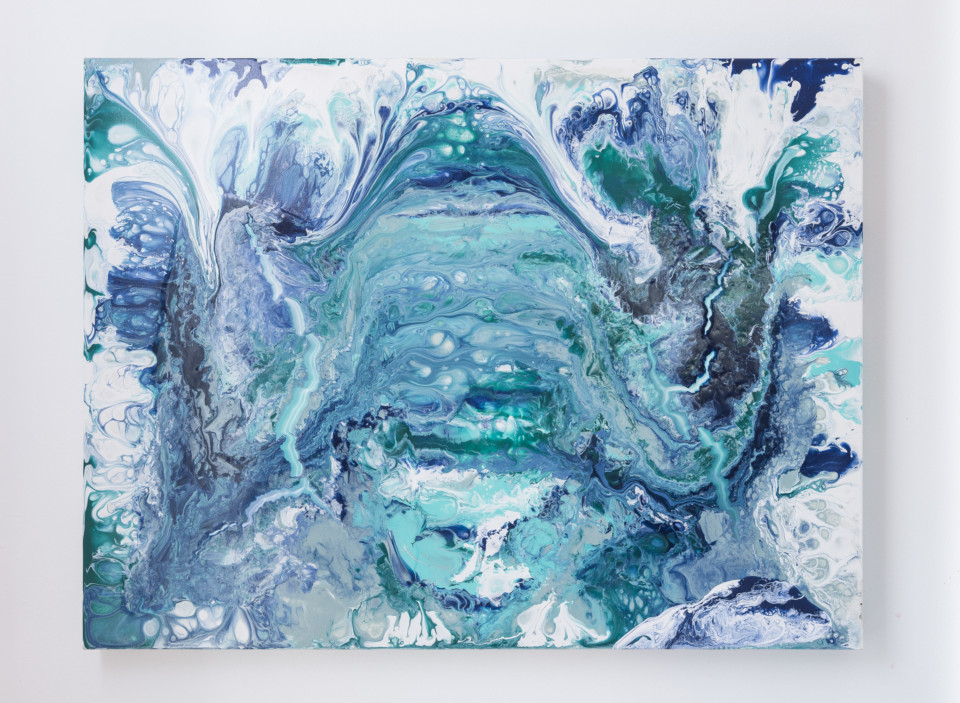
Get the Look!! Fusion Pouring Resin
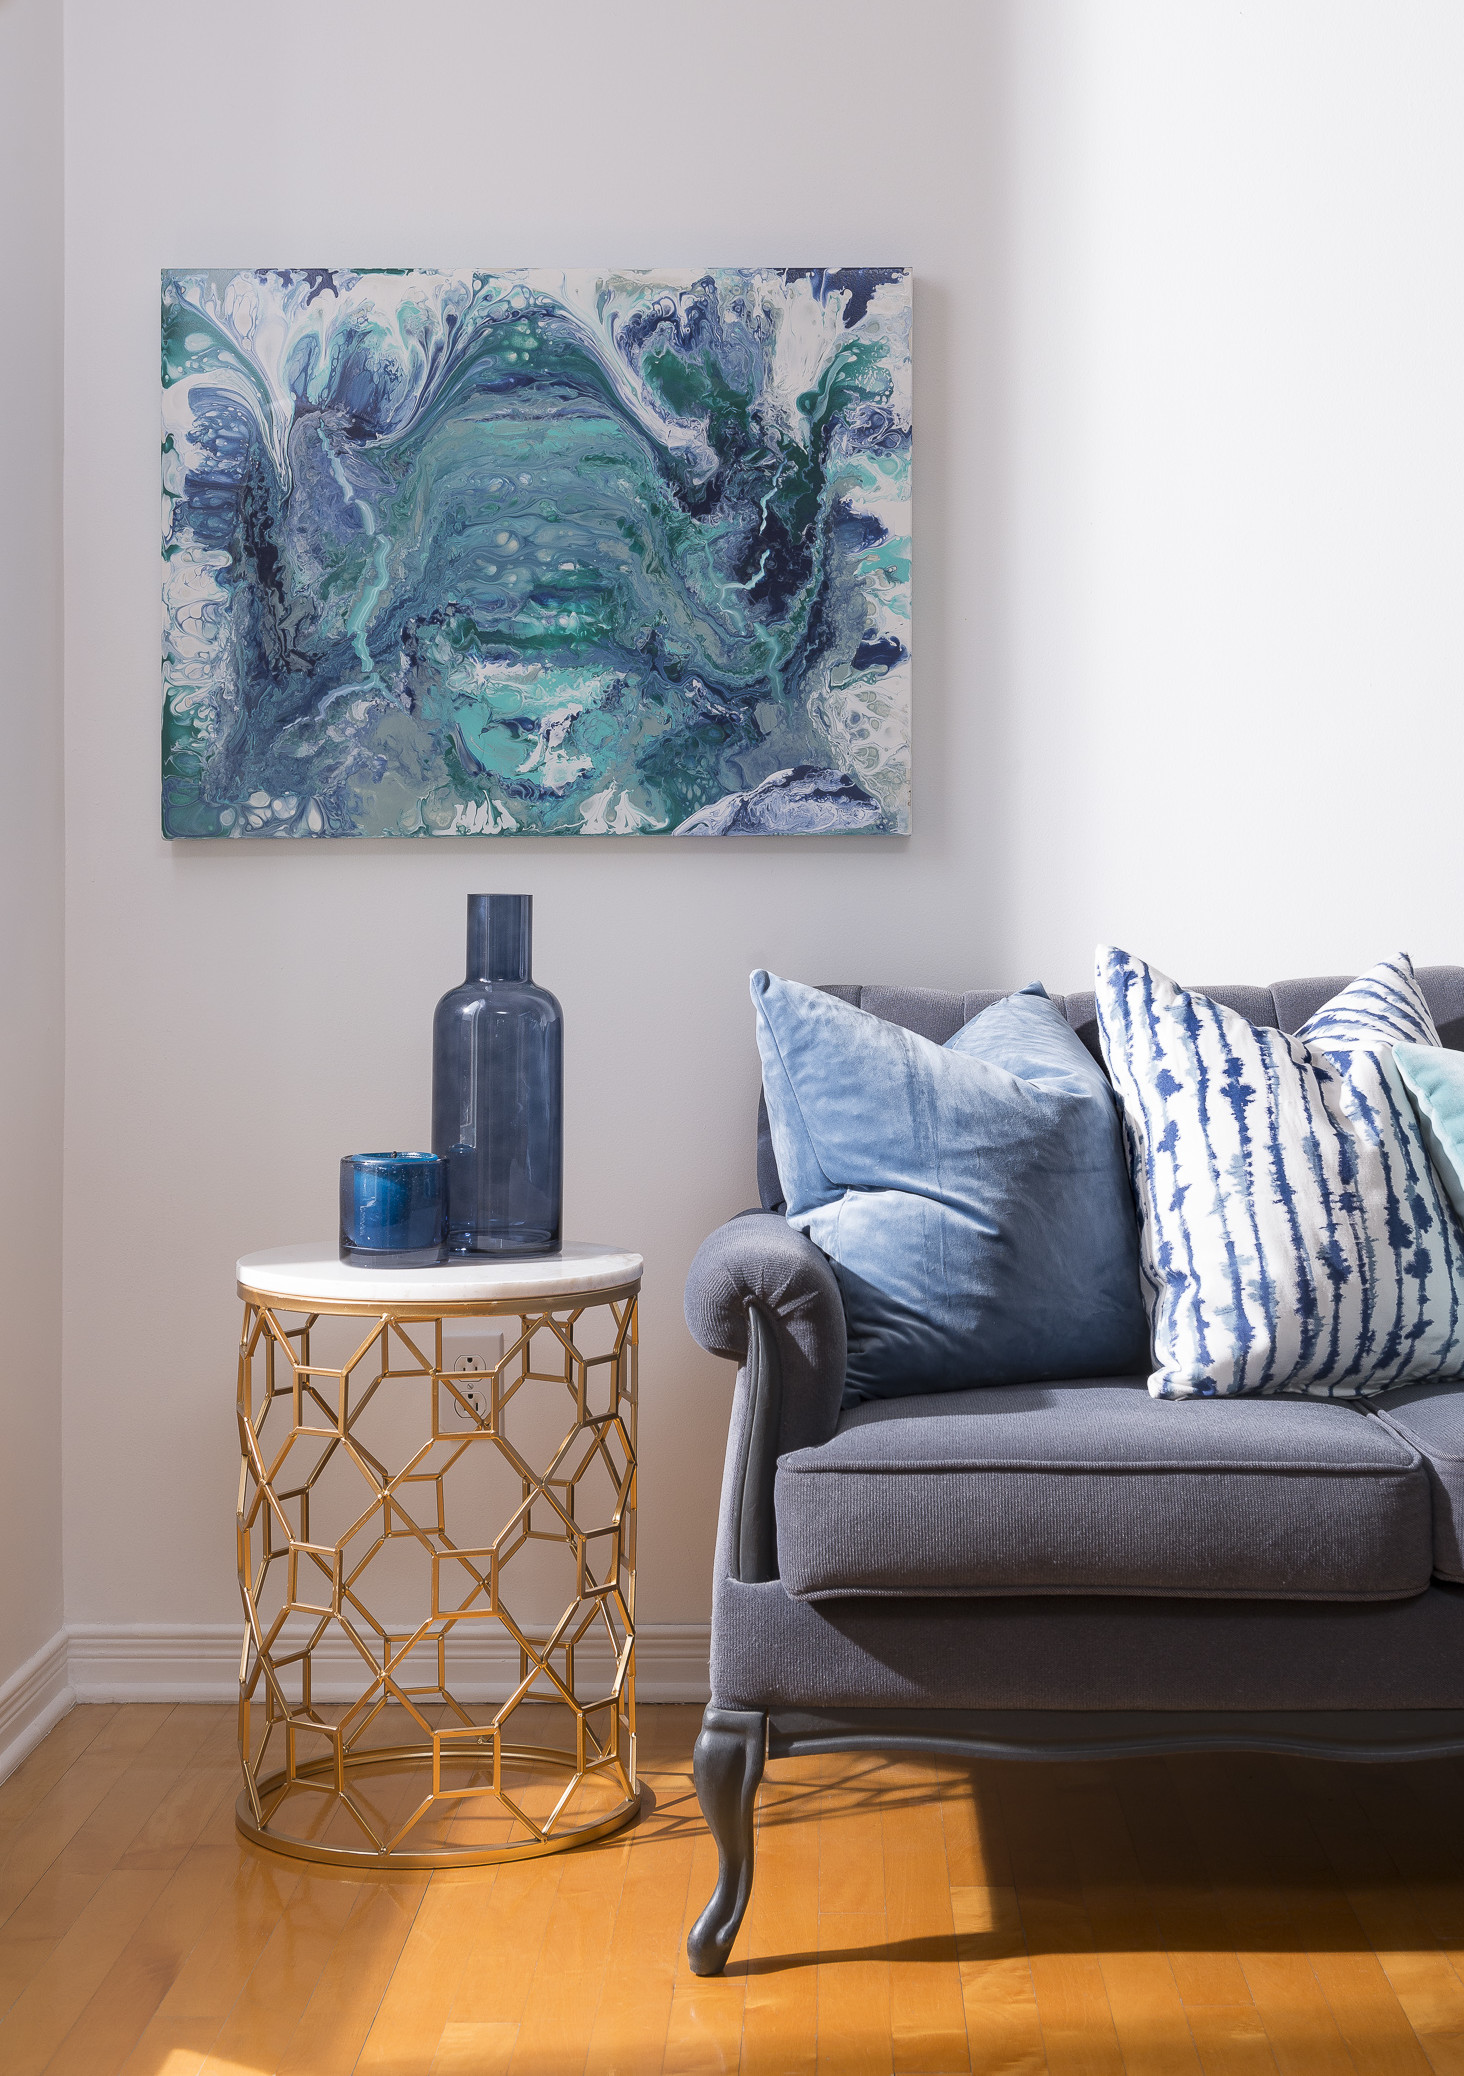
Feeling creative? Looking to create a unique beautiful piece of art to showcase in your home? Together with Fusion’s NEW Cell Enhancer and Pouring Resin is an acrylic pouring medium for creating beautiful art on canvas or wood, that dries with a high gloss finish. Pouring Resin mixes seamlessly with Fusion Mineral Paint to create beautiful and unique acrylic pour artwork. It can be used on canvas, furniture or any surface that Fusion sticks to. This achieves a durable, glossy finish, and can even be used on its own as a finish over top of Fusion Mineral Paint.You can even paint on top of for a multi-dimensional look.
*Durable glossy finish
*Easy to Use
*No topcoat needed
*Non-toxic
*No VOCs
You do not need to add Floetrol type additives to this product. Easy to Create effect using pouring resin and cell enhancer
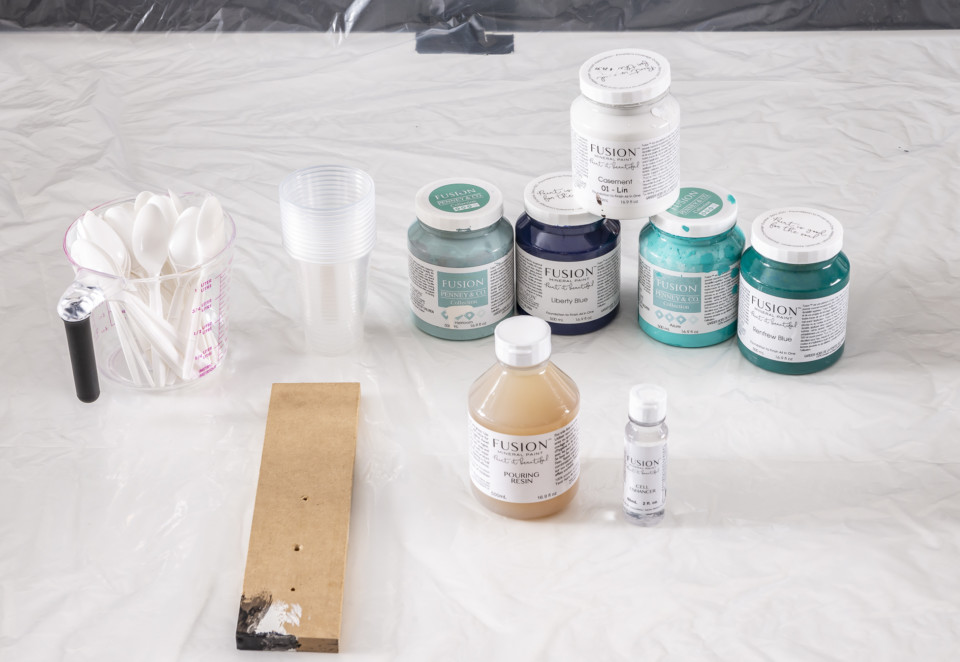
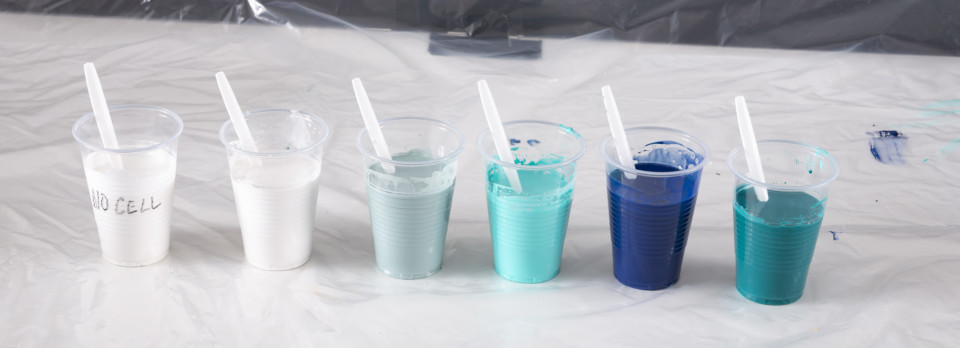
What you will need:
Paints: Casement, Heirloom, Azure, Liberty Blue, Renfrew Blue
Pouring Resin
Cell Enhancer
Canvas
Plastic cups
Plastic spoons
Stick to spread
Plastic to cover the area you’ll be working on( it can get messy!) items needed.
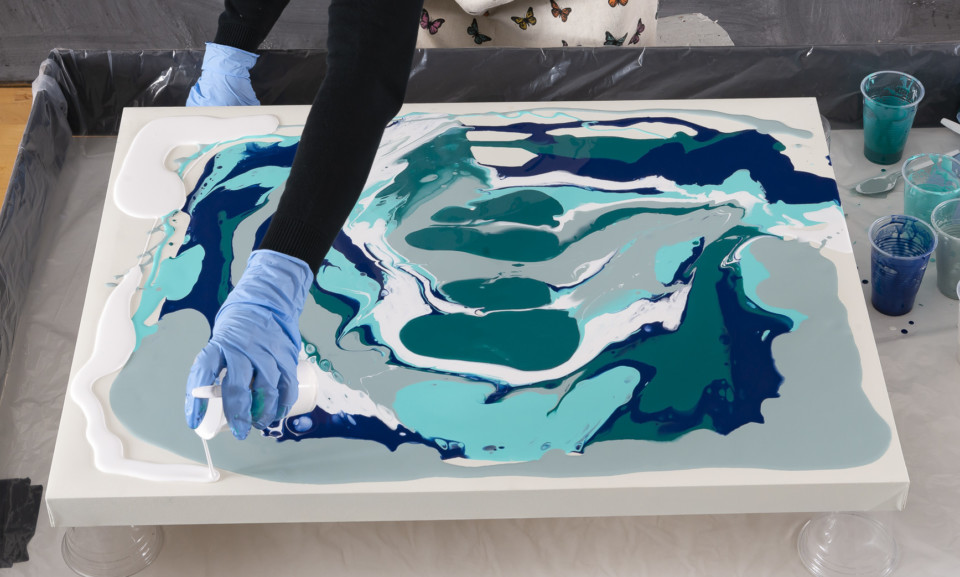
How To Use Pouring Resin
STEP 1
PREP YOU AREA AND SUPPLIES
Generally, pouring can get a little messy, so putting down a plastic drop sheet is recommended! A great tip: raise your canvas using plastic cups so the paint has something to drop off of.
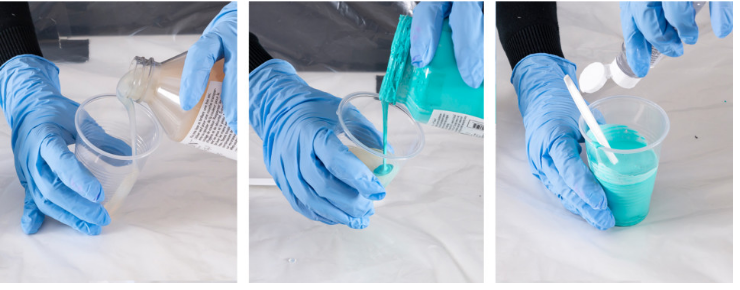
STEP 2
MIX POURING RESIN AND FUSION MINERAL PAINT
First, pour some pouring resin into a cup.
Then, add a couple of drops of Fusion Mineral Paint. Think of it as tinting the resin. You don’t want to use more than 10% paint to resin, so as not to slow down the flow of the resin.
We’ve chosen to add Cell Enhancer to each paint cup for increased separation. Create a second cup of Casement without Cell Enhancer and mark it. This Casement will be used at the end to fill out the background edges. 3 easy steps
Choose as many colours as you wish, contrasting and pops of colour are always recommended!
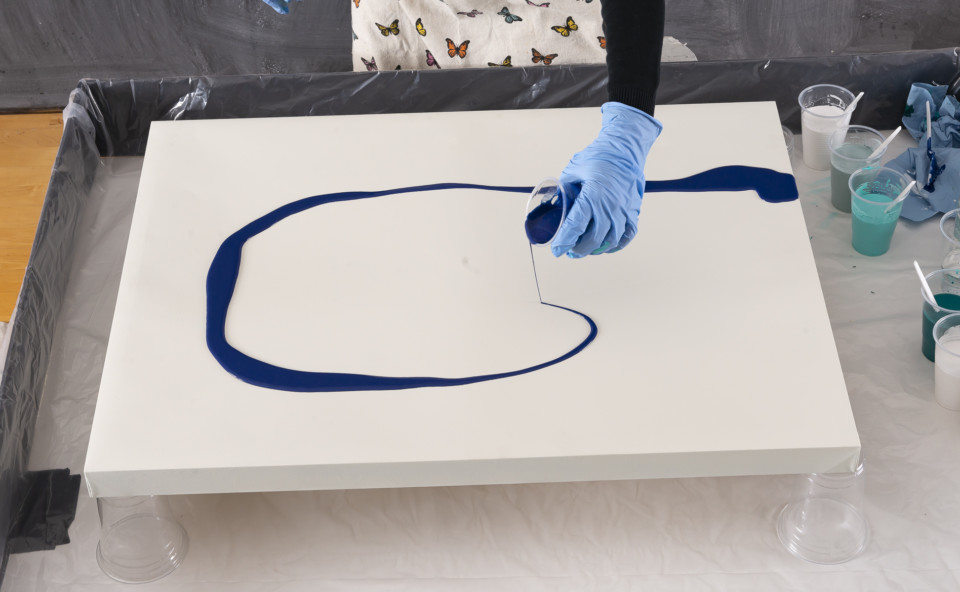
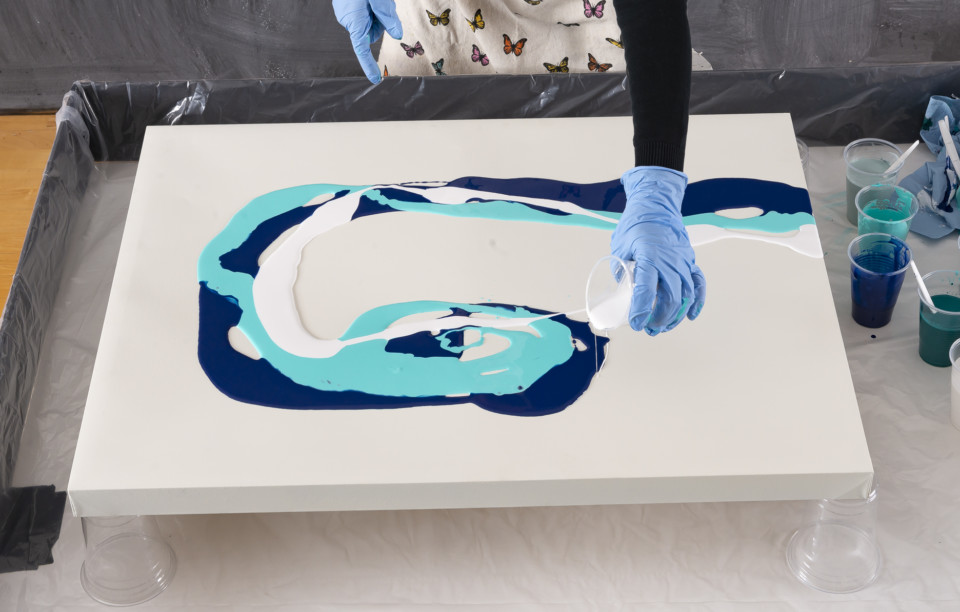
STEP 3
START POURING
Pour each individual colour in a swirly pattern one at a time onto your canvas.
Continue pouring, overlapping some of the colours.
When all of the individual colours have been poured, pour the Casement marked without the Cell Enhancer on the edges of the canvas to cover any missed surface.
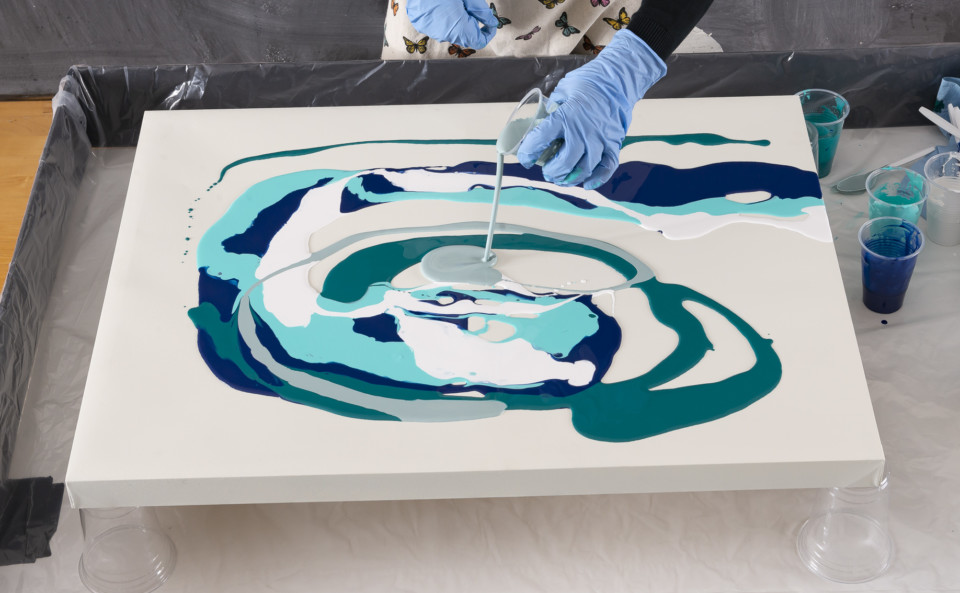
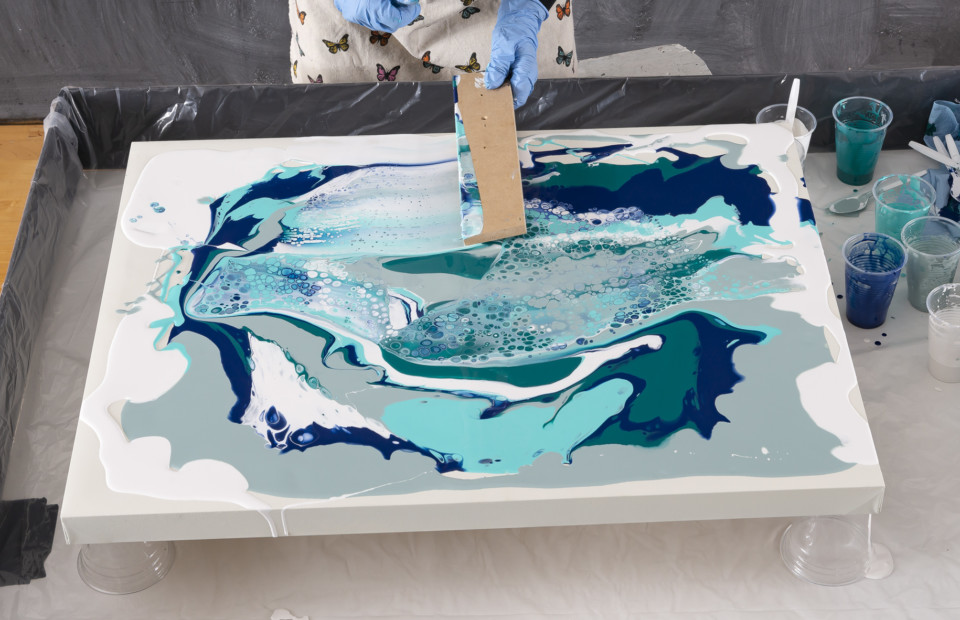
STEP 4
SPREAD THE CELL ENHANCER
Once all the product has been poured, take a stick and slide over the paint left to right and then top to bottom. In this case you can see the Cell Enhancer taking effect in the circular formations.
STEP 5
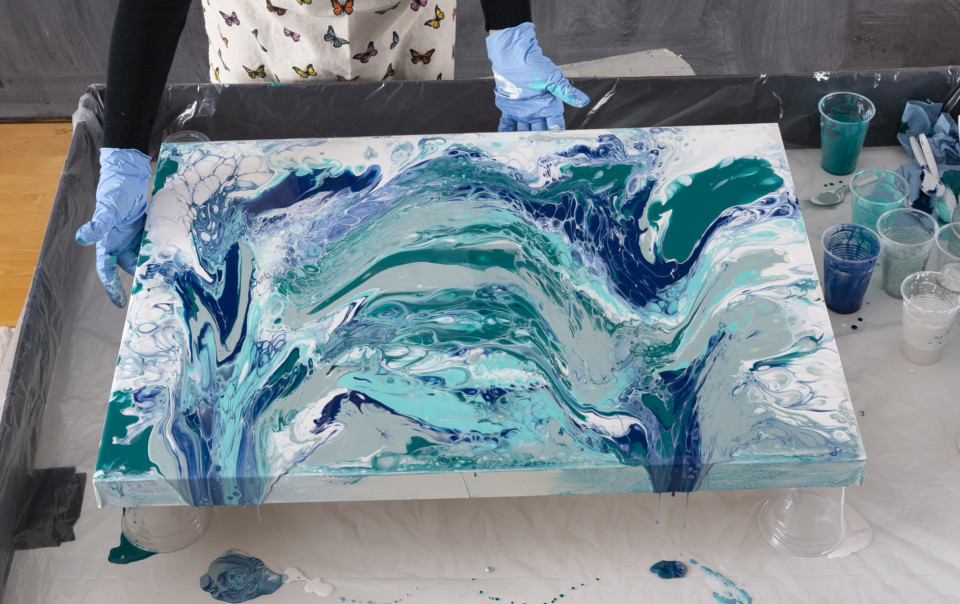
IT’S TIME TO TILT AND GET MESSY!
Now you want to tilt the canvas to bring the paint off the edges and create any patterns you desire. Continue by tilting and pouring out any extra paint on your canvas.
STEP 6
DRY & DISPLAY
Let your piece dry for 12-24 hours and then it’s ready to be displayed!
In the areas where there’s cell enhancer, you may see a shiny area. That will remain shiny unless you take a cotton swab with rubbing alcohol to remove the excess cell enhancer.
Finally, step back and look at the beautiful unique piece of art you have created!
Are you feeling tempted too? I can feel a whole new workshop coming on for those that want to try before they buy.
It is important to realise that all fabrics are different and will vary in how they take the paint, therefore it is important to experiment a bit to see if you will like how it will turn out. Painting a seating cushion? Start by painting the bottom side with all the steps below to see how it turns out before tackling your entire sofa or chair!
The most successful types of fabric to paint are Cotton, Polyester, Burlap, Vinyl and Leather.
You may find it a problem to paint velour or velvet as they tend to not result in a perfect finish, however it possible with patience and pratice.
How do you know when to paint fabric, and when not to?
When deciding whether or not to paint fabric, you need to decide the value of your piece: would you be absolutely devastated if the finish didn’t work out to your liking? Is it an heirloom that has been in your family forever? If it is, then perhaps painting it isn’t such a good idea. Instead seek out a professional re-upholsterer. Second hand finds are great for this type of treatment. No attachment, Nothing gained – nothing lost. Look for items that are of solid construction, no smells or obvious stains.
Before and after painting fabric
The Process
Before starting make sure you clean the fabric. If there are stained areas that change the texture of the fabric and cannot be cleaned you may want to upholster instead.
1. Apply your first coat made up of 1 part paint to 1 part water.This helps to absorb the paint into the fabric more, and almost dye the fabric, versus a coat of paint sitting on the fabric. ( Skip adding water if painting on Vinyl or Leather)
2. Sand with a fine grit paper to soften. This will take down any roughness of the fabric. Sometimes when you paint fabric, little fibers tend to raise up, so you knock those back with a sanding pad or fine sand paper. This takes very little effort.
3. Apply another coat of paint but this time use less water and more paint. 1 part water to 2 parts paint. ( Again skip adding water if painting vinyl or leather)
This will again help it to soak in really easily. If you think you only need 2 coats of paint and you’re getting really good coverage, you can skip watering down your second coat, and go straight to a full strength paint coat for your final layer.
Next apply a 3rd layer, if necessary, of pure paint. Be sure to sand between each coat of paint for a super smooth finish.
4. Apply wax as a top coat. This isn’t strictly necessary as Fusion has a built in top coat. However it will soften the fabric and make it feel like leather. Always apply thin coats of wax and buff as necessary. We recommend using either Fusion beeswax finish or MMS Furniture Wax.
Aftercare
Once fully cured (approximately 30 days depending on weather conditions) the painted fabric is washable. We would recommend washing by hand with cold water. Do not wash with any other items! Leave to air dry.
What if I get paint on my clothes?
Not all of us are tidy painters and accidents do happen. If you get paint on your clothes our advice is to wash it as soon as possible. Scrub the affected area with Fusion Brush Soap and water. Then machine wash ASAP.
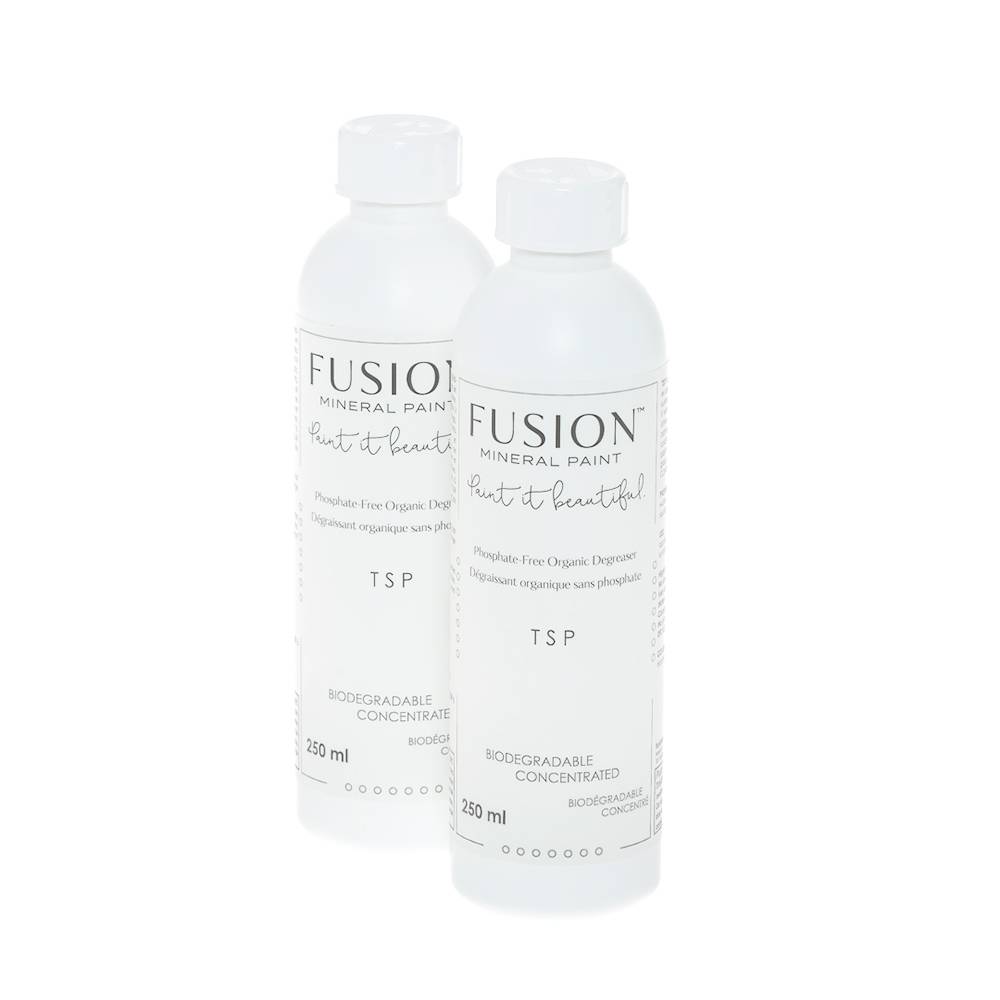
If you have bought Fusion Mineral from us, you will have inevitably received a leaflet from us showing the what if any prep you may need to do before painting. (If you didn’t get one or have mislaid it please drop me an email). On the leaflet you will have seen mention of something called Fusion TSP and wondered what it was.
Fusion™ TSP is a water-based biodegradable degreaser used to thoroughly clean a bare or painted surface prior to applying paint. Highly efficient, it removes oil, grease, fingerprints, stains and other contaminants, which will improve the adhesion and the look of subsequent coatings.
Safe to use on all surfaces (wood, paint, gypsum, melamine, plastics, metals and glass). Fusion™ TSP is environmentally friendly and contains no phosphates.
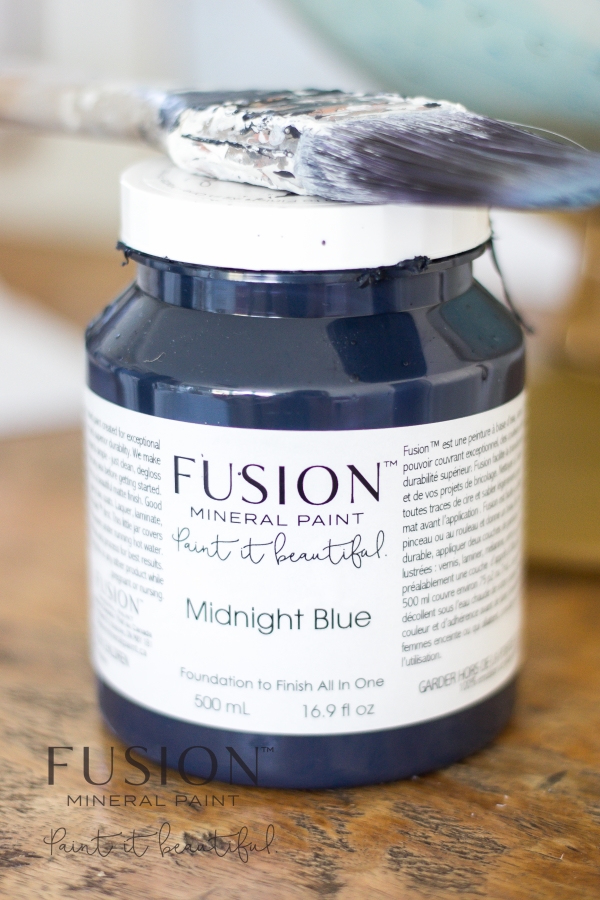
Say hello to Fusion Midnight Blue. Fusion Mineral paint have done it again. They have produced a beautifully rich dark blue verging on the edge of black. We think it is bound to make a statement and enrich any piece!
Available in either 500ml pots or 37ml tester pots.Available in store or via our website. Fusion Mineral Paint Midnight Blue
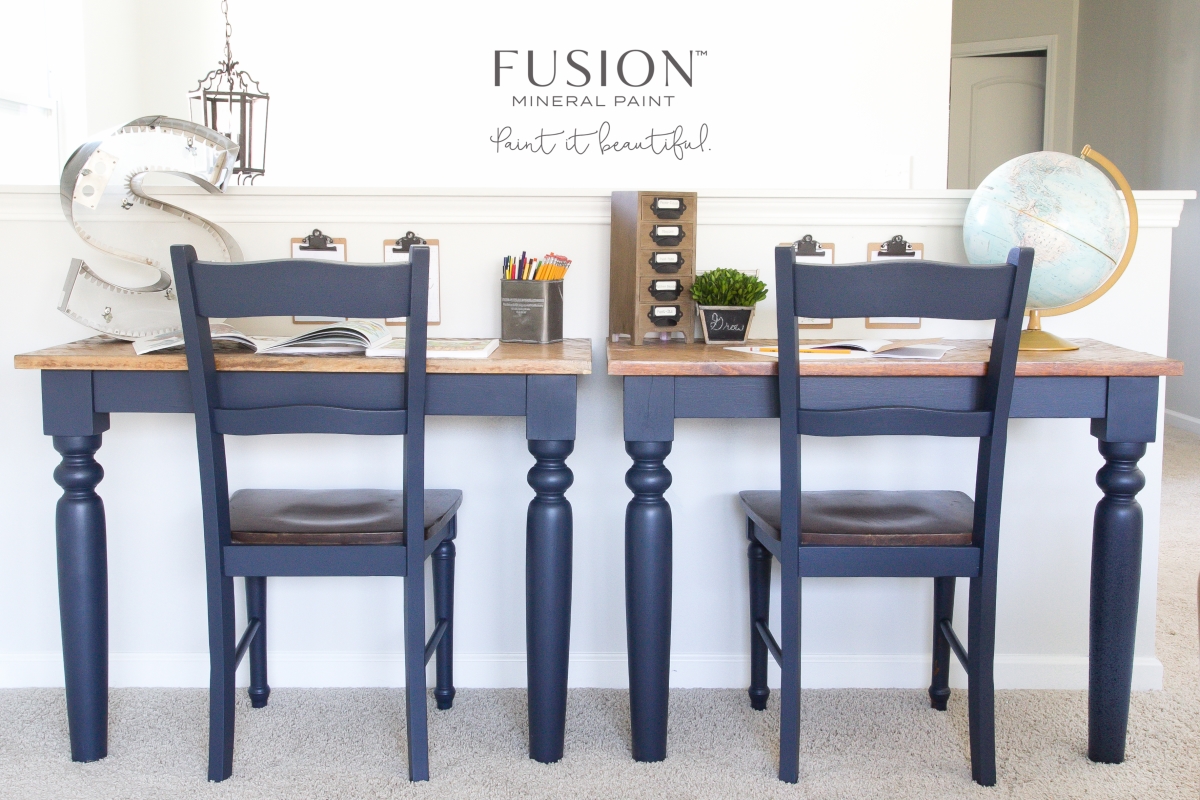
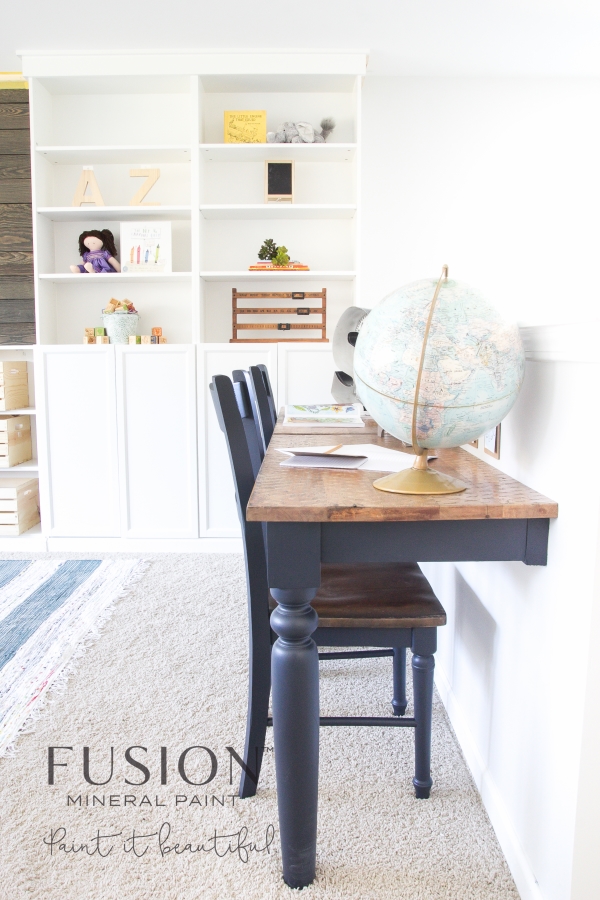
Check out this lovely desk painted using Fusion Midnight Blue.
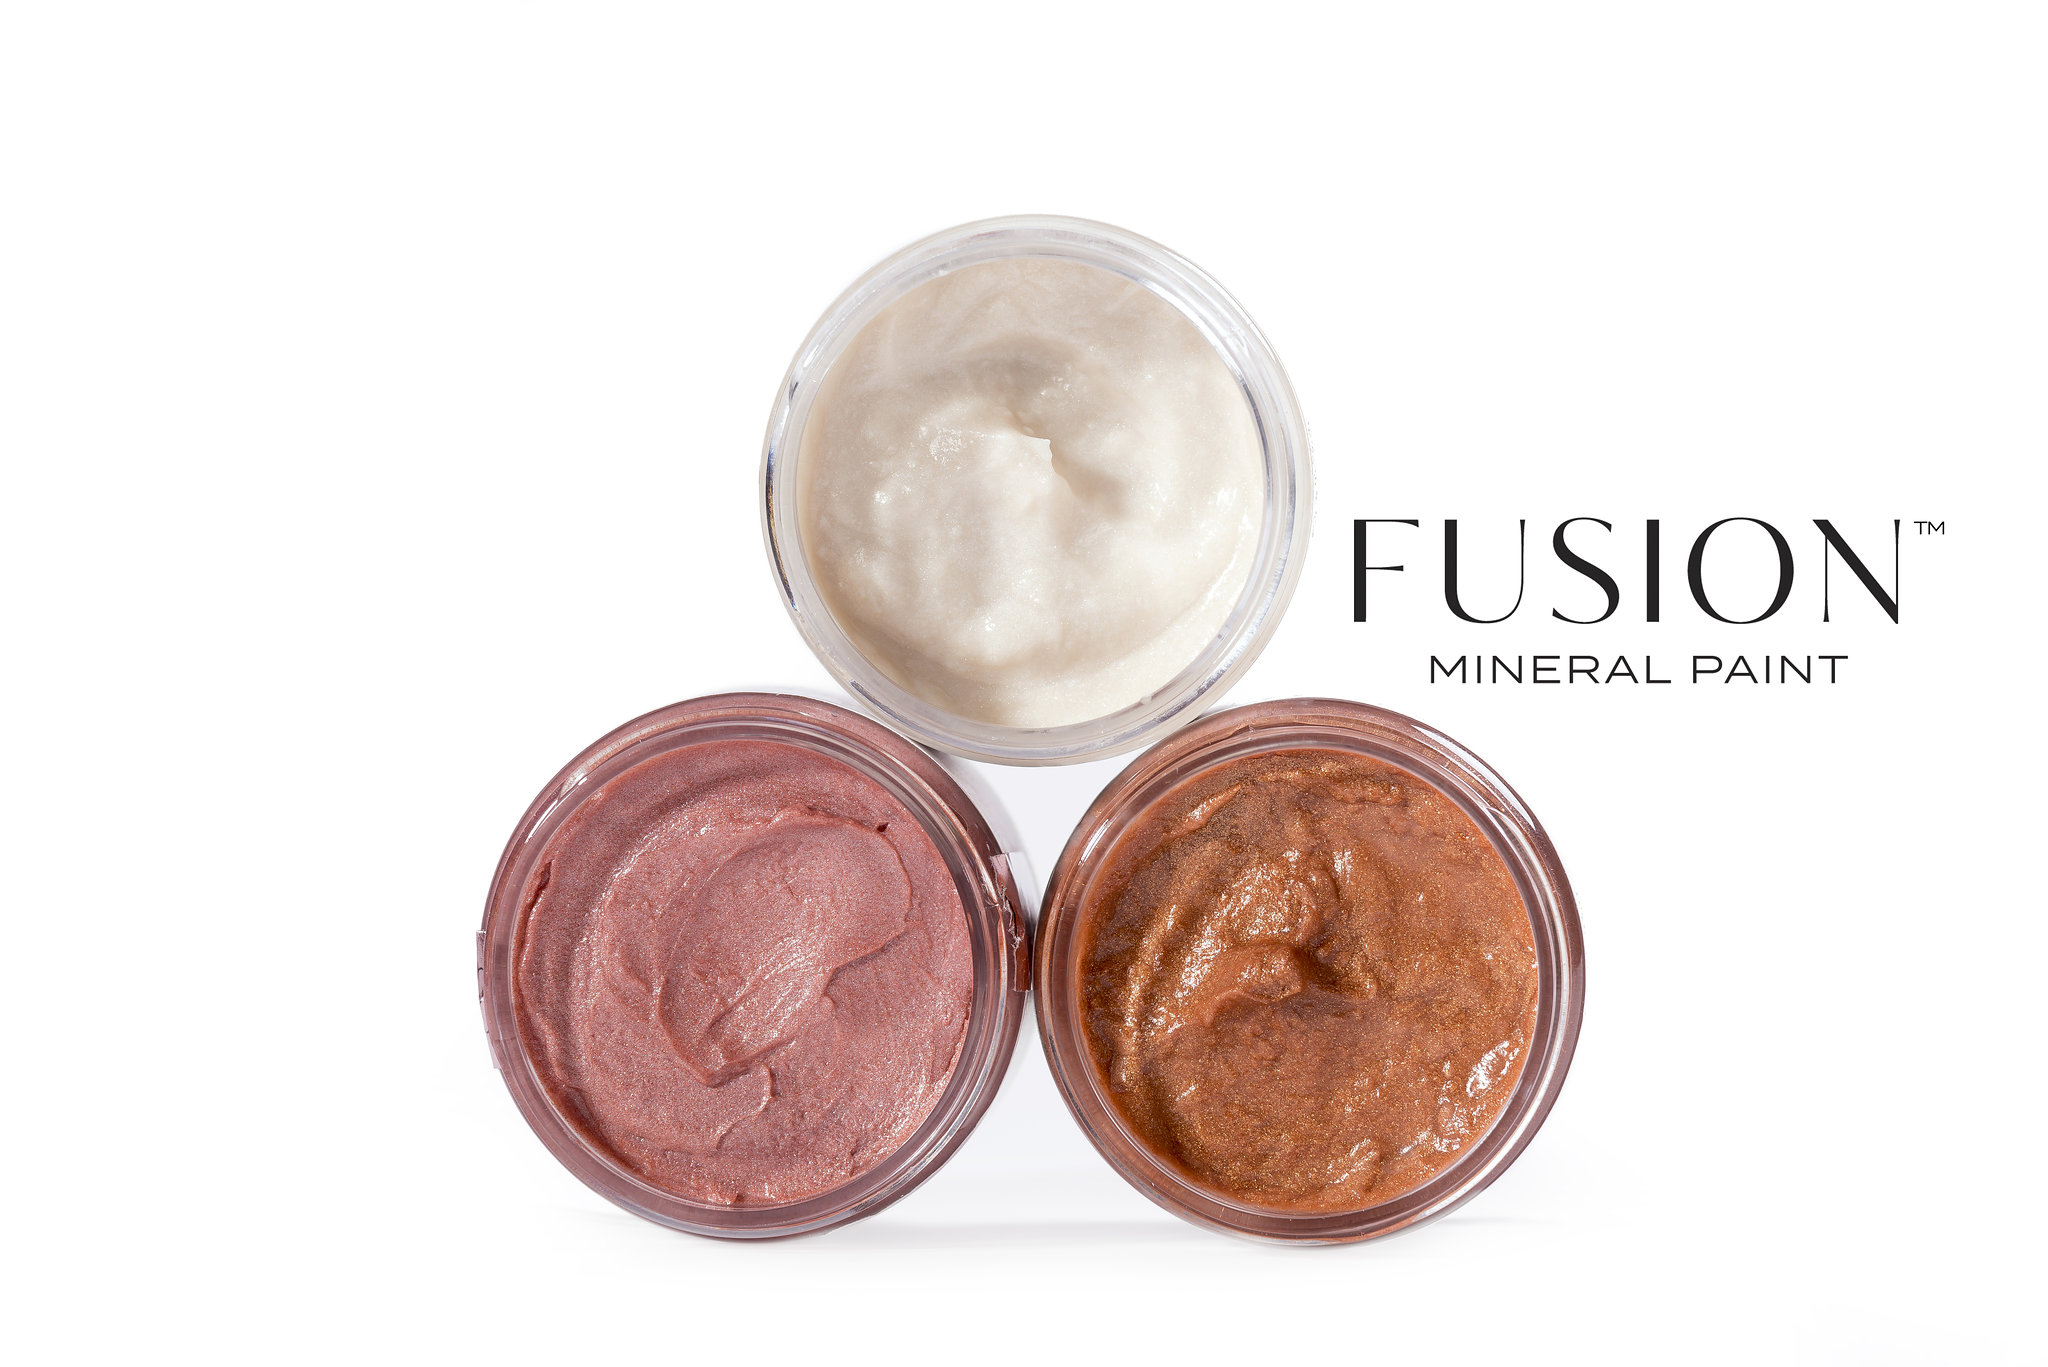
More new products from Fusion Mineral Paint. Three beautiful metallic waxes.Fusion Furniture Wax is absolutely stunning to work with! So easy to apply. A little goes a long way and for those of you that like facts this is one for you. A 50g pot may sound small but it will cover an amazing 125ft² or a little over 38m².
Fusion waxes are a fine museum quality wax, based on an old family recipe, it goes on like butter. It is soft and smooth. Easy to apply, it provides a durable finish with a beautiful lustre and has almost no odour.
These waxes are exceptionally durable, consisting of pure natural beeswax, and a touch or carnauba wax and a odourless mineral solvent for workability, this wax has been manufactured for over 30 years and is tried tested and true.
For those that aren’t sure about waxes or waxing let me explain how easy it is to apply.Just follow these 6 easy steps:
Step N°1 – Use Sparingly! A little goes a very long way, and since these are pigmented, you don’t need much to get the impact you’re looking for.
Step N°2 – Use a clean cotton cloth or brush to apply wax in a thin layer, working into recesses of carved details or surface imperfections.Apply
with a brush into detailed areas, and wipe away and buff off excess with a lint free cloth
Step N°3 – Wipe away excess.
Step N°4 – Allow it to dry for 3-5 minutes.
Step N°5 – Buff to a shine with a clean lint-free cotton cloth.
Step N°6 – Stand back and admire!!
Now the important part…..let’s have a look at the colours…….
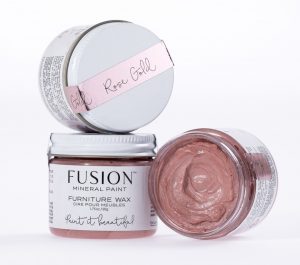
Rose gold wax offers the perfect shade of pink and a little shimmer for a subtle and sophisticated accent
Rose Gold
Rose Gold
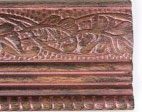
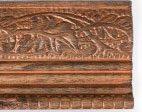
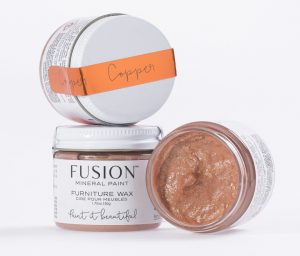
Copper wax which will looks fabulous when used over darker colours to really shine – old world age and copper patina.
Copper
Fusion Copper Wax
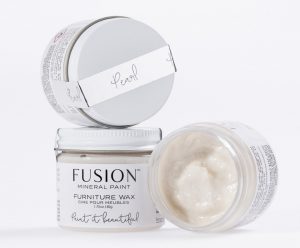
Pearl wax which is virtually clear on application, this subtle metallic offers a soft overall shimmer .
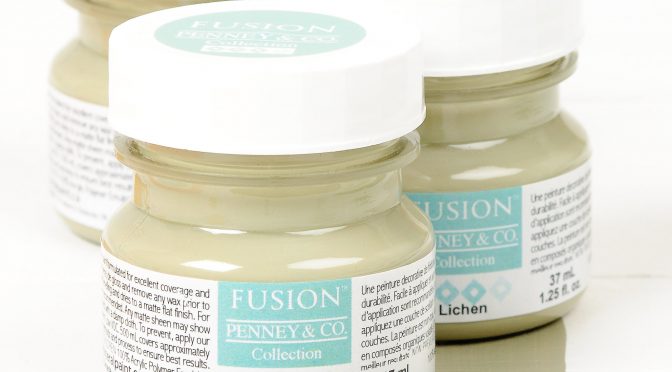
Fusion Lichen
Say hello to Lichen.
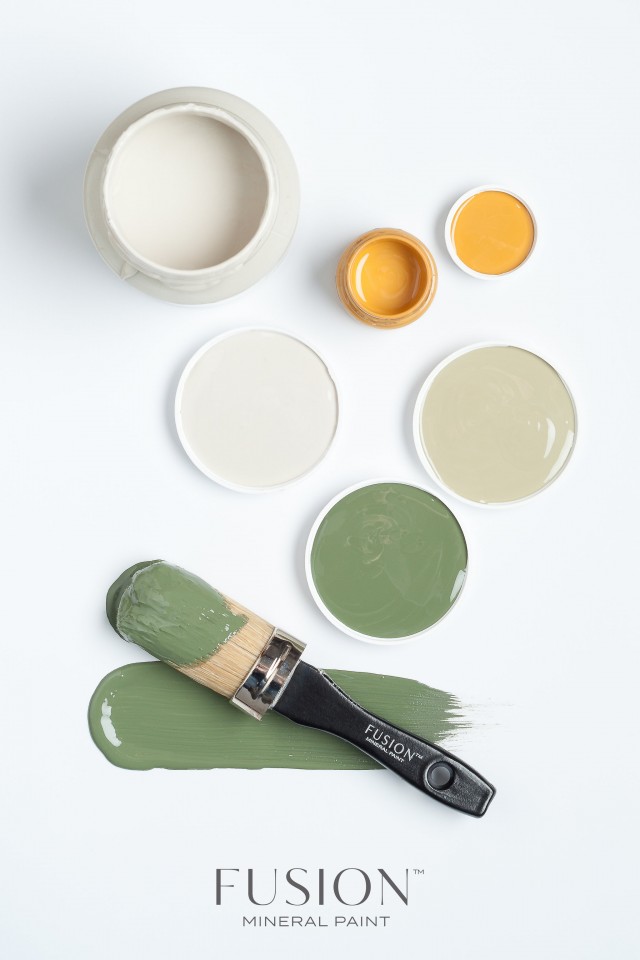
Drawn from Nature this grey green is soft, subtle and soothing. A new addition to the Michael Penney collection from
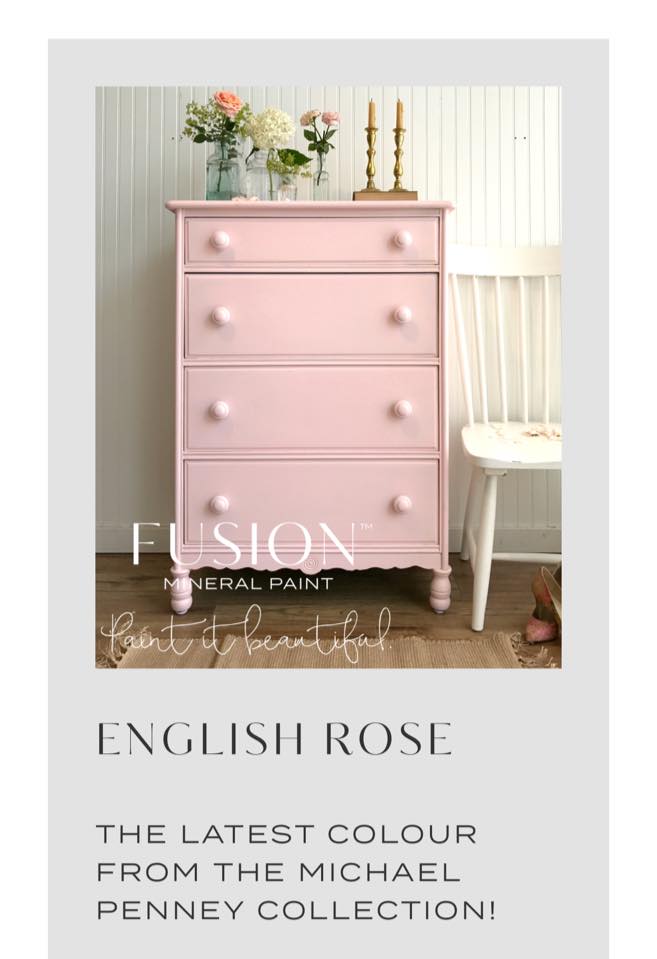
Say a big hello to a brand new colour from Fusion Mineral Paint. A soft pale pink reminiscent of an English rose. We know you are going to love this colour. Fusion English Rose
This colour is part of the Michael Penney designer colour range brought to you by English Rose by Fusion Mineral Paint
Yes you can buy this colour and any other Fusion colours from our shop here in France. It is also available for mailorder. A soft pale pink from Fusion Mineral Paint
If you haven’t tried Fusion Mineral Paint yet, you will be surprised at how easy it is to apply. And for those that hate wax here is a furniture paint with a built in top coat which means there is no need to add wax. And if that was not enough it is also waterproof. English Rose from Fusion with built in top coat
It is only 24€ for a 500ml pot of high quality paint. So what are you waiting for….. Buy on line here or pop in and see us in store.