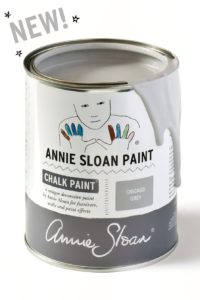
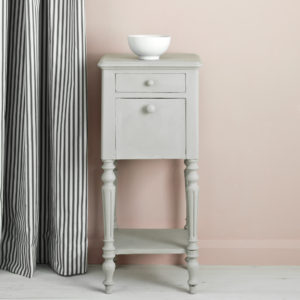
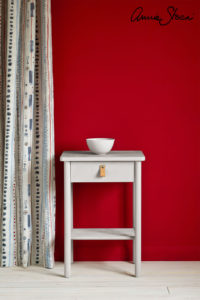
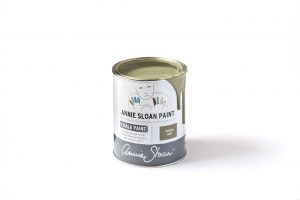
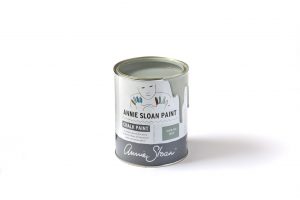
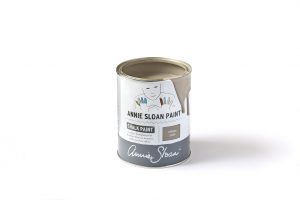
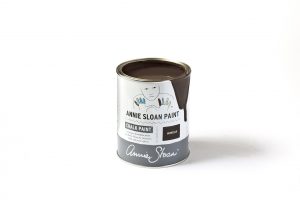
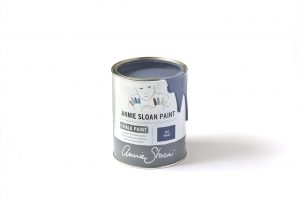
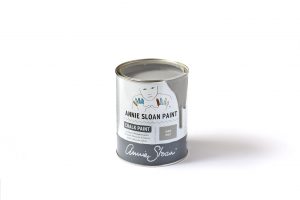
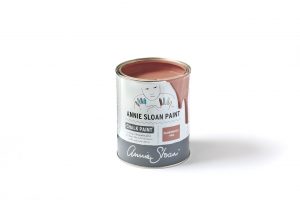
For those of you who are lovers of Annie Sloan’s Paris Grey you are going to love this new colour. Annie Sloan Chicago Grey is a cool, fresh and modern grey, with a hint of blue. Suggestive of the architecture in Chicago. A perfect neutral for industrial interiors, or muted Scandinavian styling.
Pour ceux qui aiment Paris Grey d’Annie Sloan, vous allez adorer cette nouvelle couleur. Chicago Grey est un gris frais, moderne et frais, avec une touche de bleu. Suggestive de l’architecture à Chicago. Un neutre parfait pour les intérieurs industriels ou le style scandinave étouffé.
Annie Sloan Charleston Collection.
Annie Sloan discovered the Bloomsbury group of artists and their country retreat, Charleston farmhouse, whilst she was studying Fine Art. When the opportunity arose to collaborate with the Charleston Trust to create a unique range of Chalk Paint™ colours, it was a dream come true for Annie. What is Charleston?
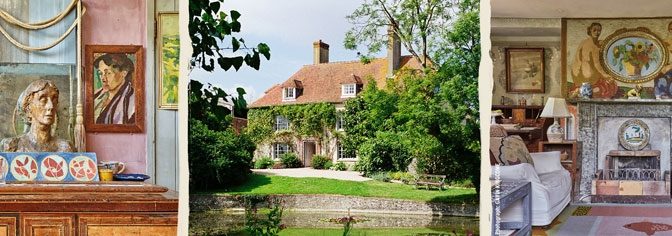
Charleston is an English farmhouse nestled deep in the Sussex countryside. In 1916 Charleston became the home of Bloomsbury group artists Vanessa Bell and Duncan Grant; two of the most radical and influential British artists of the twentieth century. The house had an open-door policy and frequently hosted fellow intellectuals including Virginia Woolf, E.M Forster and Roger Fry. Over the next 50 years they transformed Charleston, from an unremarkable seventeenth century farmhouse, into a decorative masterpiece – bringing the experimental language of modernism into their home.
The Bloomsbury group included some of the twentieth century’s most pioneering artists, writers and thinkers – people who believed in debate, creativity, beauty, innovation and truth and whose work was guided by a sense of fun, freedom and irreverence. Annie has channelled this inspiration into each of the colours and products she has designed for this collaboration.
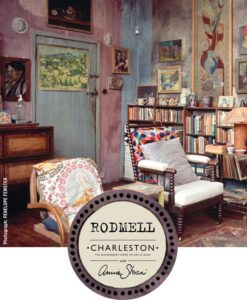
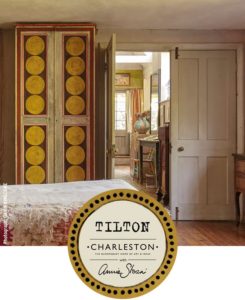
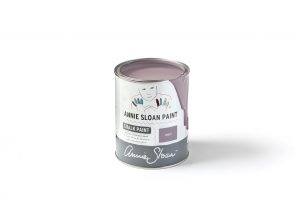
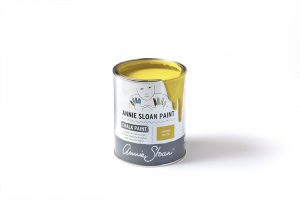
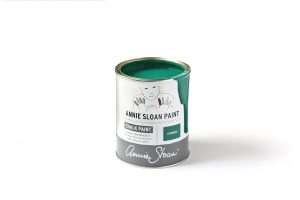
Annie’s collaboration with Charleston has seen her create three distinctive Chalk Paint™ colours inspired by the incredible home of the Bloomsbury group. Each of the colours are named after local places which the artists would have known, and are inspired by elements of the highly decorated rooms within the British farmhouse.
Click each of the rooms below to discover Annie’s inspiration behind each colour from the Annie Sloan with Charleston collaboration.
The Collaboration
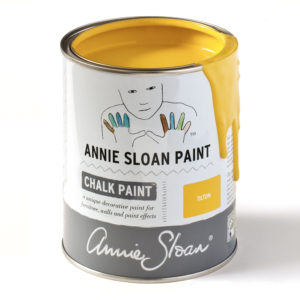
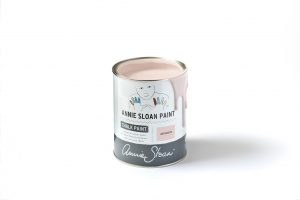
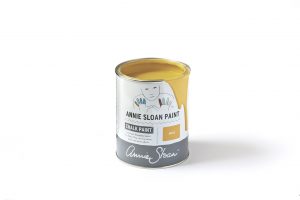
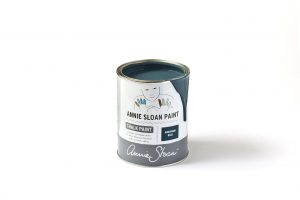
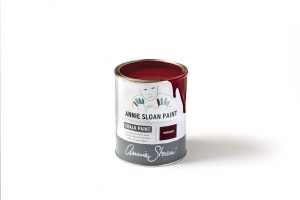
The three exclusive Charleston colours will be available to buy either separately in one litre tins or a part of a set designed by Annie. To purchase simply click on your colour of choice. Firle Rodmell Tilton
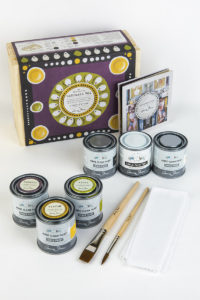
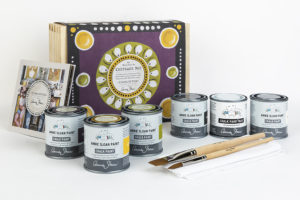
Finally there is a paint your own Keepsake Box set, which has been designed to offer the full range of Annie Sloan with Charleston exclusive colours, with two best-selling neutrals from the Chalk Paint™ palette and a Clear Wax. Keepsake Box
Annie Sloan et Charleston
Annie découvrit les artistes du « groupe de Bloomsbury » et leur domaine à la campagne, Charleston Farmhouse, quand elle étudiait les beaux-arts. Aussi, quand l’opportunité s’est présentée de collaborer avec le Charleston Trust pour créer une gamme inédite de coloris Chalk Paint™, c’était un rêve qui devenait réalité.
Le domaine de Charleston, qu’est-ce que c’est ?
Charleston est un domaine niché au cœur de la campagne anglaise, dans le Sussex. En 1916, Vanessa Bell et Duncan Grant s’y installèrent. Membres du « groupe de Bloomsbury », ils figurent parmi les artistes les plus éminents et radicaux du XXe siècle. La maison était ouverte à tous et ils y invitaient souvent des intellectuels de leur connaissance tels que Virginia Woolf, E.M. Forster et Roger Fry. Au cours des 50 années qui ont suivi, ils ont transformé Charleston : au départ une ferme du XVIIe siècle, elle devint un chef d’œuvre de décoration intérieure, introduisant les codes modernistes et expérimentaux dans l’espace privé de la maison.
Le groupe de Bloomsbury était constitué d’artistes, écrivains et intellectuels parmi les plus iconoclastes du XXe siècle. Ils croyaient en la valeur du débat, en la créativité, la beauté, l’innovation et la vérité. La joie de vivre, la liberté et l’impertinence sont les piliers de leur œuvre. Annie a interprété leur inspiration et l’a concrétisée dans les couleurs et les produits qui sont le fruit de cette collaboration.
La collaboration d’Annie avec le domaine de Charleston a donné naissance à trois coloris Chalk Paint™ bien distincts, inspirés par l’extraordinaire demeure du groupe de Bloomsbury. Chaque couleur a été baptisée en honneur de lieux que les artistes ont connus, et tire son inspiration de la décoration des pièces de Charleston Farmhouse.
Cliquez sur les pièces ci-dessus pour découvrir la source d’inspiration de chaque colori d’Annie Sloan lors de sa collaboration avec le domaine de Charleston. La collaboration avec Charleston
la Keepsake Box, a été conçu pour offrir l’ensemble de la gamme de couleurs exclusives issues de la collaboration entre Annie Sloan et Charleston, accompagné des deux coloris neutres les plus vendus dans la palette Chalk Paint™ et d’un pot de cire Claire Wax. Cliquez sur le coffret ci-dessous pour en savoir plus. Kit de peinture – keepsake box
En plus des produits exclusifs conçus par Annie à l’occasion de cette collaboration, nous sommes ravis de vous proposer le guide ultime du domaine de Charleston. Charleston: A Bloomsbury House and Garden est le fruit de l’érudition de Quentin Bell et Virginia Nicholson. S’il ne vous est pas possible de visiter le domaine de Charleston, vous pouvez vous munir de ce livre exceptionnel et découvrir tranquillement chez vous l’ensemble de ses pièces richement décorées. Raconté par Quentin Bell (fils de Vanessa Bell), le riche passé du domaine de Charleston est dévoilé dans ce livre illustré avec les photos exclusives de Gavin Kingcome.
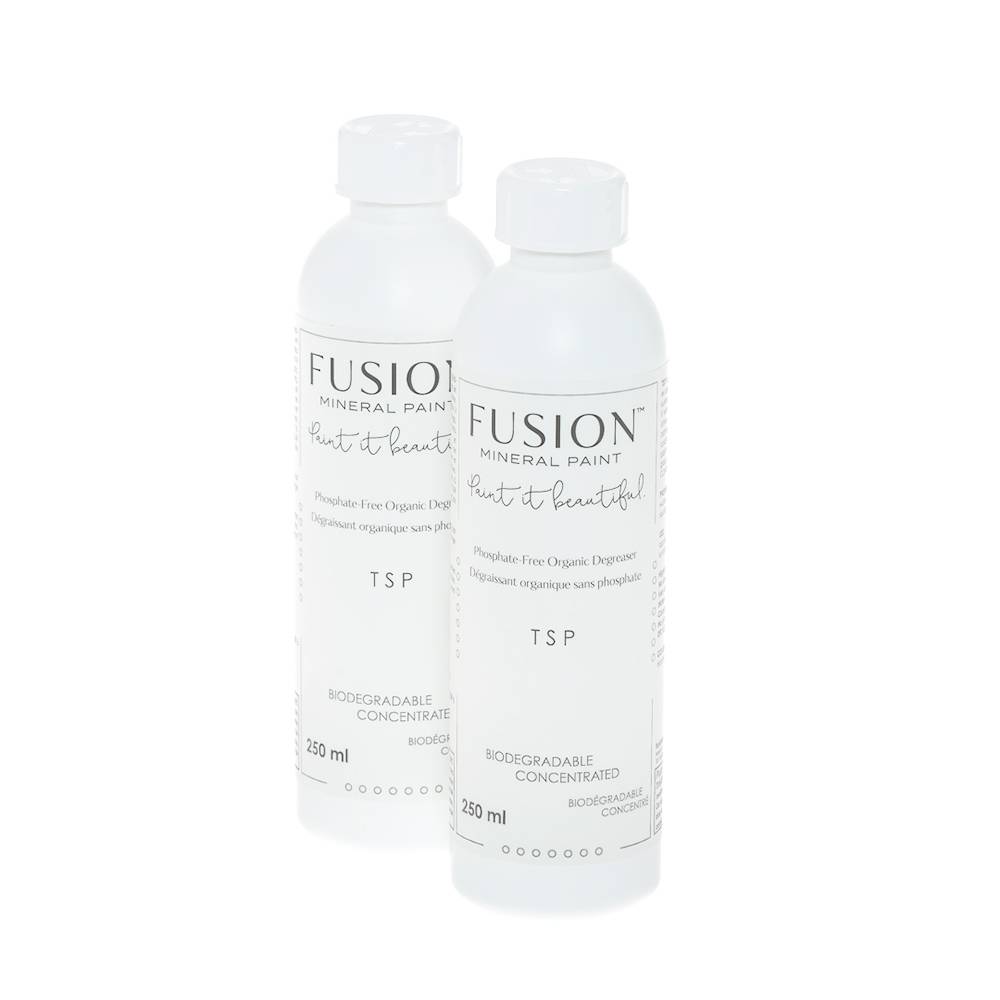
If you have bought Fusion Mineral from us, you will have inevitably received a leaflet from us showing the what if any prep you may need to do before painting. (If you didn’t get one or have mislaid it please drop me an email). On the leaflet you will have seen mention of something called Fusion TSP and wondered what it was.
Fusion™ TSP is a water-based biodegradable degreaser used to thoroughly clean a bare or painted surface prior to applying paint. Highly efficient, it removes oil, grease, fingerprints, stains and other contaminants, which will improve the adhesion and the look of subsequent coatings.
Safe to use on all surfaces (wood, paint, gypsum, melamine, plastics, metals and glass). Fusion™ TSP is environmentally friendly and contains no phosphates.
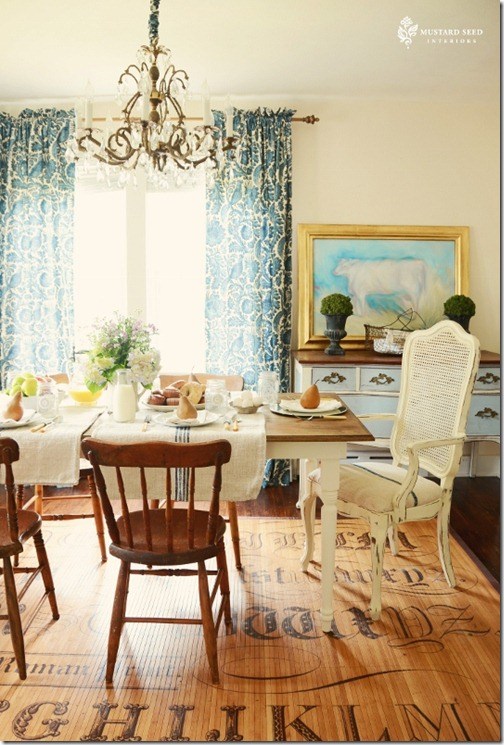
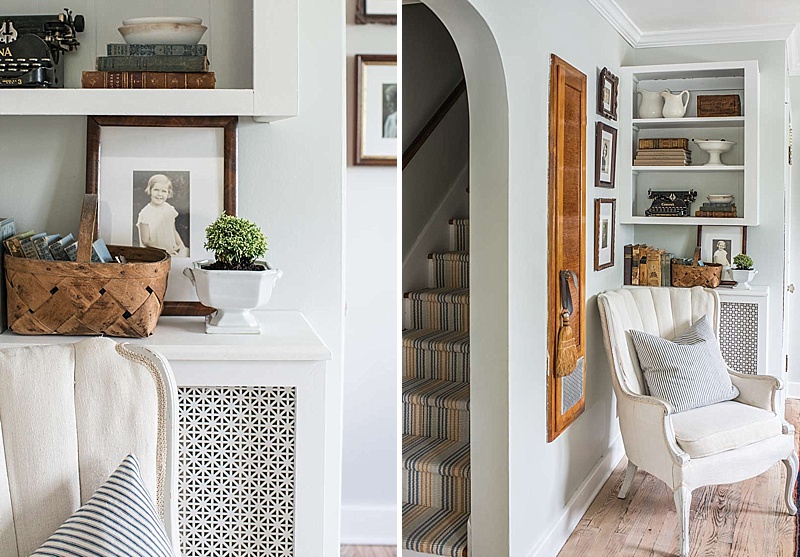
For those of you who follow Miss Mustard Seed’s blog, which incidentally I do, this book has tons of gorgeous photos that are not on her blog. Miss Mustard Seed has a wonderful taste in decorating and a keen eye for beautiful things. This book is written with her usual down-to-earth style and she manages to keeps it real about expectations. The book includes a number of tutorials which are wonderfully done and she takes us through the step-by-step process of how she transformed her own house into a lovely home. As always, her photography really captures the feel for her displays of items such as white ironstone, old books, and grain sack upholstery. There’s also inside tips for bargain hunting which Miss Mustard Seed shares with the reader. Her transformations include taking a worn out dresser to become a painted piece of art. I must admit that I found some of these absolutely stunning. It is also interesting to note that as you would expect the book contains projects and information about the Miss mustard Seed Milk Paint line but interestingly also contains more than a nod to Annie Sloan Chalk Paint™. Not only is this book a good read, it’s a great book to keep handy for inspiration for your own home.
“Inspired You – Letting God Breathe New Life into Your Heart and Home” is a book that I can’t recommend enough! I’ve read it numerous times now and I know I’ll keep picking it up and refer back to it many more times. It is full of beautiful photos, easy-to-follow tutorials and tons of inspiration. I think people will fall in love with this book as soon as they read what Marian has written in the first chapter about redefining what makes a beautiful home.
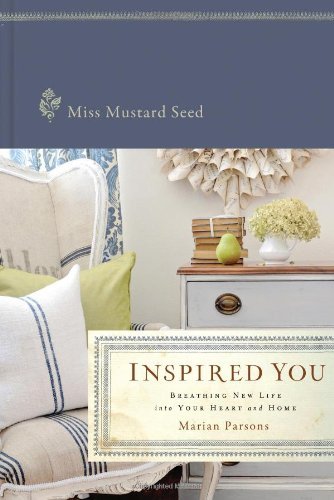
Inspired You by Marion Parsons
“It’s not about big budgets and magazine-quality perfection; it’s about making the best of what you have and finding contentment despite what you don’t. It’s not about keeping up with the hottest trends, style setters, or the neighbors; it’s about creating a space that feels inviting, is functional for your family, and shows off the style and interests of the people who live there.”
From the treasure hunt of finding run-down furniture and bringing it back to life again, to showing how to paint furniture, sew slip covers and more, Marian inspires all women to work with what they have and decorate on a budget, using the God-given gifts that we all have received.
Taking a peek through the book, you’ll see lots of beautiful rooms in Marian’s home. She’s a wonderful decorator and knows how to put thing together and she teaches us all how to do it as well.
Inspired You
Some girls get giddy over a new pair of shoes. Marian Parsons gets giddy over room makeovers. With a lot of ingenuity, a little bit of effort, and a tight budget, she has transformed her home into a beautiful space and filled her heart with a lot more contentment.
Marian will remind you that homes don’t have to be magazine material to be special, comfortable, and inviting. The goal you’re working toward is a home. Not a perfect home. Not an “impress the neighbours” home. Just a home—one whose walls and rooms tell the story of the family who lives there. Beautiful homes start with inspiration and a willingness to try. So uncover your God-given creativity. Be encouraged, be willing, and be inspired.
Welcome to part 2 of our book reviews. Very often people want to give the interior designer in their life a present or gift that is both practical and different. This book fulfills both of these qualities.
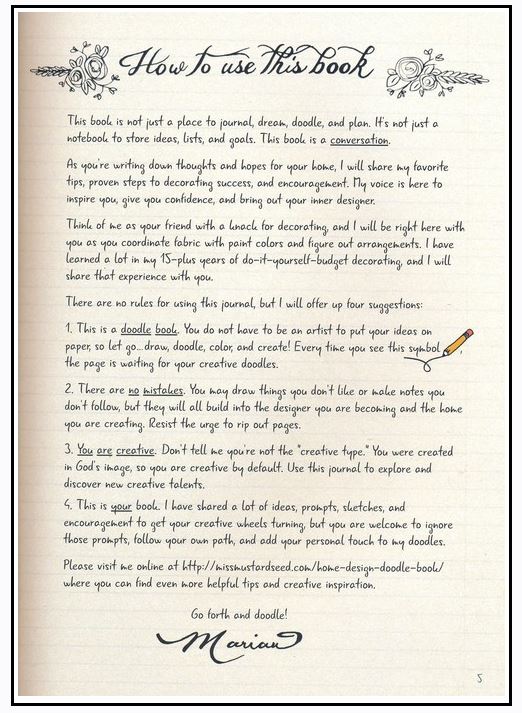
Officially entitled The home design doodle book – unleash your inner designer, this is a book by Marian Parsons who is probably better known as the author of the blog Miss Mustard Seed. Marion is also the owner of the very successful Miss Mustard Seed’s Milk Paint range. This book is designed to be a helpful guide on your home decorating journey. This book is designed to inspire creativity, help you determine your style and offers practical and tips offers you a place to store all of your wonderful ideas so that you can create the home you love.
This hard backed Home Design Doodle book is intended to give you a push in the right direction for putting design ideas on paper. It’s a hybrid sketch/decorating book with thick pages for gluing and painting some of your favorite ideas. Included are colour inspiration pictures, home decorating tips, doodle and journal prompts, and blank sketch pages. Express your creativity! You never know what might happen.
Must-have book for the home decorator, a space to jot, store, and plan each room and put your personal design ideas on paper.
Hardbound book with elastic band closure is interspersed with Bible verse quotes, plus tips on color selection, furniture painting, and spaces to plan the mood of every room. The Home Design Doodle Book
I guess you could refer to this book as a design source book which is combined with a sketch/decorating book that has pages for gluing and doodling some of your favorite ideas. At the back is slip envelope for swatches, colour cards, and clippings; prompt pages for jotting lists of paint and furnishings you’ve bought or are planning to purchase.
If you’re into recycling, fixing up houses or are simply planning dreams for your new home, here’s the essential place to stash and keep track of everything.
The Home Design Doodle Book by Marian Parsons is a doodle/ journal book, so it’s the kind of book that far better in paper format than Kindle format. I like the inside of the book, very pretty, and creative with a lot of beautiful pictures,would make a perfect gift idea.
Today I thought I would share with you a book that I treated myself to a little while ago. I don’t normally do reviews of books which we don’t stock in our own shop but if this is something you would like to see more of please feel free to leave a comment below.
This particular book is written by Jamie Lundstrom is the founder of the blog So Much Better With Age. For those of you that like to follow interior decor blogs this one really should be on your list. She has been featured on HGTV and the Today show in Canada, as well as in Country Living and Better Homes & Gardens. Jamie currently lives in Vancouver, Canada.
So what attracted me to this book. I had noticed that a number of people where commenting on how good it was and had shared pictures from it. So I just had to have a look. One of the great things about this book is that it is not centred solely around one type of paint. Quite the opposite and refreshingly so. The book shows up to 70 different projects all centred around a French vintage look. Hence the name of the book!
Each project has beautifully photographed images including many before and afters. As well as a how to there are photos showing it being done along with a list of ingredients that were used. And that is where for me it gets exciting. Not only does Jamie Lundstrom use Annie Sloan Chalk Paint™ which we all know and love but she also uses Fusion Mineral Paint ! Two paints which we at La Deuxième Chance are passionate about.
The strap line for this book should be “Add That Certain Je ne sais quoi to your home, effortlessly”
Rustic and elegant French décor never goes out of style? And with these easy, yet sophisticated accessories, for your home, these 70 projects will transform your space and add that special touch to any room.
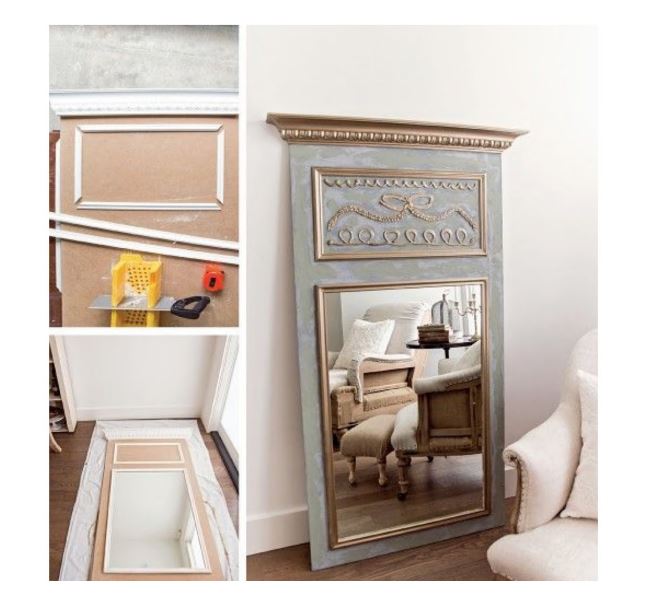
Jamie Lundstrom’s projects use easy-to-find and recycled objects, as well as new materials, to bring her French vintage style into your life. Projects span every season and category, from sewing to painting and upholstery, including provincial antique baskets, a fantastique Trumeau mirror, a jolie gold leaf frame, boutique plaster of Paris?dipped flowers and a chic antique chair. Featuring simple step-by-step instructions with beautiful photos to help guide you, these projects can be created in just a few hours or less.
French Vintage Decor by Jamie Lundstrom
Here’s a small excerpt
French Vintage Décor – Jamie Lundstrom
CHAPTER 1
Jolie ART & MIRRORS
Art is one of the beautiful things you think of when you think of France (or anywhere in Europe, for that matter). Mirrors and art adorned the walls of great castles and palaces. Today, museums are filled with these great masterpieces. You can spend days looking at walls and walls of magnificent works that just leave you in awe. Few people in the world will ever be able to have such pieces of artwork displayed in homes, and to be honest, I wouldn’t want the pressure.
From the time I got my first apartment, I was always excited to put art up on the walls. I thought they had to be professionally framed pieces that were a bit out of my budget, and they had to be created by someone who called themselves an artist. I finally had a few pieces that I deemed special enough to be called art, but after some time, I grew tired of them and I wanted to switch things up. But how could I just get rid of them when they were so expensive?
Now, I feel differently. I feel art is anything that can be created and hung on a wall. I think mirrors are a great example of art and are beautiful in every room of the house. Artwork I’ve found from thrift shops, my children’s art, silver platters or plates hung on a wall are all art.
I love that there are magnificent pieces of “real” art in the world today that we can visit and savor when we get the chance to, but I don’t want my home to feel or look like a museum, and I want to be able to change up my art when I want to without feeling the pressure to keep it hanging on the wall for a lifetime because we paid a small fortune for it.
In this chapter, I’ll show you how to do some techniques for making gorgeous mirrors and making “nothing” look like art. Art is whatever we make it to be.
ANTIQUED MIRROR
Trumeau Mirror
I love antiqued mirrors. They remind me of the great, ornate hanging mirrors that you see in chateaus or castles in France. An antiqued mirror in a room elevates it to a piece of art. Practice this technique on a small mirror before attempting a large one and make sure the mirror can be removed from the frame.
YIELD: 1
• Plastic sheets, garbage bags, drop cloths or newspaper
Note: Mirrors from China will not antique as a different technique is used to make them. If you purchase a mirror and the glass says “Made in China” on the back, you can go to a mirror shop to get a new custom mirror cut to fit the frame. New mirrors antique nicely.
In a well-ventilated area, spread out the plastic sheets. Lay the mirror reflective side down. Wearing the protective gloves, pour the paint stripper thickly over the back of the mirror. You’ll start to see the paint bubble up immediately. Wait for about 10 to 15 minutes.
Using a plastic putty knife, carefully scrape the paint off the mirror and onto the plastic sheets. You may need to repeat these steps to get all of the paint off. Wipe the excess off with paper towels. Hose off the mirror to remove all of the stripper.
To antique the mirror, you will be removing some of the reflective material. You have to work quickly, so gather everything you need before you begin. You can either dab the muriatic acid onto the mirror with a cotton cloth (for a dramatic look) or you can spray it on using a spray bottle (for a subtle look).
Wearing a mask and protective gloves, pour the muriatic acid into a small container. Take a cloth and dip it just a bit into in the muriatic acid. Dab onto the edges of the mirror. You don’t want the cloth to be soaked. I dabbed all over for a dramatic effect, but if you dab or spray just lightly along the edges, this will give you a more natural look.
Immediately wipe it off with another dry cotton cloth.
Check the other side of the mirror to see if that’s the look you want. You can repeat above if you didn’t take enough off.
Spray with Simple Green cleaner to ensure all acid is removed and hose off the mirror again to ensure a full clean. Dry, being careful not to scrape the mirror.
If you took off too much of the reflective backing, you can spray on some mirror spray over the spots where too much came off.
Spray paint the back of the mirror with the gold spray paint and let dry for about 1 hour. Then spray paint the back of the mirror with the black spray paint and let dry fully for at least 1 hour. Once completely dry, you can put the mirror back in its frame.
AGED MIRROR FROM GLASS
Add that je ne sais quoi to any room by adding an aged mirror to your wall. You don’t have to live in a French villa or find antique mirrors to add a French feel to your home. If you are not sure about antiquing a mirror by stripping off the back of it, then you might like spray painting a piece of glass! Try this shortcut to making a simple antiqued mirror.
YIELD: 1
• Frame with glass
In a ventilated area, remove the glass from the frame and lay it down on a dropcloth. Spray one entire side of glass with 2 to 4 coats of the mirror spray paint, drying approximately 1 hour in between coats. Spraying more coats of the mirror spray paint will give you more of a reflective look. I wanted a more “foggy” look, so I sprayed it with just two coats.
Once dry, lightly spray some black spray paint over the back in a “splattered” pattern. Do not fully spray paint the back with black; you just want a few splatter marks. Check the other side of the mirror to see if you like the look. You can add more layers of the mirror spray paint or add more black if you like.
Wait to fully dry at least 1 hour and put the mirror back in the frame. See Rusted Frames (here) and Add Ribbon to Frames or Mirrors (here) to complete this project.
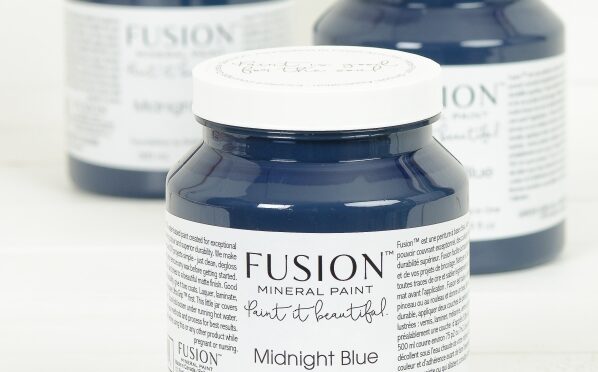
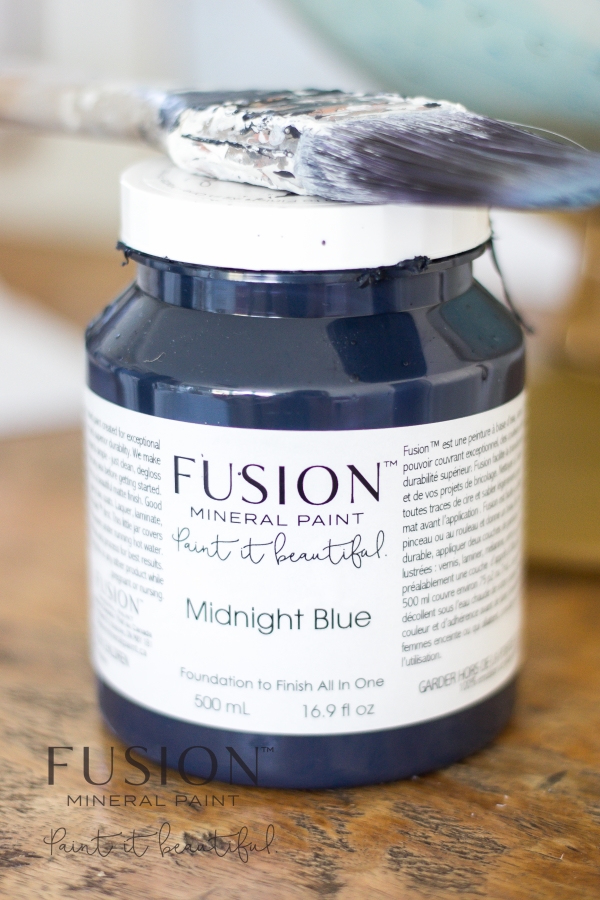
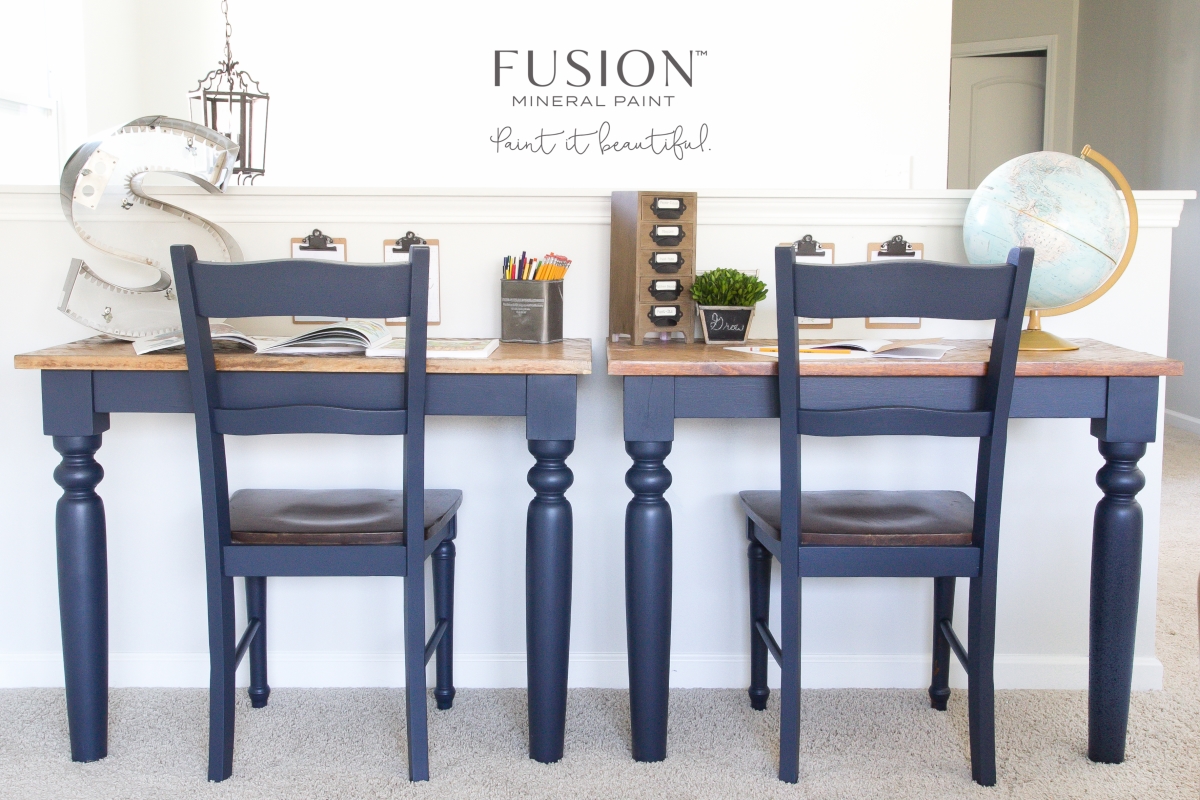
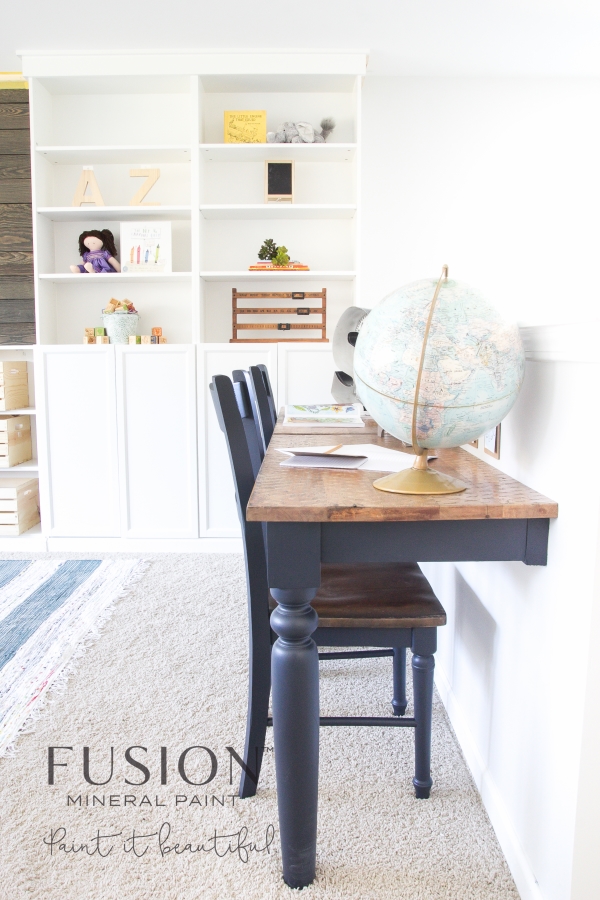
Say hello to Fusion Midnight Blue. Fusion Mineral paint have done it again. They have produced a beautifully rich dark blue verging on the edge of black. We think it is bound to make a statement and enrich any piece!
Available in either 500ml pots or 37ml tester pots.Available in store or via our website. Fusion Mineral Paint Midnight Blue
Check out this lovely desk painted using Fusion Midnight Blue.
Annie Sloan vous montre comment peindre avec Chalk Paint™ en Lem Lem, sa spéciale, une couleur en édition limitée en collaboration avec Oxfam. Chaque pot de Lem Lem vendu permettra de récolter des fonds essentiels pour Oxfam, une association aidant les gens à vaincre la pauvreté dans le monde entier.(SVP notez que cette coleur est maintenant abandonnée mais il y a encore beaucoup d’autres couleurs à choisir.)
Choisissez votre meuble a peindre, Annie a choisi une table d’appoint en pin. Comme toujours, il n’y a pas besoin de poncer ou de préparer la surface!
À l’aide d’un pinceau pour la Chalk Paint™, peignez avec Lem Lem sur le bois – peignez dans toutes les sens. Laissez sécher.
Appliquez une seconde une couche de Chalk Paint™, si nécessaire. Laissez sécher.
Utilisez une brosse à cire Chalk Paint™ ou un chiffon non pelucheux pour appliquer la cire Claire Chalk Paint™ partout sur la pièce que vous peignez. Assurez-vous de couvrir toute la surface peinte, pénétrer dans les coins et recoins. Enlevez tout excès de cire avec un chiffon non pelucheux.
Traitez votre pièce finie avec un soin supplémentaire pendant que la cire durcit et se solidifie- cela peut prendre entre 5 et 21 jours.
Commander Chalk Paint par Annie Sloan ici
La Deuxième Chance
7 rue de la Croix Cholette
79120
Bois de Messé
France
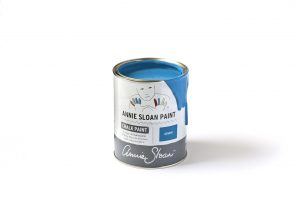
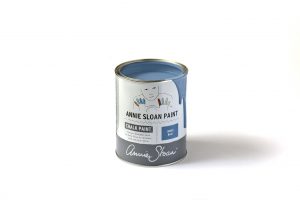
Annie Sloan Chalk Paint™
Pour commander Annie Sloan Chalk Paint ™, veuillez cliquer sur la couleur que vous souhaitez commander. Cela vous mènera à notre site principal. La peinture est disponible en 2 tailles. Une boîte de 1 litre coûte 34€ et les pots de testeurs 9.00€.
N’oubliez pas de commander votre cire!
Bonne peinture! Amsterdam Green Antibes Green Antoinette Arles Aubusson Blue Burgundy Chateau Grey Coco Country Grey Cream Duck Egg Blue Emile English Yellow Florence French Linen Giverny Graphite Greek Blue Honfleur Louis Blue Napoleonic Old Ochre Old Violet Old White Olive Original Paloma Paris Grey Primer Red Provence Pure Scandinavian Pink Versailles