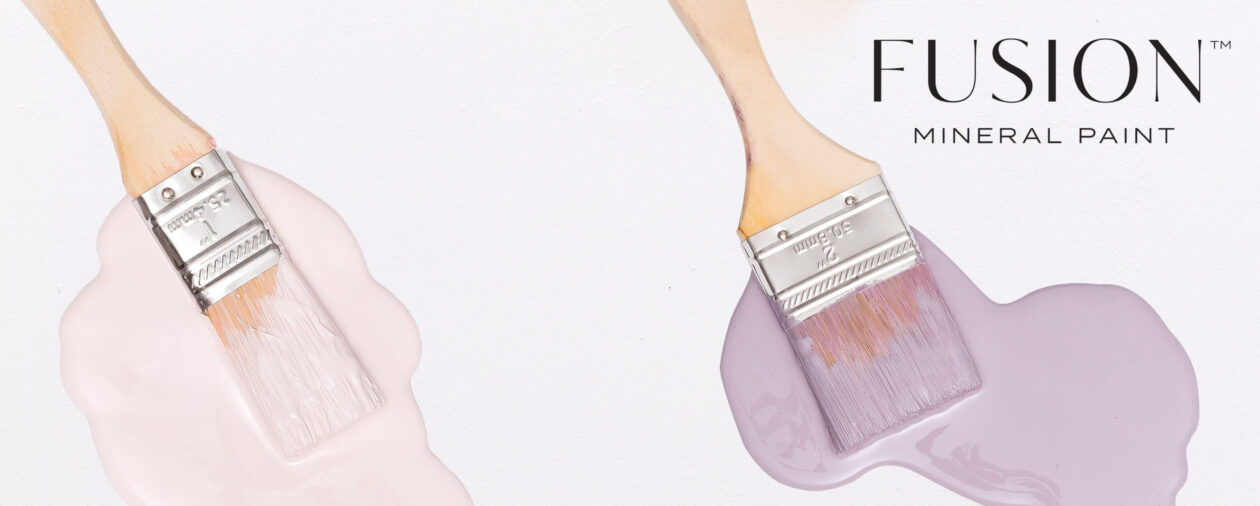
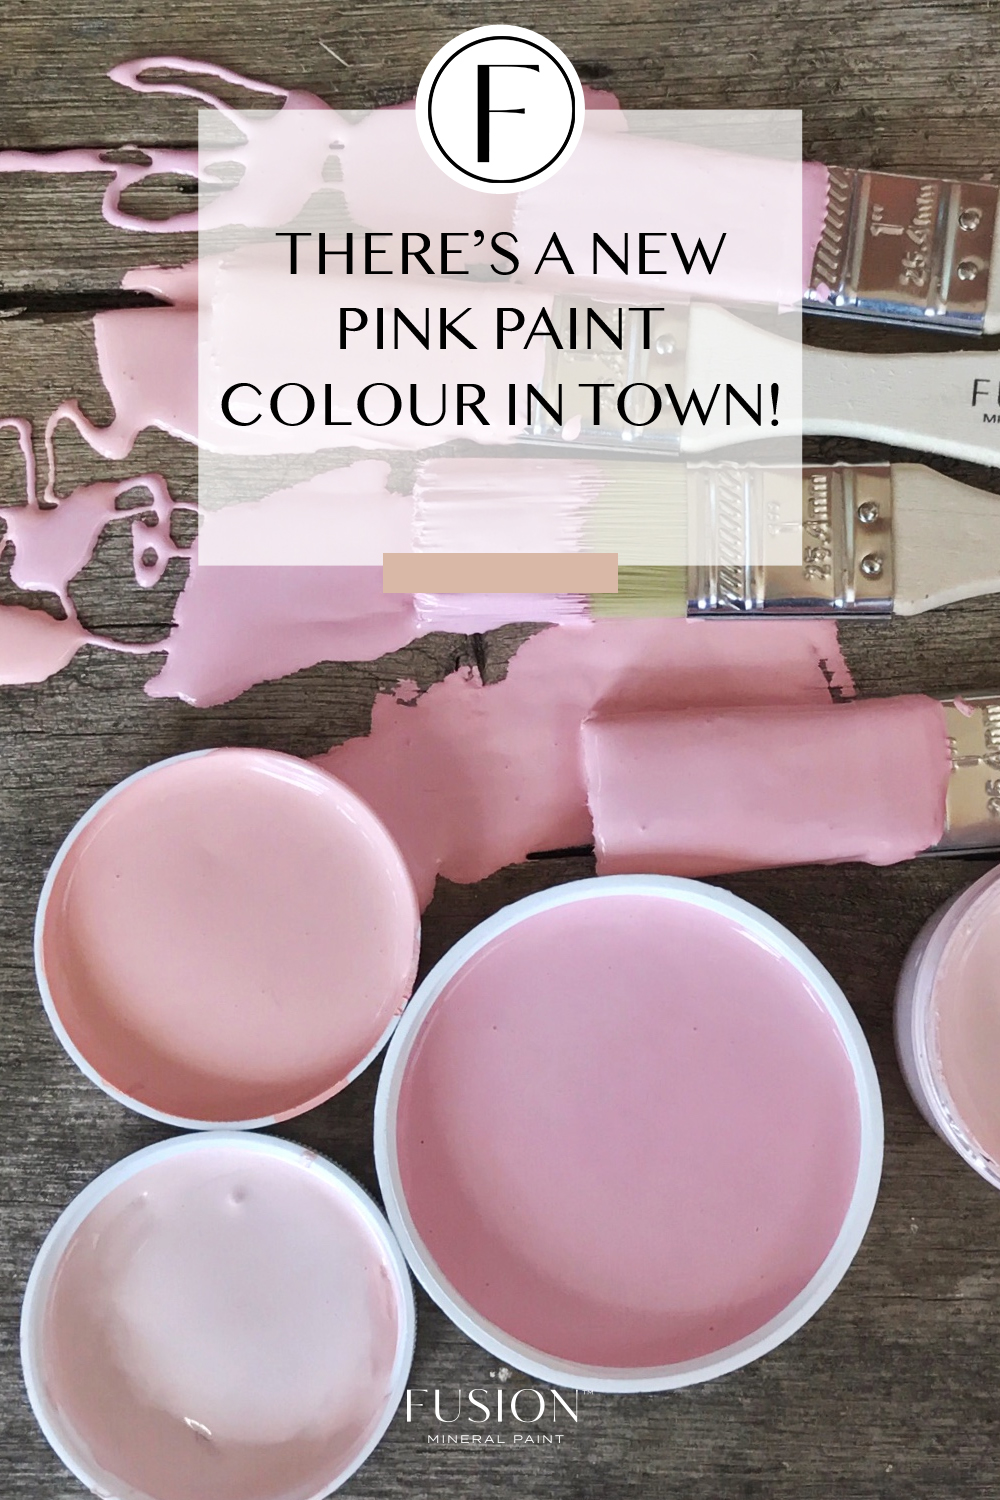
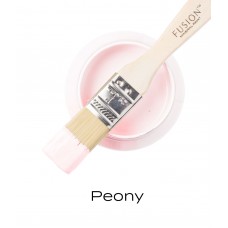
Say hello to Fusion Peony. A subtle and soft pink.
Say hello to Fusion Peony
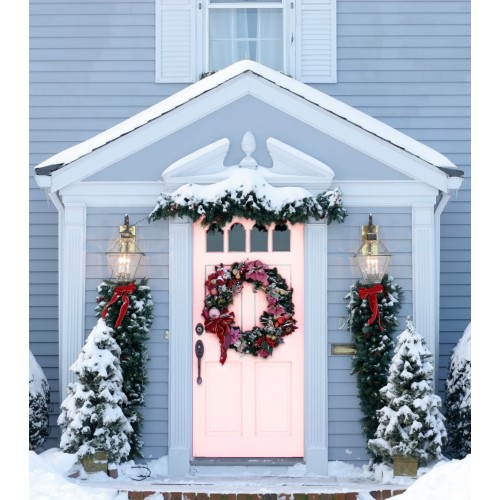
This delicate pink is a soft blush, yet can so easily be the centre of attention. Front door painted in Fusion Peony
Fusion Peony is now the replacement for Fusion English Rose which has sadly been retired.It is a lighter pink than English Rose but just as pretty.
Try it with Fusion Casement for a soft and pretty contrast, or with
Fusion Sterling for a sophisticated look. Fusion Peony
Available to order via our website or in our store.
Peindre les sols et les parquets est rapide et facile avec Chalk Paint™ d’Annie Sloan! Chalk Paint™ est une peinture pour meuble polyvalente pouvant être utilisée sur pratiquement toutes les surfaces. La solution parfaite pour donner un coup de jeune à vos sols ! Dans cette vidéo, Annie vous explique comment bien commencer, vous donne des astuces pour corriger vos erreurs et des conseils pour garantir que vos nouveaux sols resteront magnifiques pendant des années.
• Tout d’abord, vous devez tester la peinture Chalk Paint™ et laOld White) sur plusieurs petites zones. Annie vous conseille de tester différentes zones du sol pour avoir une meilleure idée de sa condition : en effet, certaines parties peuvent avoir été tachées ou inondées.
• Une fois la peinture sèche, appliquez une couche de laque Chalk Paint™ Lacquer sur chaque zone peinte. Cette étape est la plus importante. Comme précisé dans la vidéo, la peinture Chalk Paint™ recouvre les taches, et c’est seulement une fois la laque appliquée que les taches et salissures deviendront apparentes. Les produits chimiques trouvés dans la laque garantissent que vos sols auront une finition durable et résistante, mais ont le désavantage de faire ressortir les taches et souillures à la surface de la Graphite, Aubusson Blue, Athenian Black, Amsterdam Green ou Oxford Navy. Ici, Annie utilise Chalk Paint™ dans la couleur Athenian Black. Une tache apparente avec Old White ne l’est pas avec une peinture noire. C’est une solution simple et facile, mais nous vous conseillons néanmoins de tester votre sol avec une couleur foncée pour être sûr qu’aucune tache n’est visible.
2. Si vous tenez à utiliser une couleur Chalk Paint™ claire, vous pouvez essayer d’appliquer une sous-couche à votre sol. Les apprêts de sous-couche sont généralement transparents ou opaques et disponibles dans les magasins de bricolage. Annie préfère utiliser des sous-couches transparentes. Appliquez cet apprêt sur vos sols, puis suivez l’étape suivante.Vous pouvez également utiliser la peinture Zinsser Bin pour sceller les taches.
• Comment procéder une fois tous vos tests réalisés ? Vérifiez que vos sols sont propres ! Utilisez de l’eau tiède savonneuse et une éponge. N’utilisez pas de produits d’entretien composés de produits chimiques agressifs tels que l’eau de Javel car ils pourraient réagir avec la peinture Chalk Paint™ et la laque.
• Application ! Pour appliquer votre peinture Chalk Paint™ et votre laque, vous pouvez utiliser un pinceau ou un rouleau éponge. Beaucoup de gens préfèrent utiliser un rouleau éponge.
• ASTUCE : utilisez un rouleau éponge ou un pinceau muni d’une poignée télescopique (ou attachez-le à un long bâton) afin de maintenir une bonne posture et de préserver votre dos durant l’application.
• À l’aide d’un pinceau, commencez par peindre les bords et les coins de la pièce sur une largeur de quelques centimètres. Ensuite, peignez le reste de votre sol. Selon la couleur sélectionnée, il faudra peut-être appliquer deux couches. Peignez la seconde couche en suivant la même technique que pour la première couche.
• ASTUCE : Commencez par le côté le plus éloigné et revenez vers la porte : vous ne voulez pas vous retrouver coincé dans un coin !
• Une fois la peinture Chalk Paint™ entièrement sèche, appliquez la laque Chalk Paint™ Lacquer. Mélangez bien la laque avant de commencer. Suivez la même technique que pour l’application de Chalk Paint™, c’est-à-dire utilisez un pinceau pour les bords et un rouleau éponge (ou pinceau si vous préférez) pour le centre de la pièce. La laque sèche plus rapidement que la peinture Chalk Paint™. Essayez de travailler plus rapidement et faites attention aux coups de pinceau répétés. Faites également attention à ne pas passer sur des zones semi-sèches car cela pourrait nuire à la finition.
• La laque Chalk Paint™ Lacquer est disponible en deux choix de finitions : mate et brillante. À cause des agents composants les vernis/laques à la finition mate, les vernis/laques brillants sont toujours plus résistants. Les deux finitions sont possibles, mais prenez cela en compte si votre sol est dans une zone très passagère. Les agents composants les laques à la finition mate peuvent également parfois troubler la finition des couleurs foncées. Par conséquent, si vous appliquez une laque à la finition mate sur une couleur sombre, nous vous conseillons d’appliquer d’abord une couche de finition brillante.
• Nous vous conseillons d’appliquer deux ou trois couches de laque Chalk Paint™ Lacquer pour garantir une bonne couverture, une résistance à l’épreuve du temps et au final votre tranquillité d’esprit ! Si vous voulez appliquer plus de trois couches, allez-y ! Il n’y a pas de limite. Laissez sécher entièrement la laque avant d’en appliquer une autre couche. Une fois sèche, la laque durcira sur une période de 14 jours. Vous pouvez utiliser votre sol durant cette période mais faites attention et faites preuve de délicatesse.
It has been a while since my last post on here. Some how life took over despite being locked down for several months. So what is new? We have a new range to offer you in our shop, which you can also order on line. Décor Transfers from Redesign with Prima. Take a peek at the designs here.
These are a very simple and easy way to add a real WOW! factor to a piece of furniture. Actually you are not just limited to furniture,they can be used on walls, doors, small projects alike.
First lets have a look at how to use Décor Transfers. Just three easy steps.
Step 1
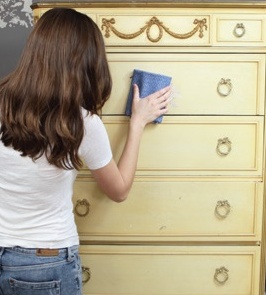
To begin make sure the area you are applying the transfer to is clean and free of any debris. For best results make sure the surface is primed and has an even surface.Take a dry cloth and clean off / dust off the area.
Step 2
Position the transfer where you like to apply it, using masking tape to secure and help keep the transfer in place. Remove the ptrotective sheet and place it on to the surface. Use a transfer tool or the supplied applicator to rub the design on to the surface. Note: Depending on the transfer design and complexity, you may have to rub the transfer with moderate force.Be sure to rub evenly all over the design to ease the release of the transfer. step 2 apply transfer
Step 3
Once done gently remove the acetate protector sheet to reveal the transferred design. If any pieces did not transfer, position the sheet back onto the surface and rub again. To extend the life of your tansfer you may want to a water based sealer or a clear wax sealant. step 3 finished item
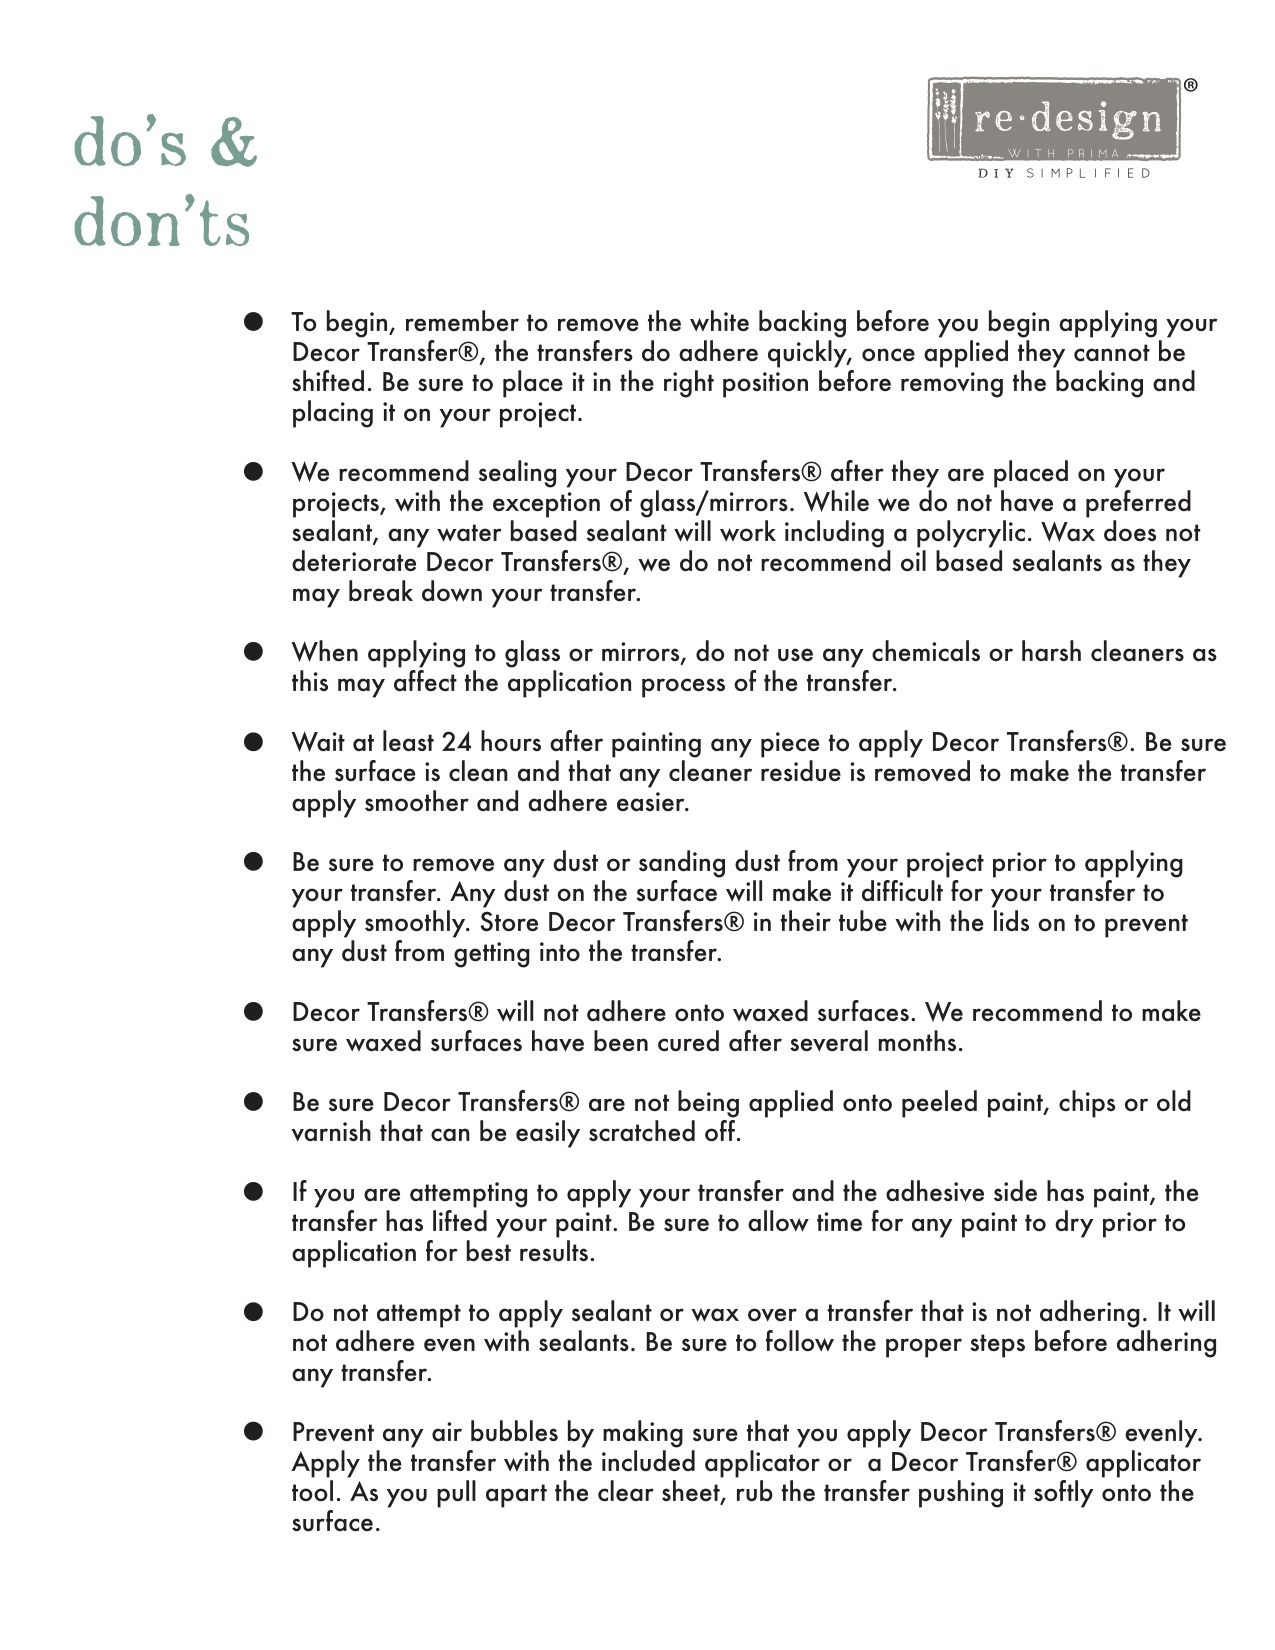
Below you will find some do’s and don’ts which should prove useful. Above all have fun transforming your furniture and home. Applying decor transfers do’s and don’ts
(Sous-titres sont disponibles. Sélectionnez les paramètres, puis votre langue.)
Dans ce court tutoriel, Annie vous montre comment peindre rapidement et facilement un radiateur avec . Annie a ici opté pour la couleur Chicago Grey. Comme toujours, veillez à bien mélanger votre peinture avant chaque utilisation.
5. Appliquez la peinture pinceaux Chalk Paint™ ont été spécialement conçus pour la peinture Chalk Paint™, mais n’importe quel autre pinceau fera l’affaire.
6. Le métal étant un matériau non-poreux, la peinture n’est pas absorbée. Par conséquent, la première couche peut être irrégulière et prendra plus de temps à sécher. Pas de panique, c’est normal ! Veillez simplement à respecter les temps de séchage entre chaque couche. Dans certains cas, une troisième couche de Chalk Paint™ pourra être nécessaire pour obtenir un résultat lisse et uniforme.
7. Une fois le radiateur peint et sec, vous pouvez, si vous le souhaitez, ajouter une couche de cire ou de laque Chalk Paint™. Lorsque vous allumerez votre radiateur, la chaleur émise permettra à la peinture Chalk Paint™ de se fixer. L’utilisation de la cire ou de la laque Chalk Paint™ est facultative, cependant cette option a ses avantages : durabilité accrue et facilité de nettoyage (ce qui est un vrai plus si le radiateur se trouve dans une zone industrielle). Annie n’utilise en général aucune laque ou cire pour ses radiateurs.
8. *ASTUCE* Pour éviter que la peinture Chalk Paint™ ne craquelle, attendez au moins 24 heures avant d’allumer le radiateur. La chaleur peut faire craqueler la peinture lorsqu’elle sèche (ce qu’Annie utilise parfois à son avantage selon les résultats souhaités !
9. *ASTUCE* Si vous avez décidé d’appliquer une couche de cire Chalk Paint™, assurez-vous que le produit est bien sec (patientez plusieurs jours) avant de rallumer le radiateur.
We don’t normally shout about new products before we launch them but this one has me excited. Fusion Pouring Resin and Fusion Cell Enhancer are coming in 2020. If you wish to pre-order them you can do so from our website.
So what’s all the fuss about?? Here’s a taster…
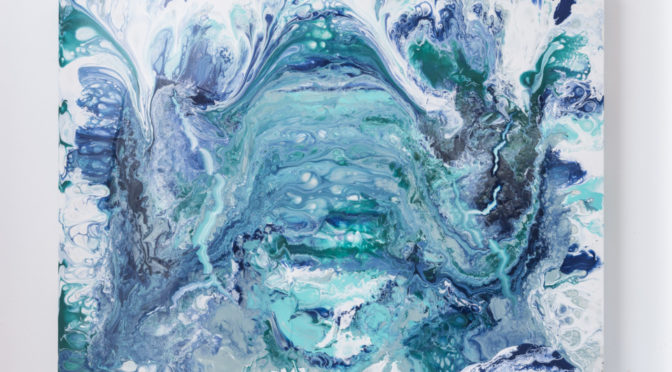
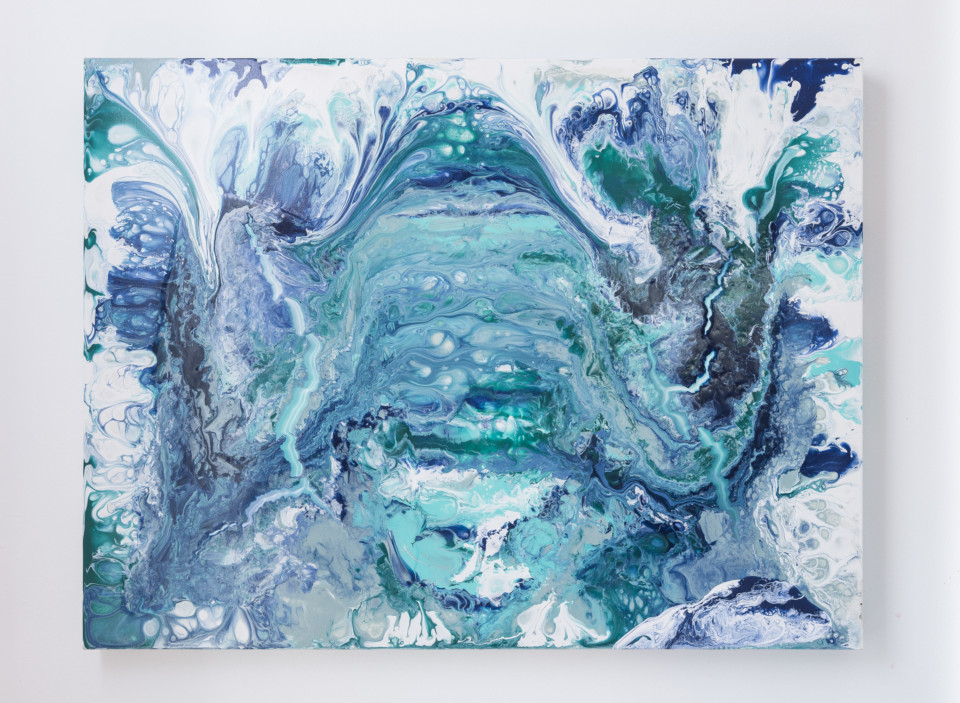
Get the Look!! Fusion Pouring Resin
Feeling creative? Looking to create a unique beautiful piece of art to showcase in your home? Together with Fusion’s NEW Cell Enhancer and Pouring Resin is an acrylic pouring medium for creating beautiful art on canvas or wood, that dries with a high gloss finish. Pouring Resin mixes seamlessly with Fusion Mineral Paint to create beautiful and unique acrylic pour artwork. It can be used on canvas, furniture or any surface that Fusion sticks to. This achieves a durable, glossy finish, and can even be used on its own as a finish over top of Fusion Mineral Paint.You can even paint on top of for a multi-dimensional look.
*Durable glossy finish
*Easy to Use
*No topcoat needed
*Non-toxic
*No VOCs
You do not need to add Floetrol type additives to this product. Easy to Create effect using pouring resin and cell enhancer
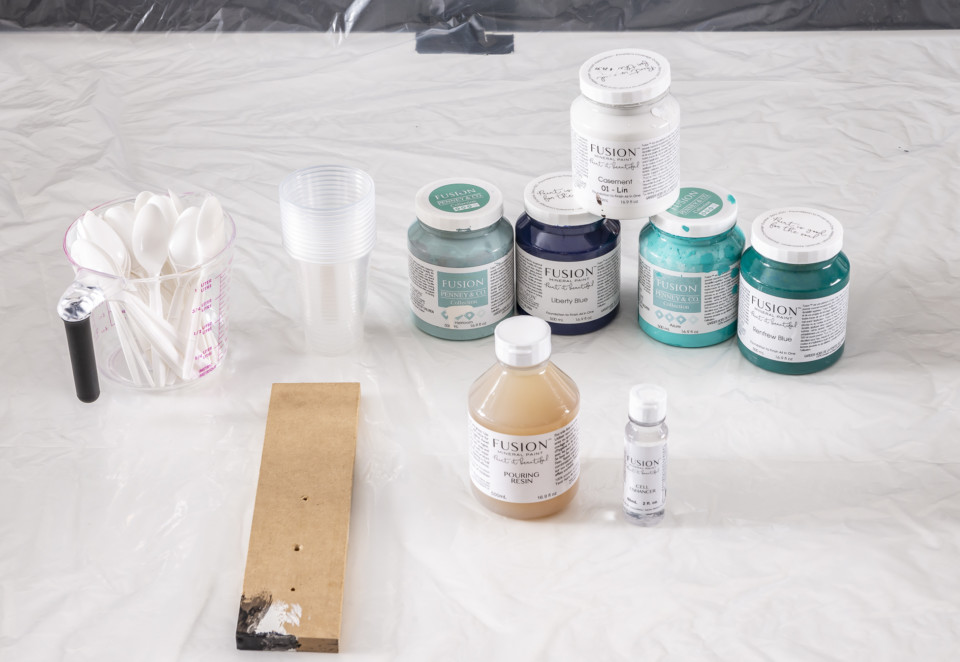
What you will need:
Paints: Casement, Heirloom, Azure, Liberty Blue, Renfrew Blue
Pouring Resin
Cell Enhancer
Canvas
Plastic cups
Plastic spoons
Stick to spread
Plastic to cover the area you’ll be working on( it can get messy!) items needed.
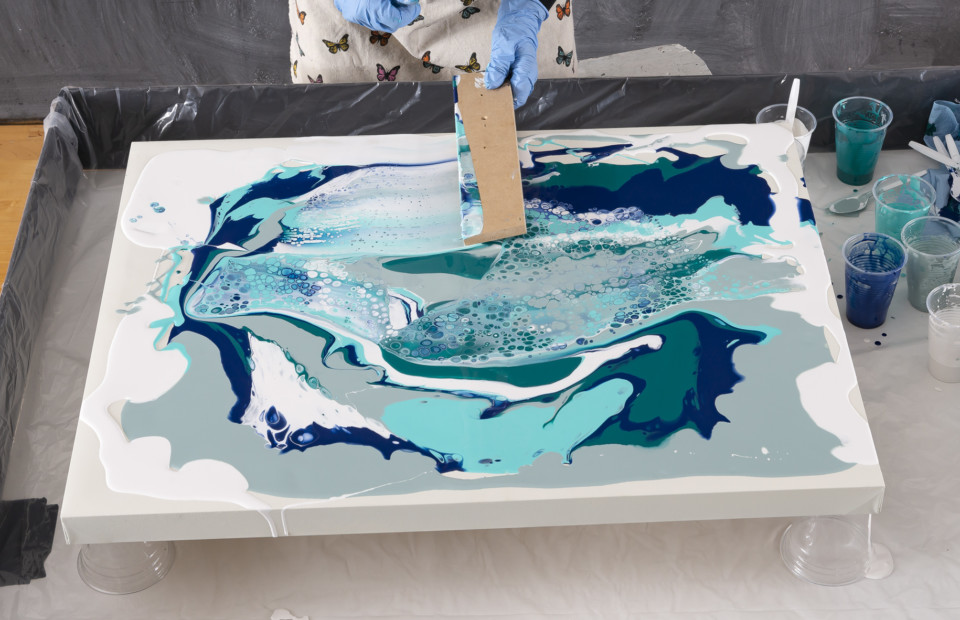
How To Use Pouring Resin
STEP 1
PREP YOU AREA AND SUPPLIES
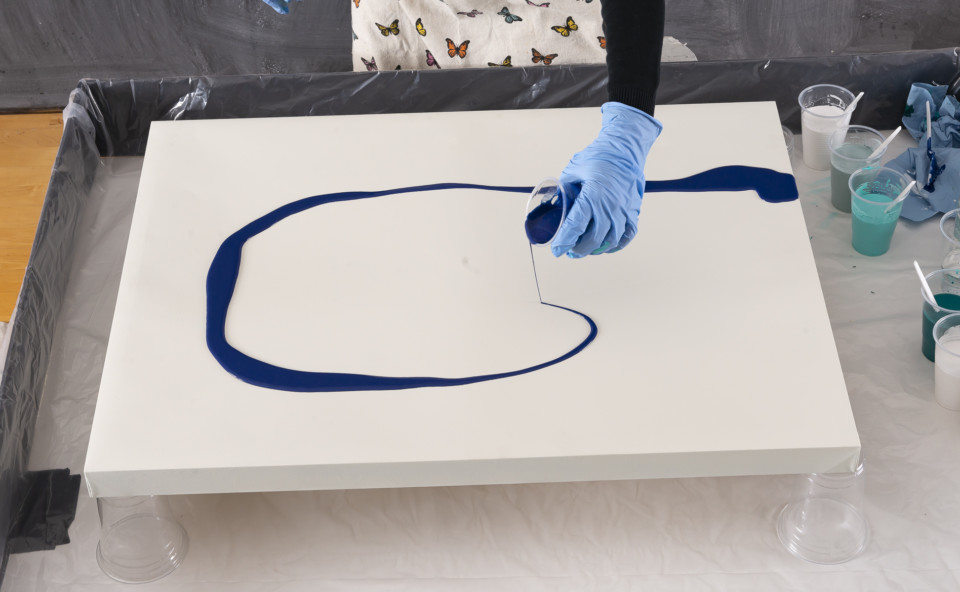
Generally, pouring can get a little messy, so putting down a plastic drop sheet is recommended! A great tip: raise your canvas using plastic cups so the paint has something to drop off of.
STEP 2
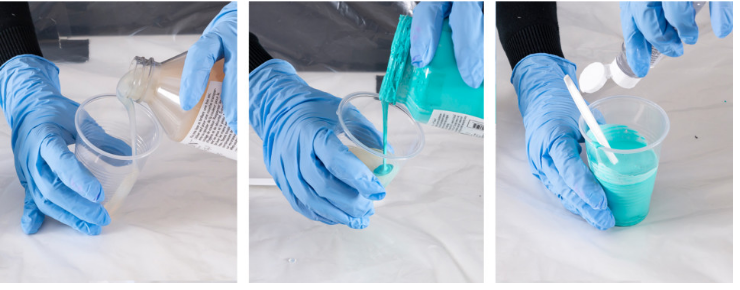
MIX POURING RESIN AND FUSION MINERAL PAINT
First, pour some pouring resin into a cup.
Then, add a couple of drops of Fusion Mineral Paint. Think of it as tinting the resin. You don’t want to use more than 10% paint to resin, so as not to slow down the flow of the resin.
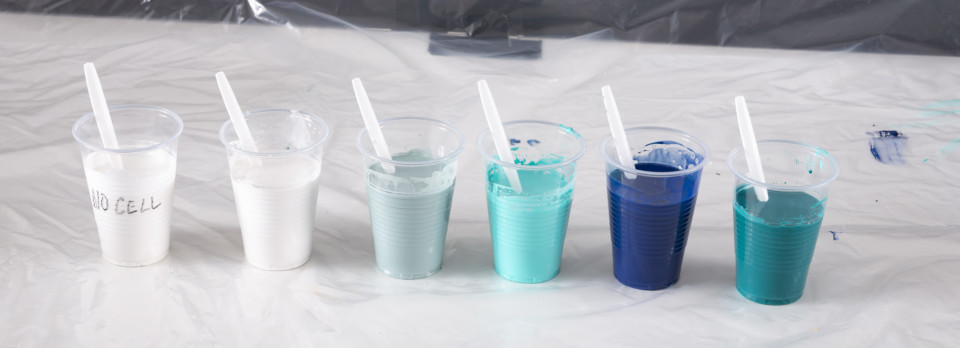
We’ve chosen to add Cell Enhancer to each paint cup for increased separation. Create a second cup of Casement without Cell Enhancer and mark it. This Casement will be used at the end to fill out the background edges. 3 easy steps
Choose as many colours as you wish, contrasting and pops of colour are always recommended!
STEP 3
START POURING
Pour each individual colour in a swirly pattern one at a time onto your canvas.
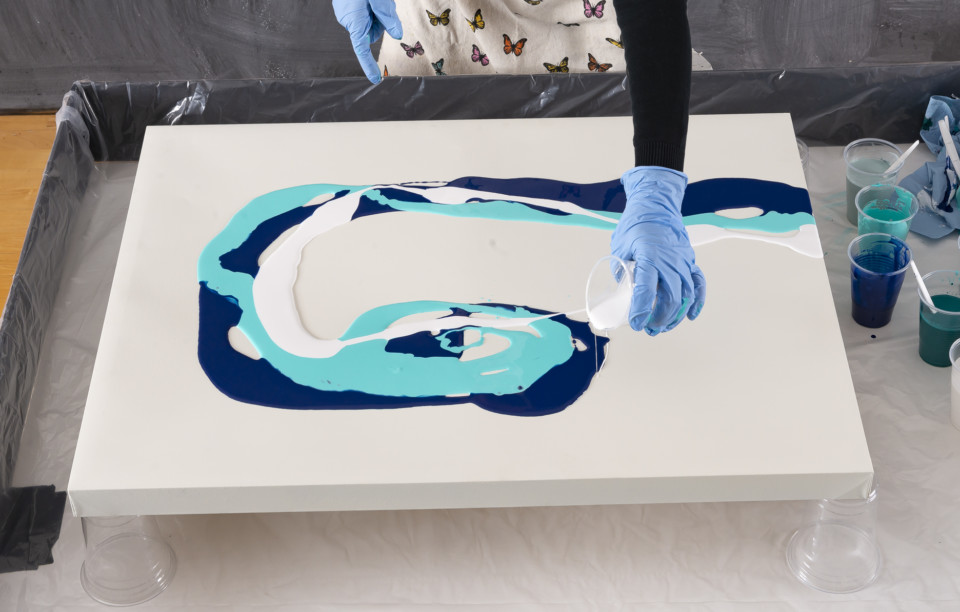
Continue pouring, overlapping some of the colours.
When all of the individual colours have been poured, pour the Casement marked without the Cell Enhancer on the edges of the canvas to cover any missed surface.
STEP 4
SPREAD THE CELL ENHANCER
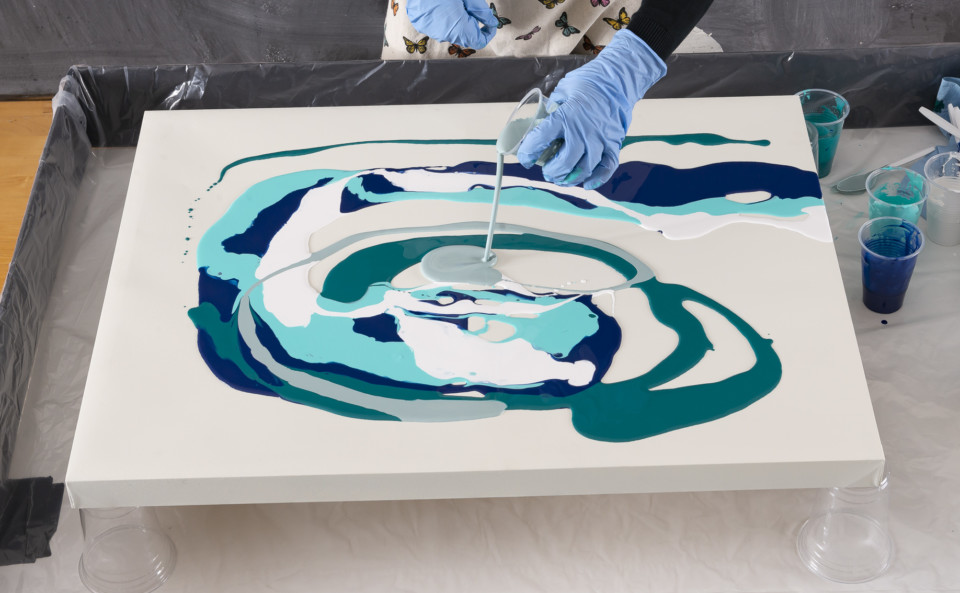
Once all the product has been poured, take a stick and slide over the paint left to right and then top to bottom. In this case you can see the Cell Enhancer taking effect in the circular formations.
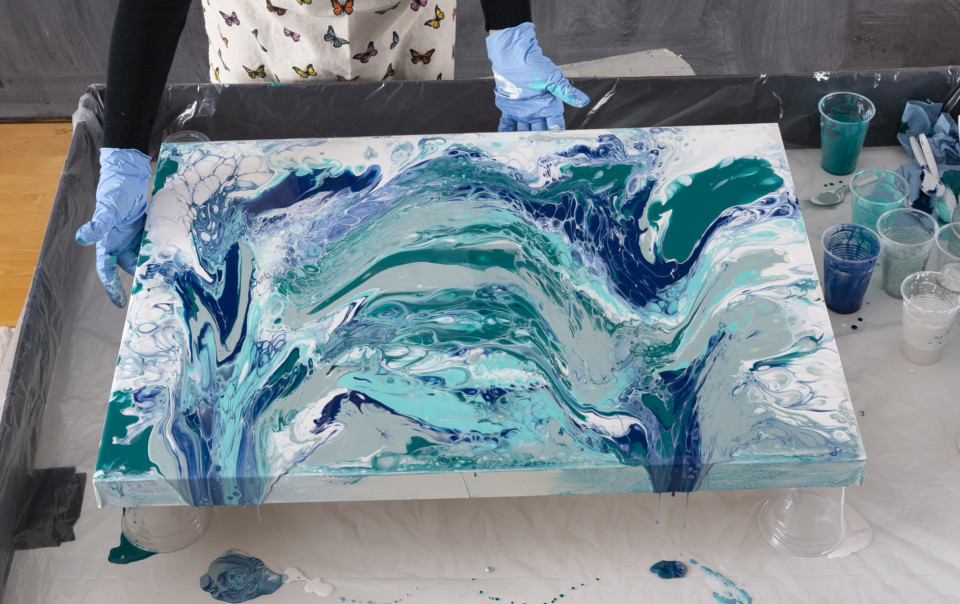
STEP 5
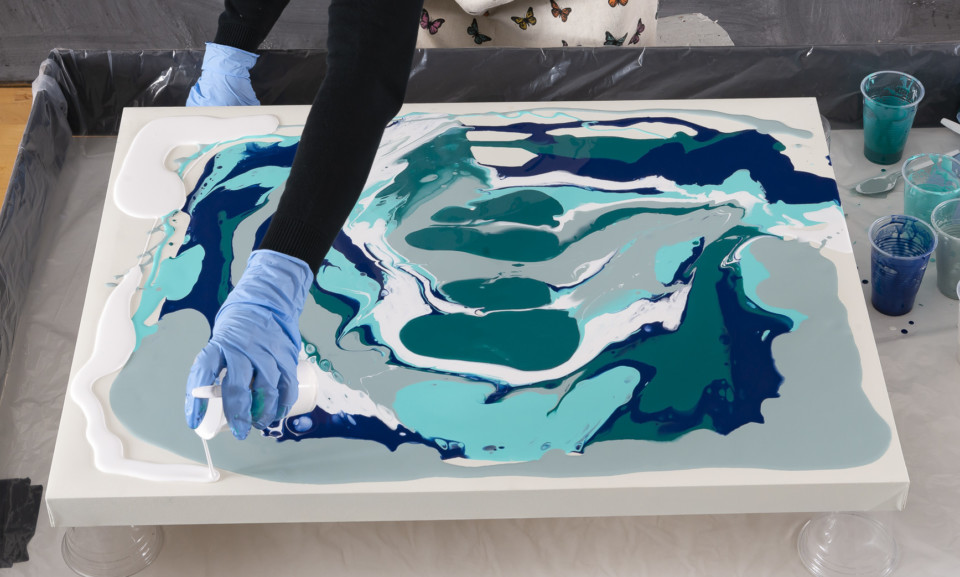
IT’S TIME TO TILT AND GET MESSY!
Now you want to tilt the canvas to bring the paint off the edges and create any patterns you desire. Continue by tilting and pouring out any extra paint on your canvas.
STEP 6
DRY & DISPLAY
Let your piece dry for 12-24 hours and then it’s ready to be displayed!
In the areas where there’s cell enhancer, you may see a shiny area. That will remain shiny unless you take a cotton swab with rubbing alcohol to remove the excess cell enhancer.
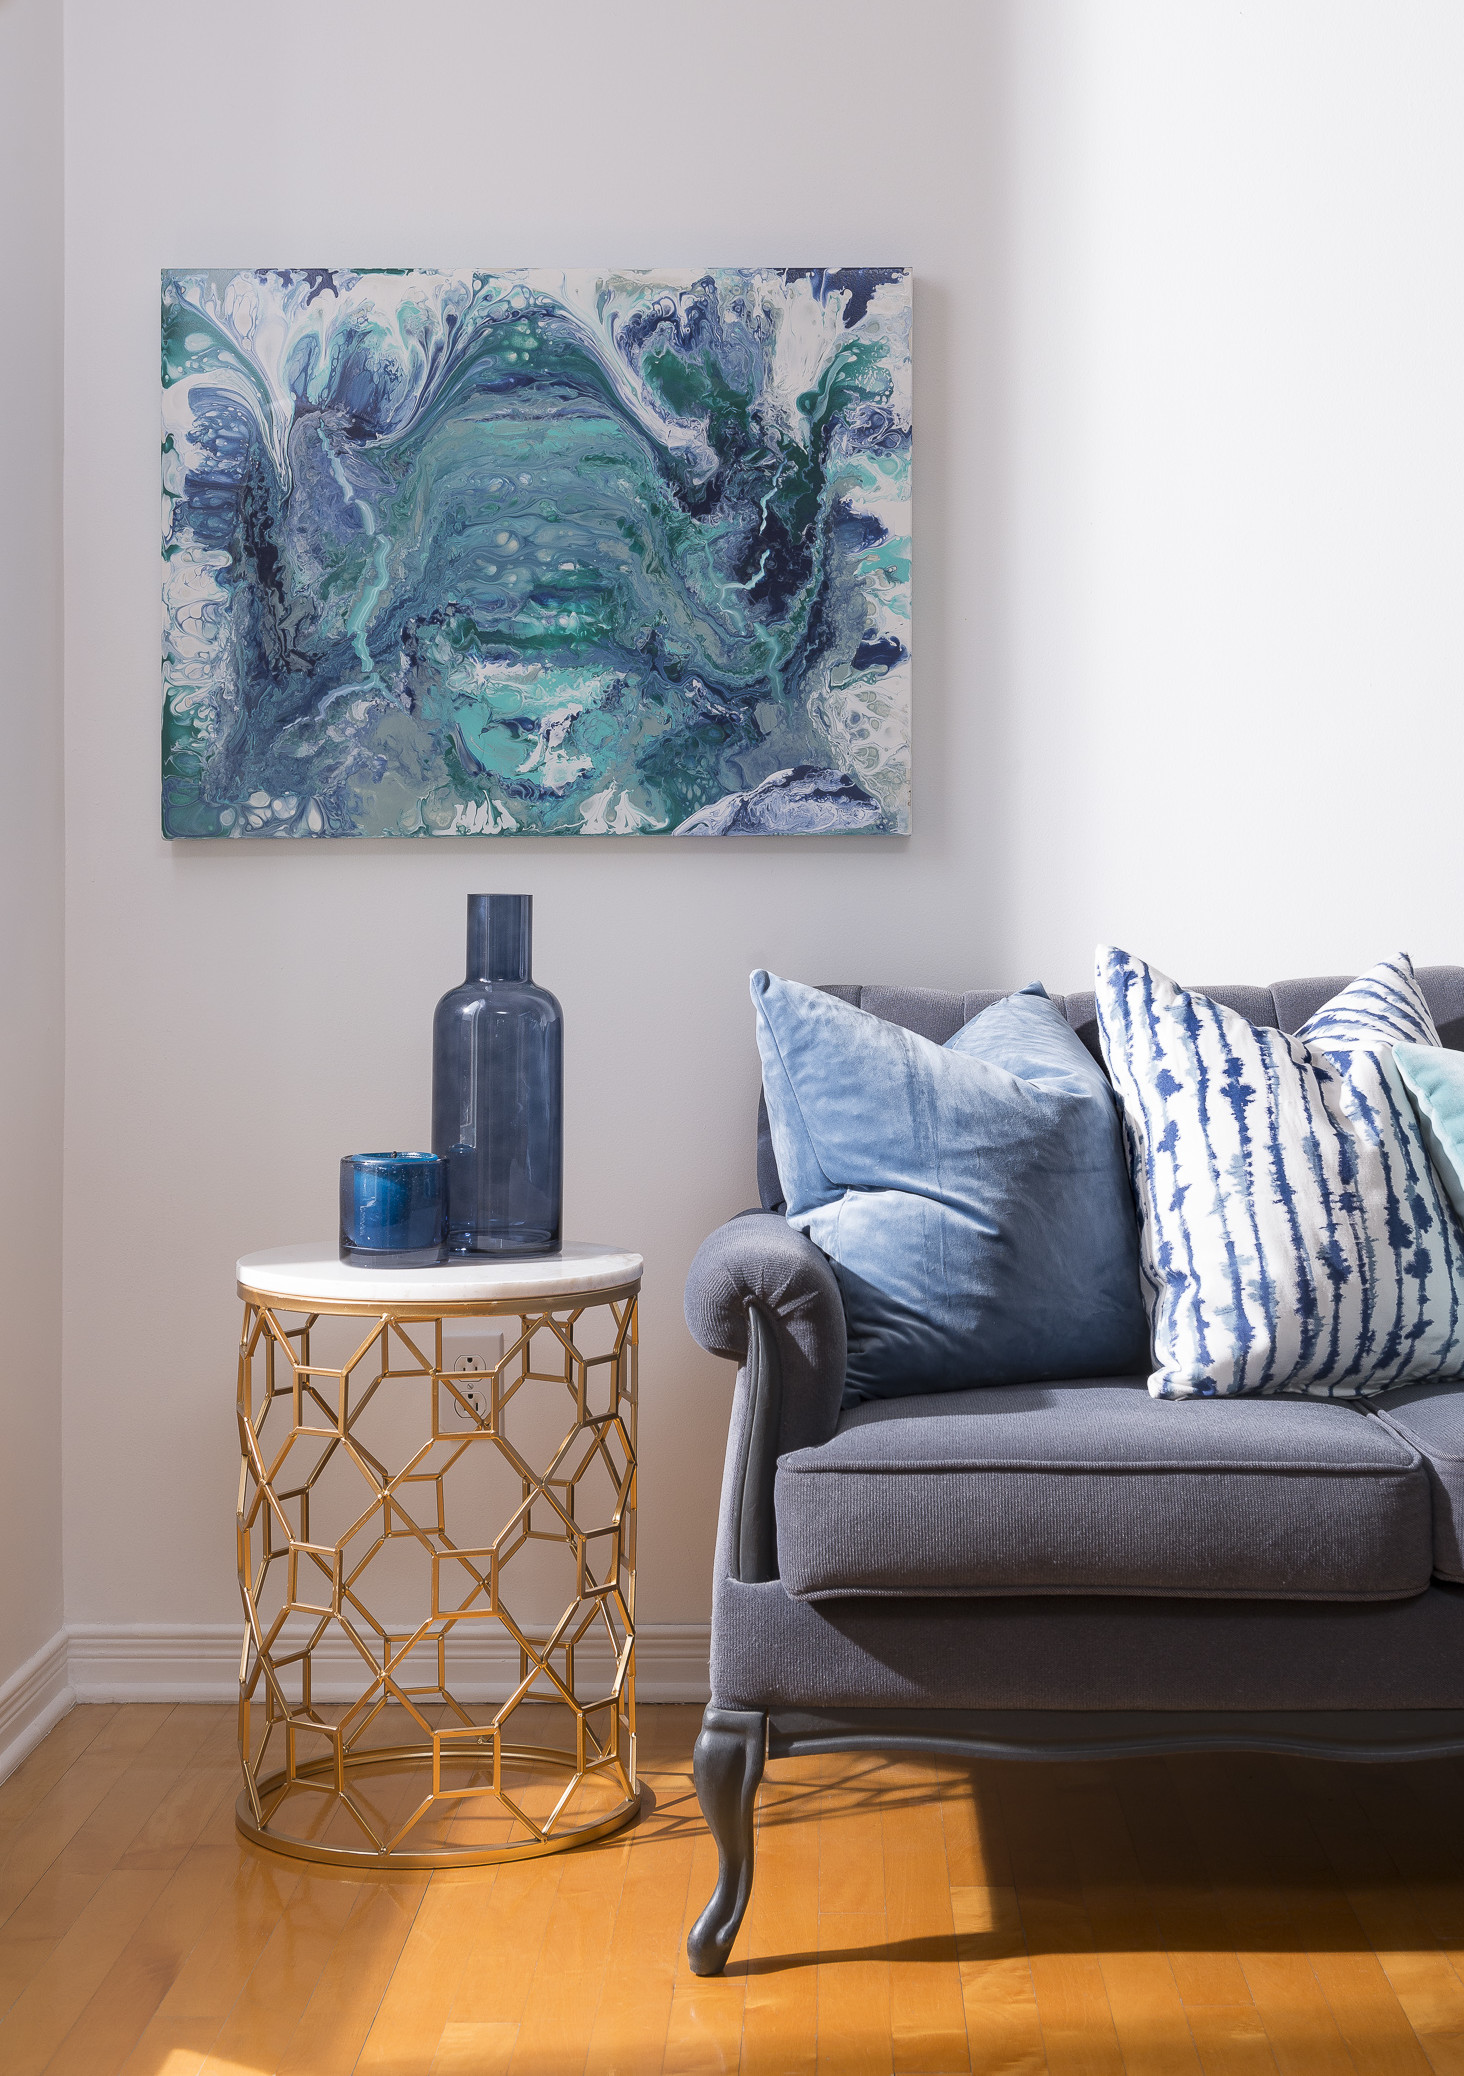
Finally, step back and look at the beautiful unique piece of art you have created!
Are you feeling tempted too? I can feel a whole new workshop coming on for those that want to try before they buy.
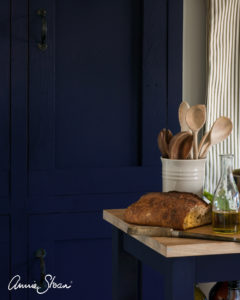
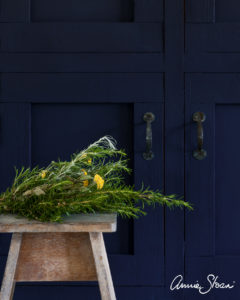
Annie Sloan recently launched two new chalk paint™ colours in France. Athenian Black and Oxford Navy. So lets say hello to Oxford Navy!
Oxford Navy is an inky, traditional navy blue which evokes the strong, august blue of academic insignia and fountain pens, as well as the rich pigment indigo blue so synonymous with traditional Indian block printing.
Oxford Navy Kitchen
Oxford Navy Kitchen
Oxford Navy Kitchen
This classic but contemporary kitchen has been given a new lease of life with a lick of Chalk Paint™ in Oxford Navy. A fresh coat of Chalk Paint™ is an excellent alternative to redoing your entire kitchen, and as demonstrated here, the end result is fresh, smart and beautiful. Just be sure to use Chalk Paint™ Wax or Lacquer to protect and seal the paint. Apply Chalk Paint™ in thin layers to shiny surfaces such as melamine kitchen cabinets, although wooden surfaces such as these cupboards and kitchen caddy will not require any special measures.
Annie Sloan Athenian Black
Introducing a new colour from Annie SLoan. For a long time people have been asking for a true black and here it is. There has always been Graphite in the Annie Sloan range which many people think of as a black. However Graphite is really a slate grey and not a true black. Athenian Black is a true, deep black developed to reflect the opaque figures and dramatic silhouetted shapes painted on Ancient Greek ceramics.
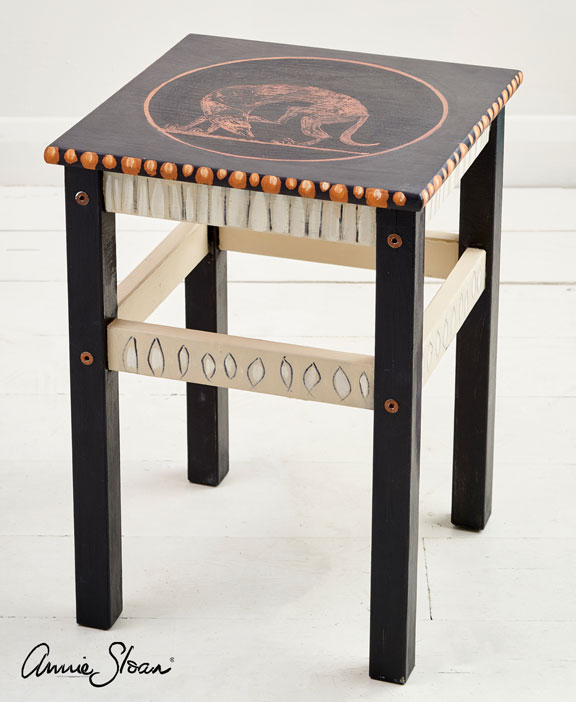
Stool in Athenian Black
Annie was inspired by the huge collection of Ancient Greek pottery at the Ashmolean Museum in Oxford to create this opaque pitch black colour. Athenian Black has been designed with an opulence of pigment in order to suggest impenetrable shadow, like the black used to render silhouetted figures on terracotta coloured clay ware in Classical times.
The seat of this IKEA stool was first painted in Chalk Paint™ in Arles, then painted with Athenian Black, then sealed with Clear Chalk Paint™ Wax. Annie then used an artist’s knife to scratch out a Greek-style likeness of a dog, revealing the Arles beneath the black. She then brushed away the scraped off paint and Waxed to finish and protect.
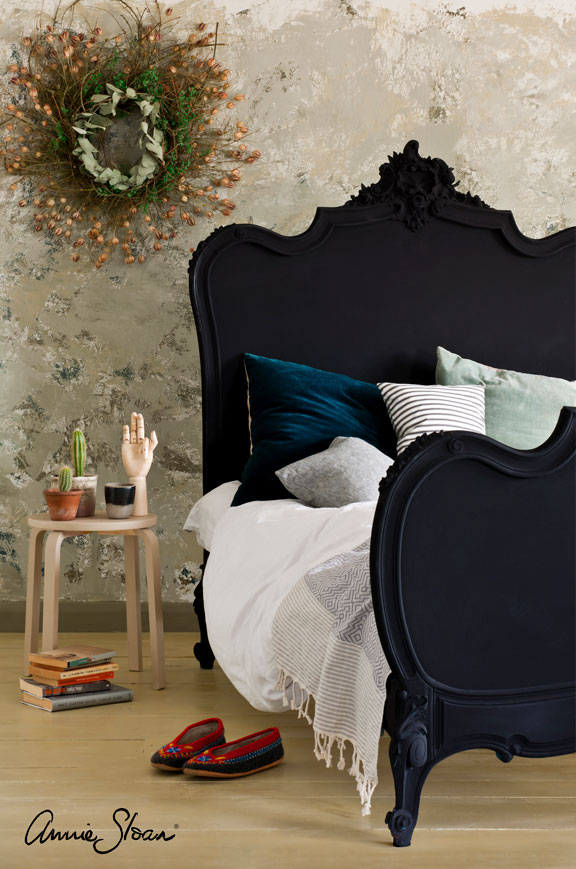
Bed paint in Athenian Black
This baroque bed frame is the perfect stage for the pitch-black pigment-packed drama of Chalk Paint™ in Athenian Black. The colour has been allowed to take centre stage in this otherwise neutral room. Just two coats of Chalk Paint™ and a coat of Clear Chalk Paint™ Wax over the entire piece to protect and perfect for years of nights to come. The bed side table is an IKEA stool which has been upcycled with Country Grey and Clear Chalk Paint™ Wax.
It is important to realise that all fabrics are different and will vary in how they take the paint, therefore it is important to experiment a bit to see if you will like how it will turn out. Painting a seating cushion? Start by painting the bottom side with all the steps below to see how it turns out before tackling your entire sofa or chair!
The most successful types of fabric to paint are Cotton, Polyester, Burlap, Vinyl and Leather.
You may find it a problem to paint velour or velvet as they tend to not result in a perfect finish, however it possible with patience and pratice.
How do you know when to paint fabric, and when not to?
When deciding whether or not to paint fabric, you need to decide the value of your piece: would you be absolutely devastated if the finish didn’t work out to your liking? Is it an heirloom that has been in your family forever? If it is, then perhaps painting it isn’t such a good idea. Instead seek out a professional re-upholsterer. Second hand finds are great for this type of treatment. No attachment, Nothing gained – nothing lost. Look for items that are of solid construction, no smells or obvious stains.
Before and after painting fabric
The Process
Before starting make sure you clean the fabric. If there are stained areas that change the texture of the fabric and cannot be cleaned you may want to upholster instead.
1. Apply your first coat made up of 1 part paint to 1 part water.This helps to absorb the paint into the fabric more, and almost dye the fabric, versus a coat of paint sitting on the fabric. ( Skip adding water if painting on Vinyl or Leather)
2. Sand with a fine grit paper to soften. This will take down any roughness of the fabric. Sometimes when you paint fabric, little fibers tend to raise up, so you knock those back with a sanding pad or fine sand paper. This takes very little effort.
3. Apply another coat of paint but this time use less water and more paint. 1 part water to 2 parts paint. ( Again skip adding water if painting vinyl or leather)
This will again help it to soak in really easily. If you think you only need 2 coats of paint and you’re getting really good coverage, you can skip watering down your second coat, and go straight to a full strength paint coat for your final layer.
Next apply a 3rd layer, if necessary, of pure paint. Be sure to sand between each coat of paint for a super smooth finish.
4. Apply wax as a top coat. This isn’t strictly necessary as Fusion has a built in top coat. However it will soften the fabric and make it feel like leather. Always apply thin coats of wax and buff as necessary. We recommend using either Fusion beeswax finish or MMS Furniture Wax.
Aftercare
Once fully cured (approximately 30 days depending on weather conditions) the painted fabric is washable. We would recommend washing by hand with cold water. Do not wash with any other items! Leave to air dry.
What if I get paint on my clothes?
Not all of us are tidy painters and accidents do happen. If you get paint on your clothes our advice is to wash it as soon as possible. Scrub the affected area with Fusion Brush Soap and water. Then machine wash ASAP.
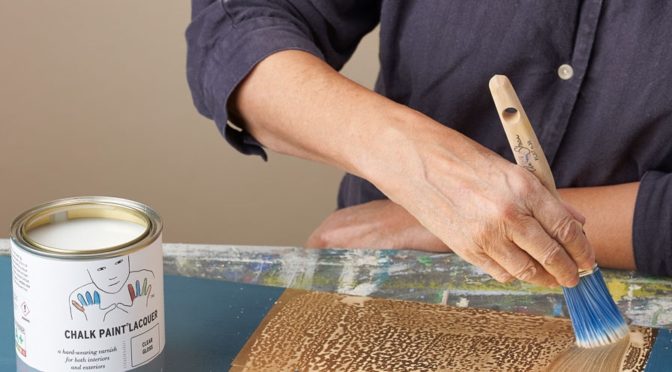
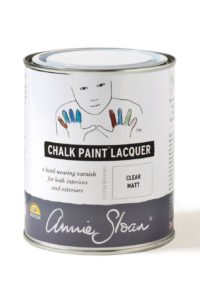
Annie Sloan’s new Chalk Paint™ Lacquer gives a hard wearing protective finish which is suitable for either indoors or outside.It has been especially developed for use with Chalk Paint™. Annie Sloan Chalk Paint Lacquer includes an in built UV protection to keep colours vibrant when used outdoors. It is low in VOCs and is also certified as toy safe. The lacquer is available in either matt or gloss finish and can be applied by brush, roller or spray gun.
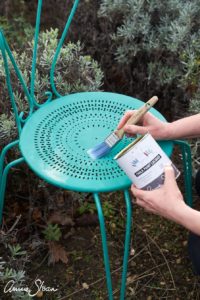
Annie Sloan recommends her Chalk Paint™ Lacquer to protect floors, outdoor furniture and kitchen units. Remember! Do not apply Lacquer over a waxed surface. Be sure to always test an area with paint and lacquer before you begin as results can vary depending on previous treatments. Always stir the lacquer well before using and regularly during use. Don’t over brush. Each tin will cover up to 19 m². Use a high quality brush or roller and apply methodically. Annie’s top tip is to dilute the lacquer with 10% water when applying over Chalk Paint™ for a more even finish.
Curing time for maximum protection takes 14 days but the lacquer should be touch dry and ready for a second application after 2 – 24 hours.
Outdoor use. Apply at least two thin coats to ensure full coverage – any parts you miss will be susceptible to water ingress, which could then cause the Chalk Paint™ underneath to peel over time. Annie recommends storing your up-cycled furniture indoors or undercover in the winter to prolong the life of the finish.
Aftercare Immediately wash your brushes or rollers in warm soapy water. To protect Chalk Paint™ Lacquer finished furniture, clean with a damp cloth using mild soapy water. Avoid regular use of harsh chemicals. Store left over Chalk Paint™ Lacquer in a cool dry place and maximise shelf life by decanting tins that are less than half full into smaller, air tight containers. For best results use Chalk Paint™ Lacquer within one year of purchase.
* Use Matt and Gloss Chalk Paint™ Lacquer side by side to create textural contrast and interest!
* Floss finishes are generally more robust than matt – for an extra durable finish, apply 1-2 coats of Gloss followed by one of Matt.
* Cloudiness – Use Matt Lacquer sparingly over dark colours, as a build up of product can cause the flattening agents in the Matt Lacquer to give a
white haze to the finish.
*Bleed through – Wood surfaces can be unpredictable. The application of Lacquer can draw out tannins or stains from a previous finish,causing
yellowing. Patch test before painting the entire piece – if staining occurs seal the whole surface of your furniture with shellac or another stain blocker ahead of painting. Chalk Paint™ Lacquer can sometimes work as a sealant. Test first! Annie Sloan Chalk Paint Lacquer in Gloss
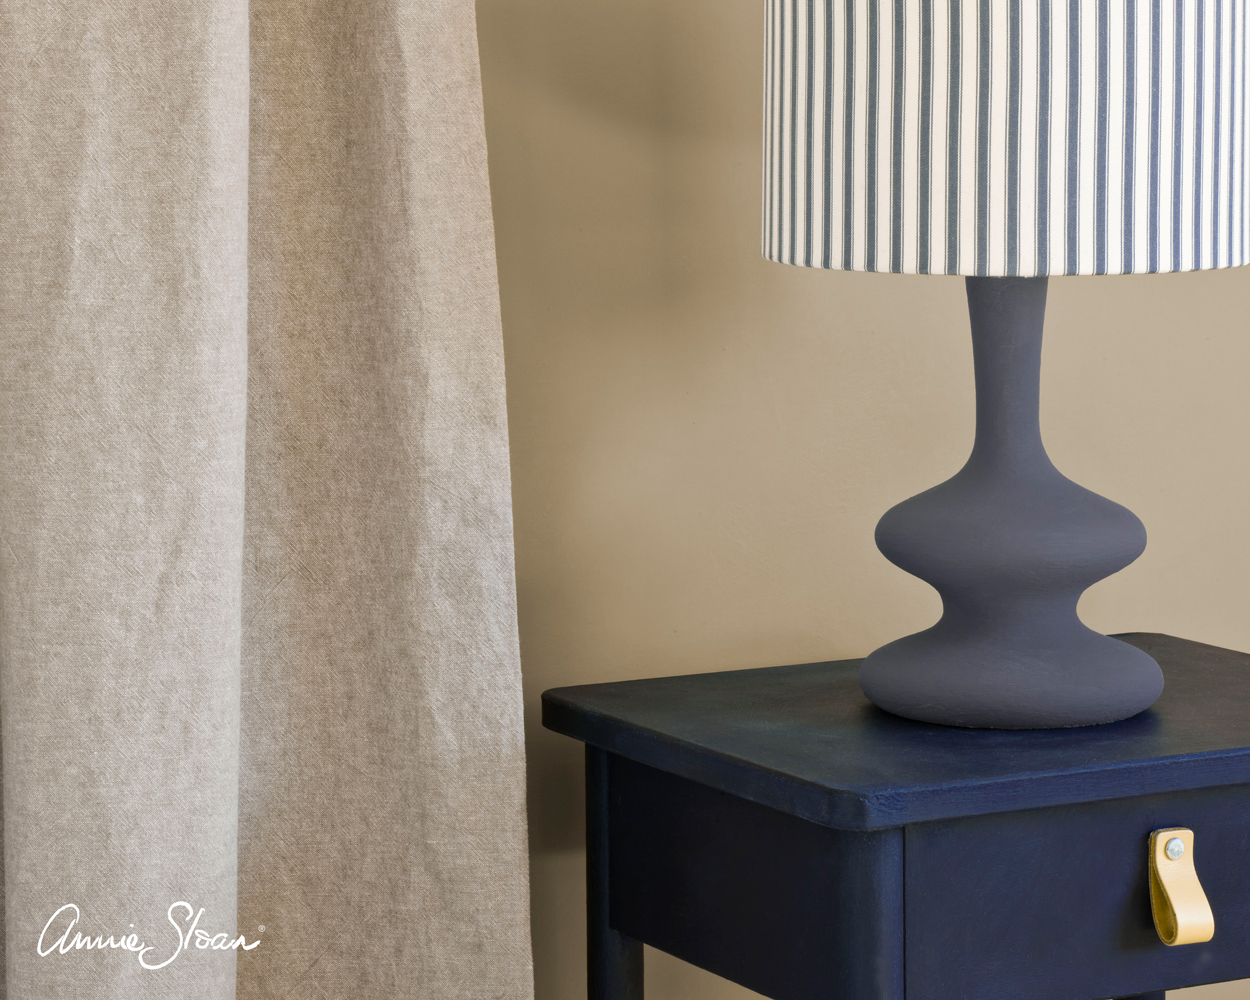
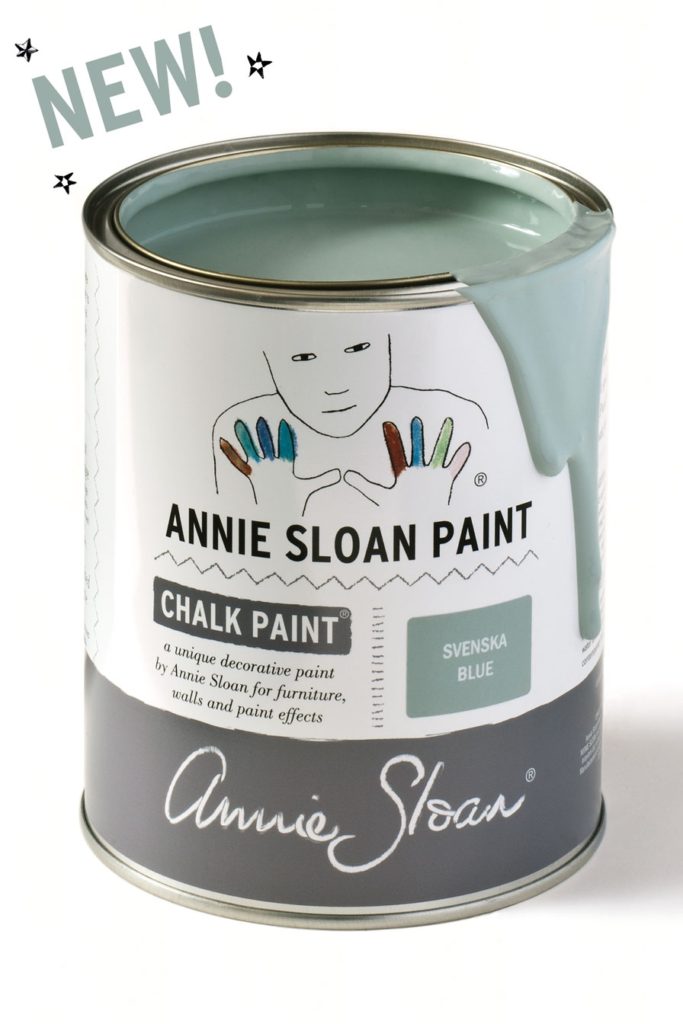
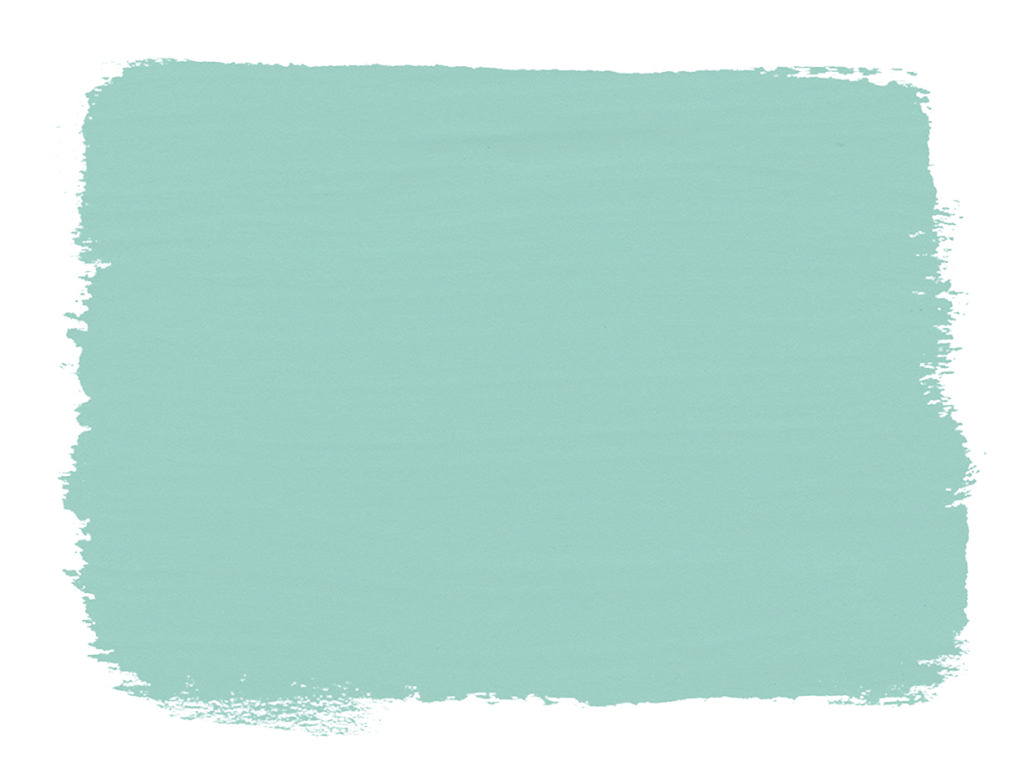
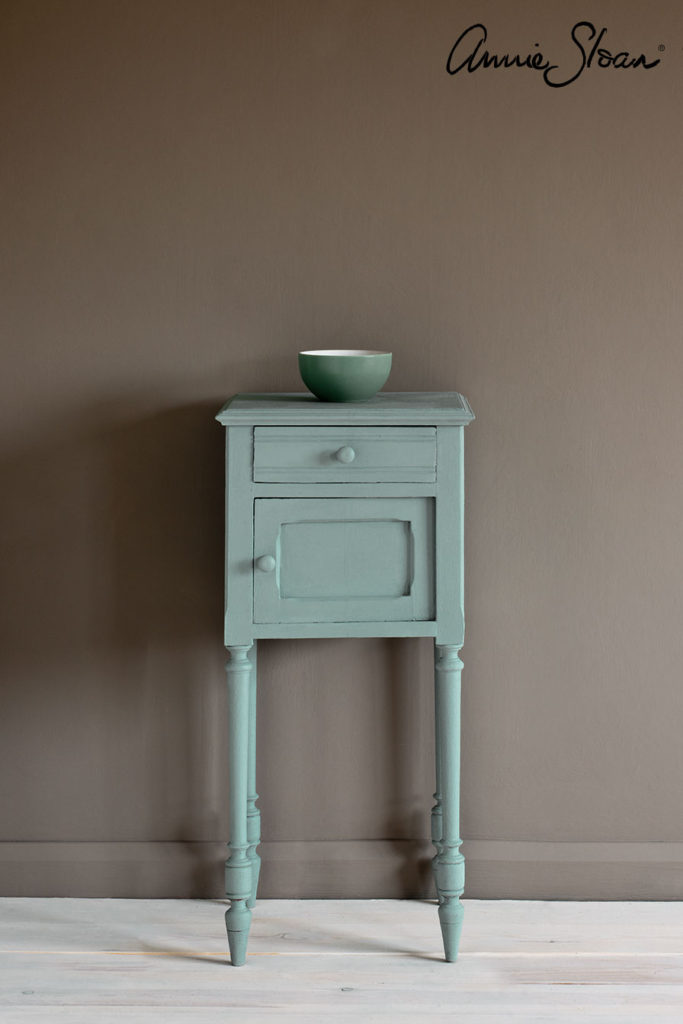
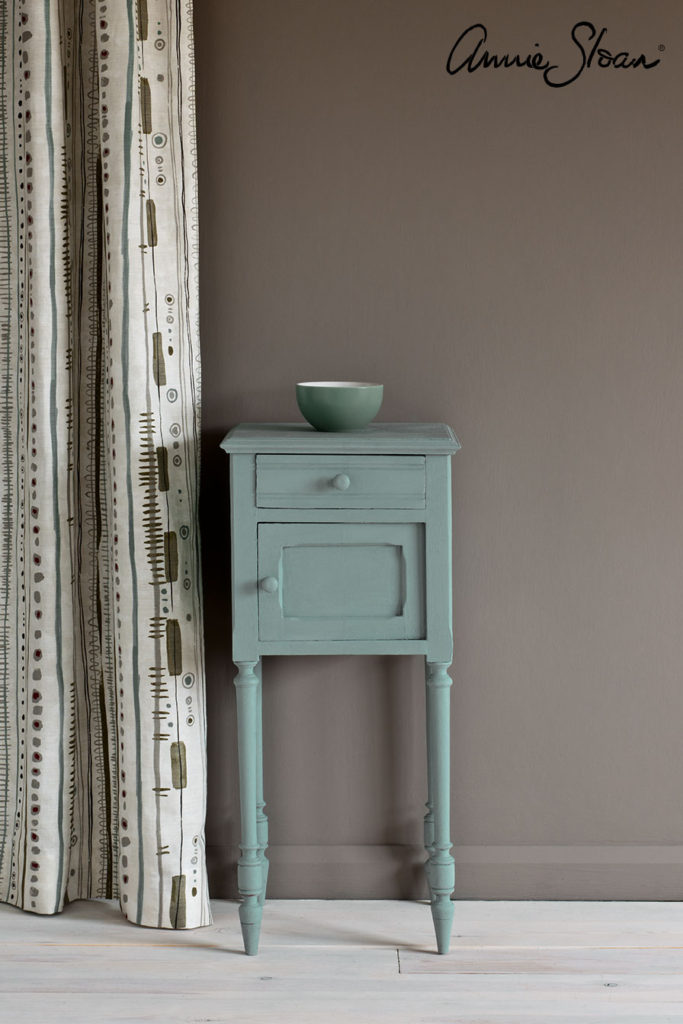
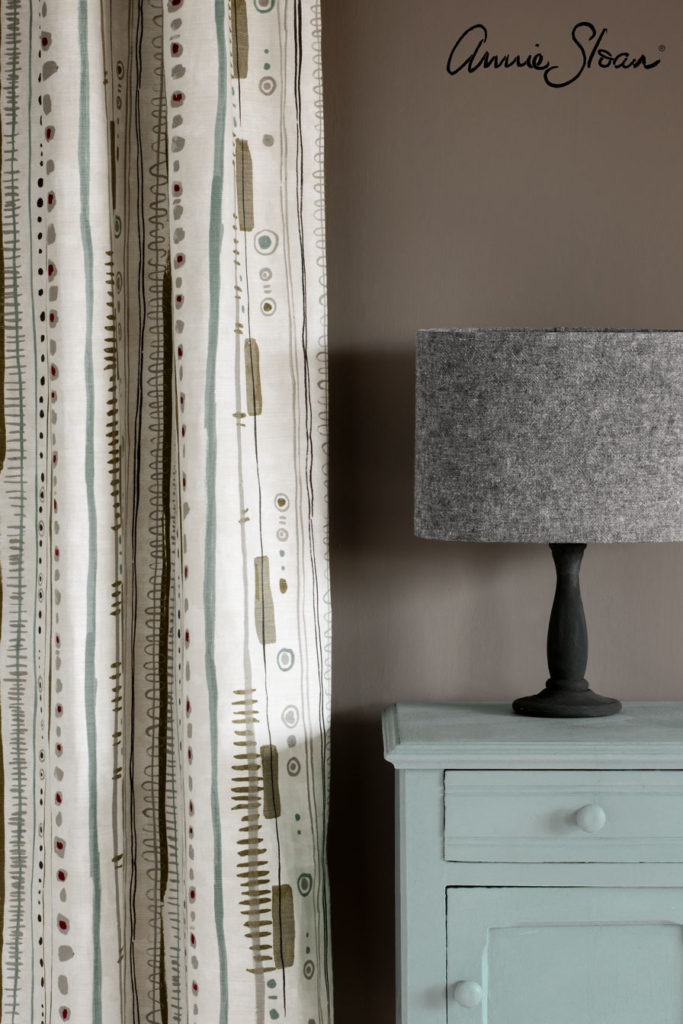
Annie Sloan Svenska Blue is a crisp and cool toned blue-grey, evocative of the colours seen throughout Swedish manor houses in the 17th and 18th Century.
Svenska Blue est un bleu-gris doux et franc, évoquant les couleurs des intérieurs de manoirs suédois aux 17è et 18è siècles.